Sales Assistant
User Manual
A detailed guide to using Lexie Sales Assistant for importing data, managing organizations and contacts, running workflows, building sequences, configuring settings, and collaborating across projects.
Getting Started
What Is Sales Assistant?
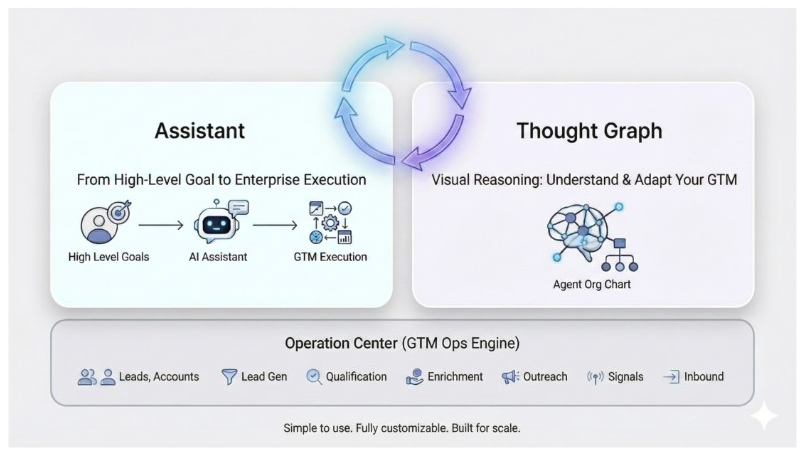
Sales Assistant is Lexie's AI-powered go-to-market workspace. It combines a conversational assistant, structured CRM-style records, enrichment workflows, outreach automation, and Thought Graph-powered reasoning so teams can move from market research to qualified contacts, playbooks, sequences, and follow-up tasks in one place.
Sales Assistant is built for GTM teams that need more than a traditional CRM. While many CRMs are adding AI features, they often remain constrained by a limited set of prebuilt workflows or workflow builders that require deep technical knowledge. Sales Assistant is AI-native from the ground up, helping teams turn account data into research, enrichment, outreach, workflows, and follow-up without needing engineering support.
Why Sales Assistant?
There are hundreds of go-to-market operations tools, but most force teams into a tradeoff. Highly customizable tools can adapt to a specific industry, sales motion, data source, or workflow, but they often require technical operators, consultants, or engineering support. Simple tools are easier for non-technical users, but they usually assume a fixed data model and a fixed workflow that may not match how a company actually sells.
Sales Assistant is built to provide customizability and ease of use at the same time.
- Flexible for specific domains: Sales Assistant can adapt to different industries, buyer journeys, data sources, account models, contact models, custom properties, enrichment strategies, and GTM workflows.
- Simple for non-technical users: Users can ask Lexie questions, launch onboarding, generate ICPs and playbooks, import data, add workflow columns, and run outreach without writing code.
- Structured enough for operations: The Operation Center keeps the output organized as accounts, contacts, segments, contact groups, communications, sequences, signals, opportunities, and tasks.
- AI-powered but inspectable: The assistant can reason about goals and workflows, while users can still review and edit the underlying data, prompts, generated properties, playbooks, and outreach steps.
The goal is to let teams tailor their GTM system to the way they sell, without making everyday users operate a complex technical platform.
Who Is It For?
Sales Assistant is built for go-to-market teams that need to research, plan, and execute account-based work quickly:
- Founders and executives who want an AI assistant to research markets, identify prospects, and turn strategy into concrete sales motions.
- Sales and business development teams who manage organizations, contacts, leads, sequences, opportunities, and follow-up tasks.
- Growth and marketing teams who build playbooks, create outreach content, manage posts, monitor signals, and coordinate campaigns.
Sales Assistant brings together three connected experiences:
- Assistant: a conversational interface for asking questions, launching workflows, and moving from high-level goals to execution.
- Operation Center: the GTM operations workspace for leads, accounts, lead generation, qualification, enrichment, outreach, signals, and related records.
- Thought Graph: the reasoning and workflow layer that understands the go-to-market process and adapts automations to the user's sales motion.
Together, these layers let users start with a business goal, use AI to reason about the next step, and then execute or review the work in structured Sales Assistant modules.
Accessing the Sales Assistant
- Sign up at sa.lexie.ai — you can sign up with your Google account or set up the account using a dedicated password
- Log in to your Sales Assistant account
- Explore the Dashboard, Tasks, Organizations, Contacts, Communications, Sequences, Events, Posts, Signals, Opportunities, and Workflows & Agents
Navigation Menu
The left sidebar provides access to all main features in the following order:
- Dashboard - Overview of your sales pipeline, tasks, and activity metrics
- Tasks - Your to-do list and action items
- Organizations - Company records
- Contacts & Leads - Individual contacts
- Communications - Emails, calls, and messages
- Sequences - Automated multi-step email campaigns
- Events - Calendar events and meetings
- Posts - Social media content
- Signals - Real-time intelligence and news
- Opportunities - Sales opportunities
- Workflows & Agents - Automation, playbooks, and AI workflows
- Settings - Configuration and preferences
Mode Toggle
Sales Assistant has two modes accessible via the toggle in the header:
- Executive Assistant: AI-powered conversational interface for quick actions
- Operation Center: Full dashboard view for managing data (opens to Tasks page)
Once you have set up offerings, ICPs, playbooks, workflows, and other automations, most teams do the majority of their day-to-day work in Executive Assistant mode. You can ask Lexie to look up data, run workflows, execute playbooks, and move tasks forward without opening every table. Switch to Operation Center when you need more detail or hands-on control—reviewing rows, editing fields, validating enrichment outputs, tuning filters, or managing records in bulk.
In either mode, Lexie can help you understand and operate Sales Assistant:
- Answer questions about Lexie and Sales Assistant capabilities
- Use the data and workflows available in your workspace to answer contextual questions
- Take action through browser automation, such as opening pages, reviewing records, and preparing changes for confirmation
- Take action through headless automations, such as running workflows or enrichment jobs without manually navigating the UI
- Use generic tools such as Google Search when research outside your workspace is needed
- Help you build a reusable skill so the same process can be run again in the future
Executive Assistant Mode
Executive Assistant mode is the conversational entry point. Use it when you want to ask Lexie to look up information, summarize records, run a workflow, or guide you through the next action without navigating every table manually.
Example prompts:
- "What sequences do I have? Rank them by reply rate."
- "Which contacts in my healthcare segments are in Washington, DC?"
- "Show my outbound emails from the last two weeks — which ones got replies?"
- "Run the playbook for my latest offering and tell me what step comes next."
Lexie can answer questions from Sales Assistant data, suggest follow-up actions, and route workflow requests to the right automation when a matching workflow is available.
For many teams, the first meaningful step after logging in is auto-onboarding. When you open a new workspace that does not yet have an Offering or ICP, Lexie starts in Executive Assistant mode and suggests running the auto-onboarding workflow before anything else—so you can set up your initial Offering, ICP, and Playbook conversationally instead of hunting through Settings.
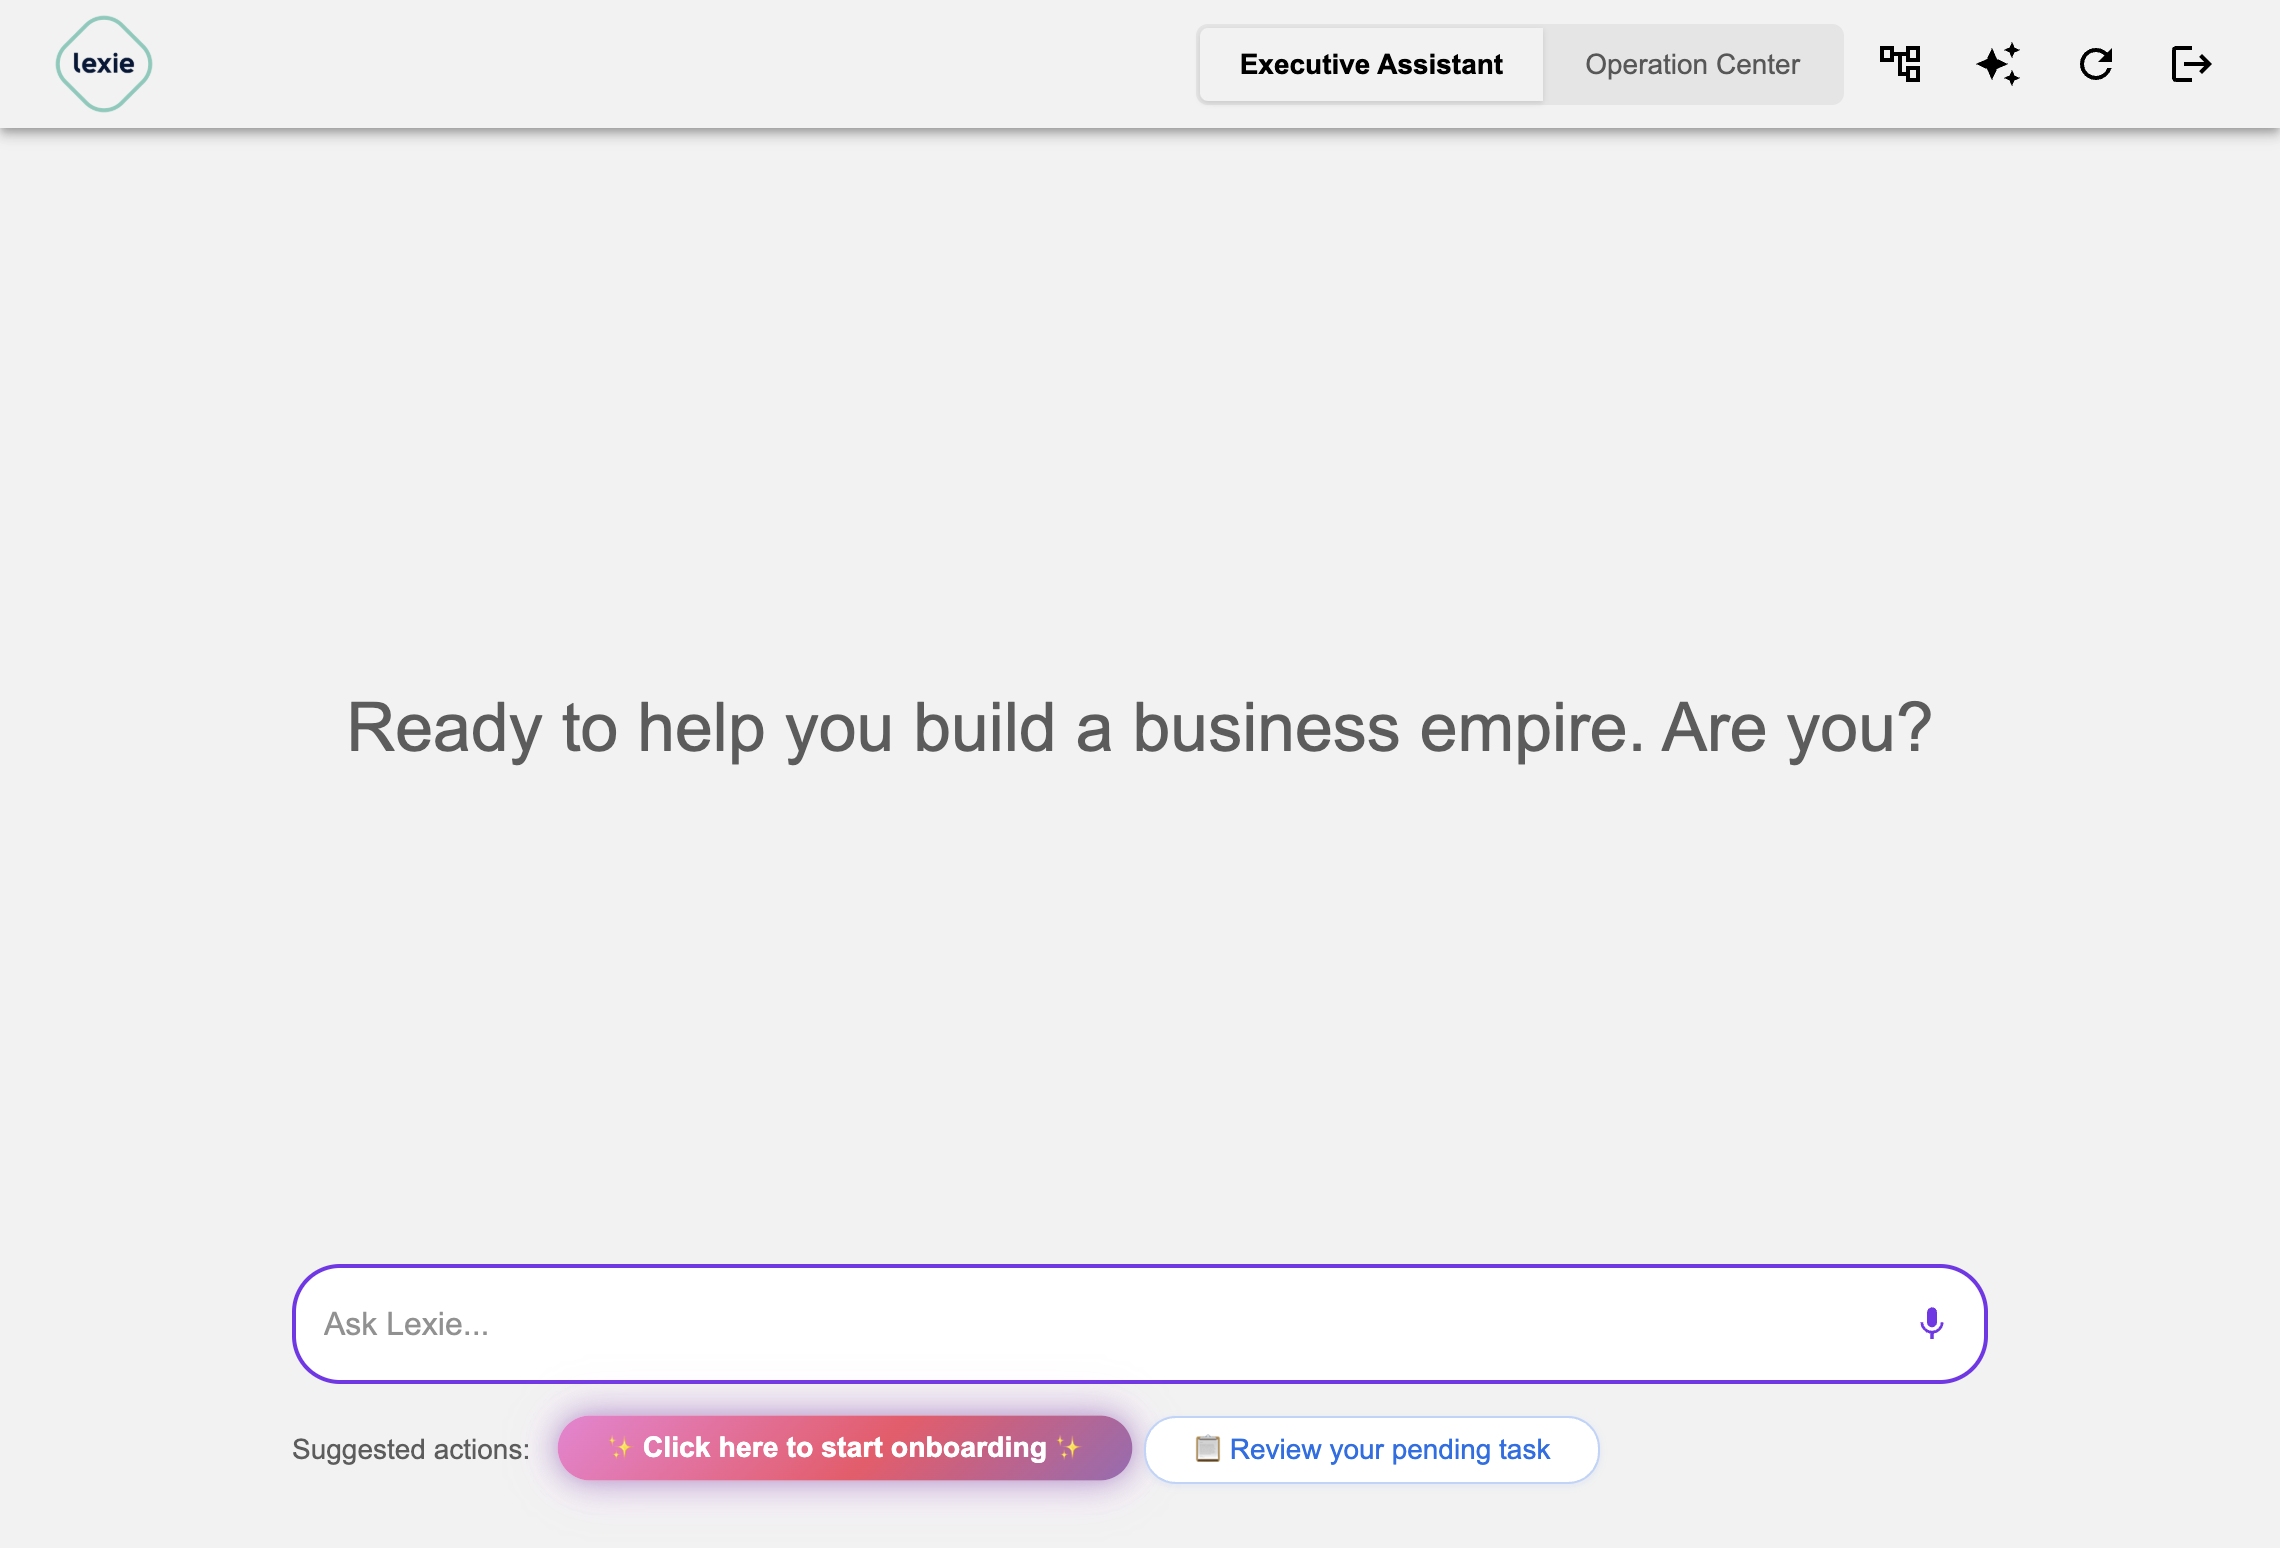
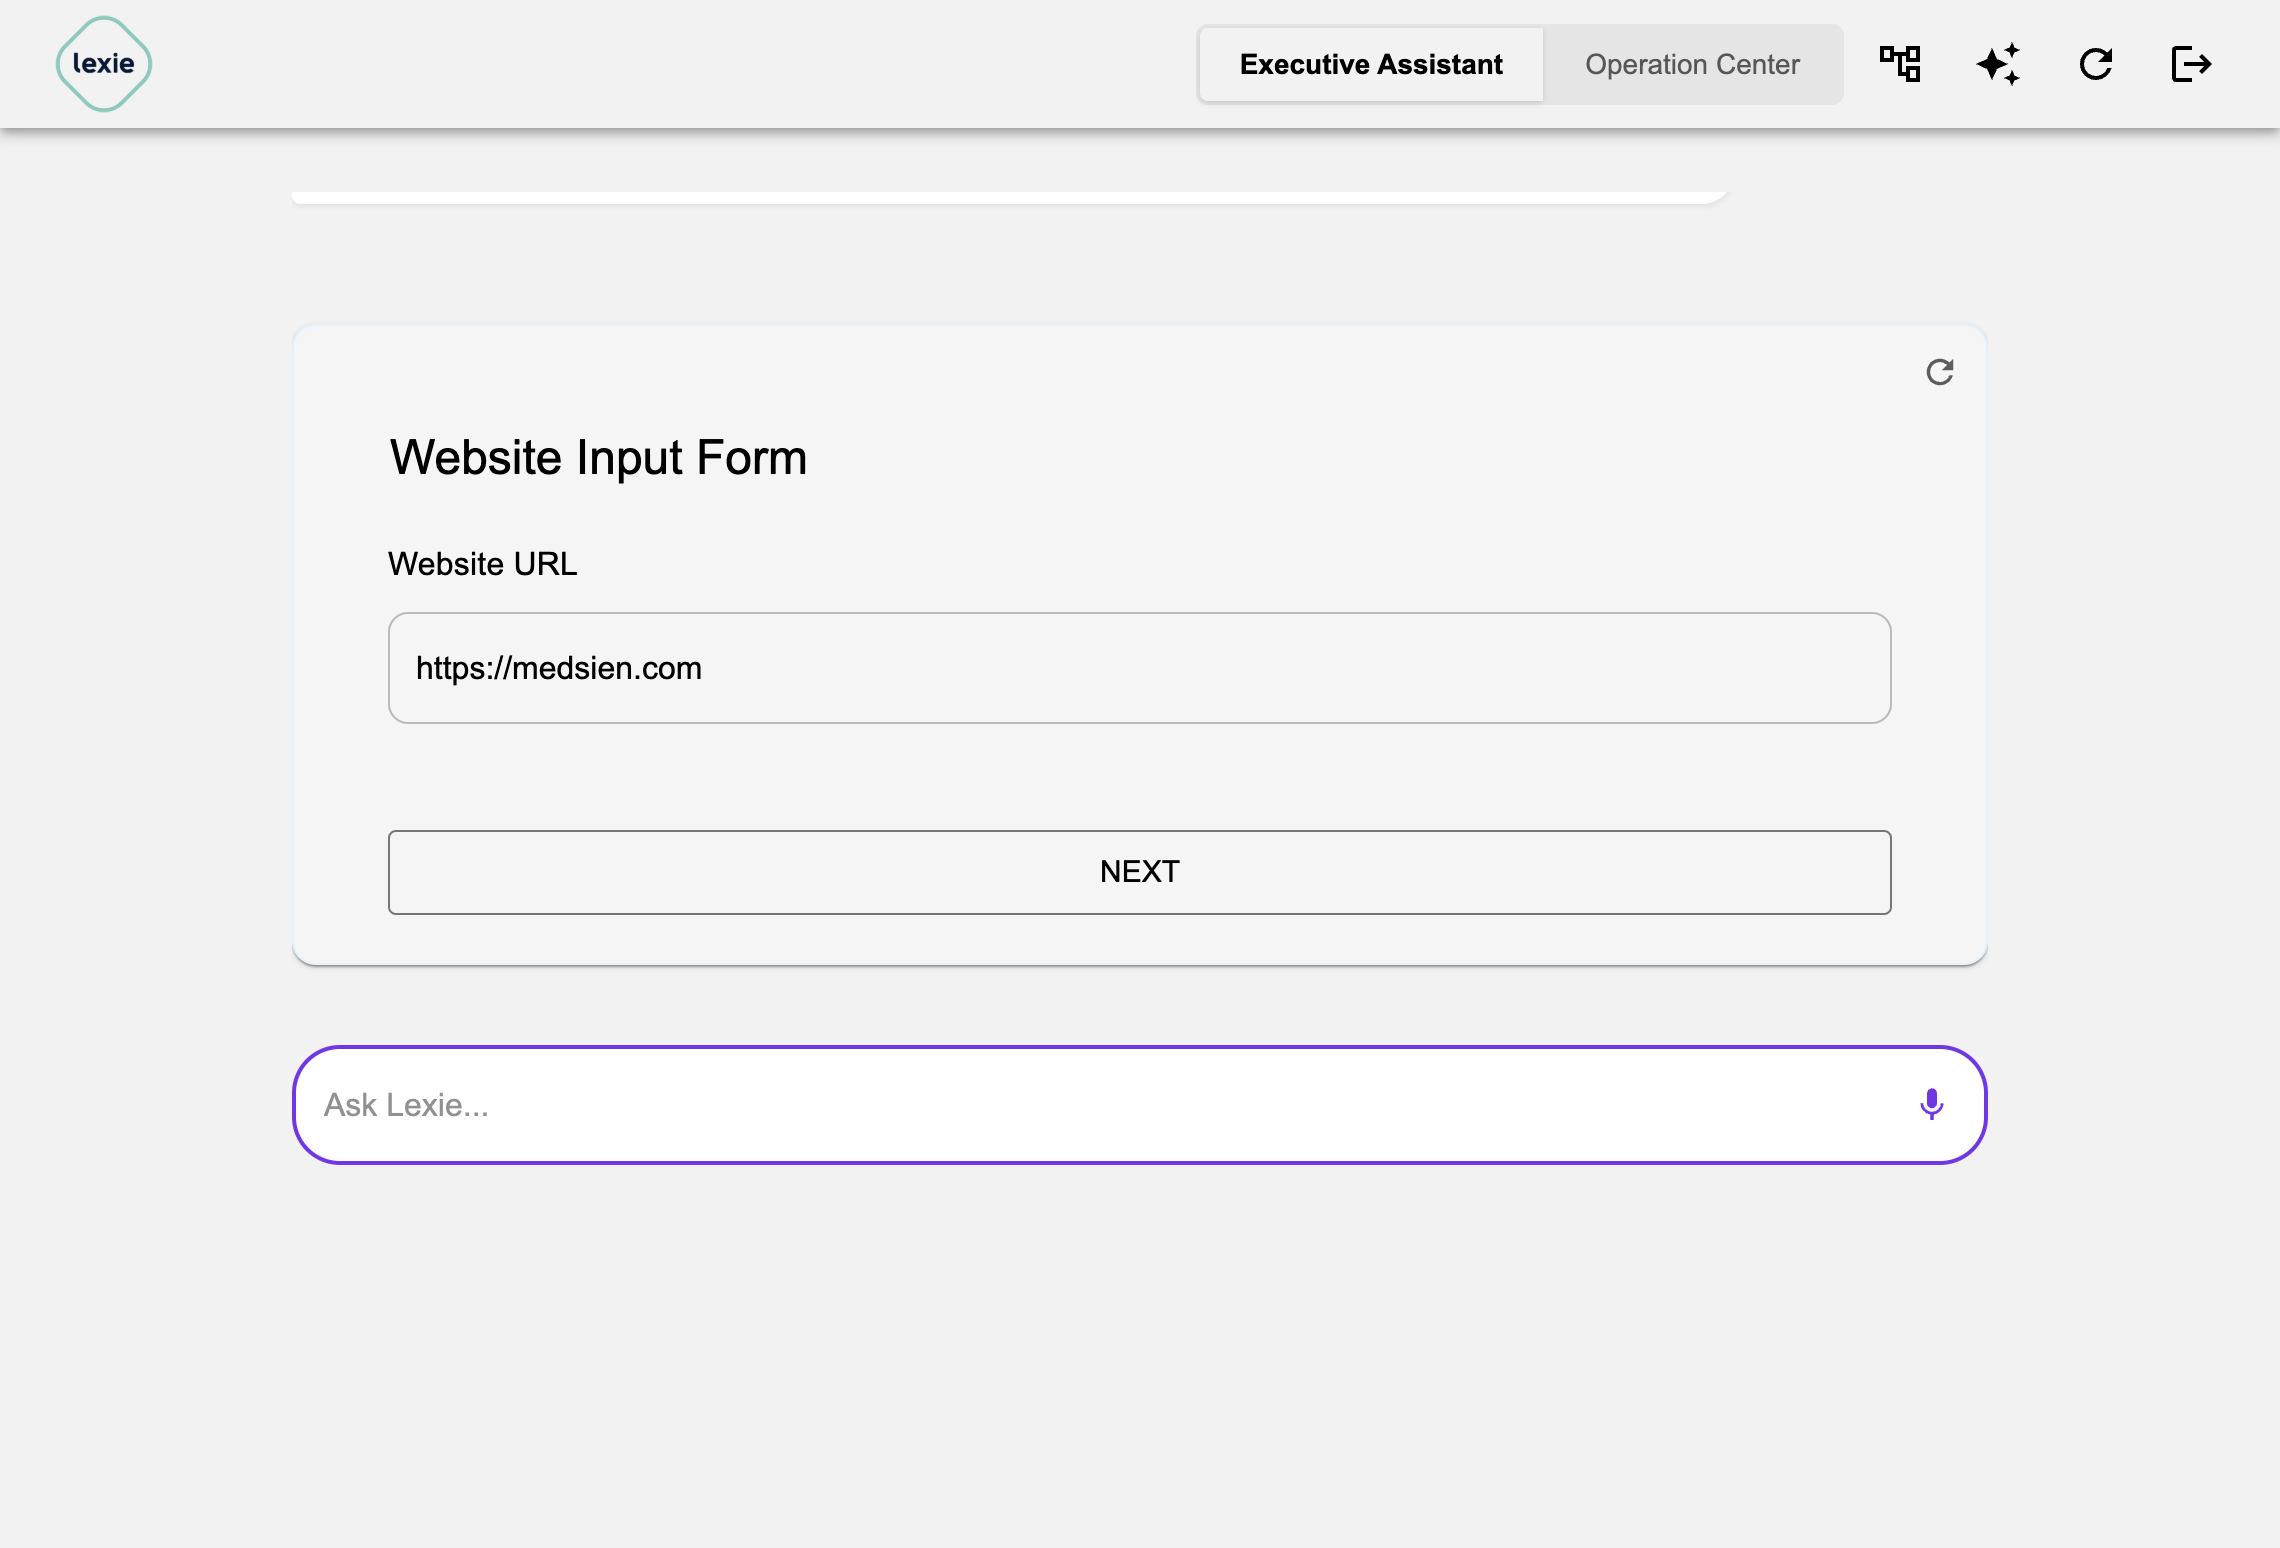
After starting onboarding, enter a website such as https://medsien.com, and Lexie will guide the setup flow for creating the initial Offering, ICP, and Playbook.
Operation Center Mode
Operation Center mode is the full working dashboard—the place to go deeper when you want to see exactly what is in your workspace. Use it to inspect or edit records directly: organizations, contacts, communications, sequences, events, posts, signals, opportunities, workflows, and settings. The rest of this user manual covers each of these modules in more detail.
Lexie's chat interface is also available in Operation Center through the copilot panel. That lets you keep the relevant table or page open while asking contextual questions or requesting actions.
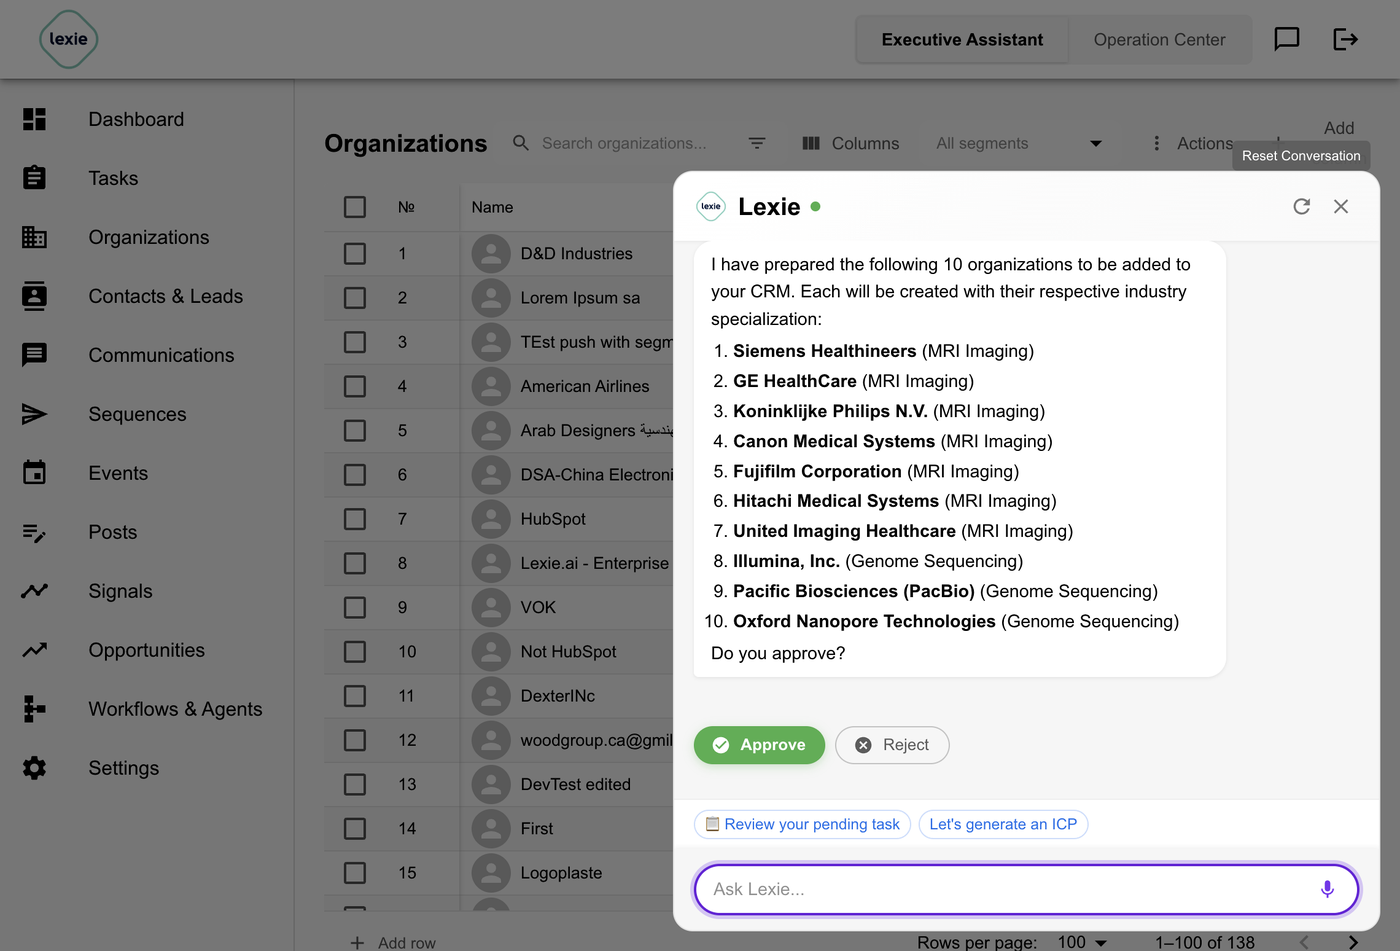
For example, the fastest way to go from an open-ended prospecting idea to structured organization records is to ask Lexie while working in Operation Center. Keep Organizations open, launch the Lexie copilot panel, and describe the target market in natural language:
Show me the top 10 medical device providers for MRI imaging or genome sequencing, then prepare them to add to Organizations. Do not save anything yet; first show me the list and ask for confirmation.
Lexie can research the target account list, turn the result into organization records, and pause for user approval before anything is saved. This keeps the workflow conversational while still preserving review and control.
Assistant Control
Sales Assistant is designed to keep you in control of what Lexie does, especially when it drives the browser or writes into your tables.
- Approval before impactful actions — When Lexie needs to drive your browser, fill forms, or write into tables, it asks for your approval first. Before executing, it presents a clear plan of the steps it intends to take so you can review the approach, approve it, or ask for changes.
- Human-in-the-loop during browser automation — While Lexie is working in Operation Center, a reasoning toast shows its reasoning and progress step by step. You can pause, resume, or stop the automation at any time. If you need to change direction—for example, adjust filters in an import modal—you can send a new instruction in chat and Lexie can adapt without you losing your place.
- Suggested next actions — After Lexie completes a step, it often surfaces clickable suggestions in the chat—such as resuming a paused import, starting auto-onboarding in a new workspace, or running the next playbook step. Click a suggestion to send that follow-up to Lexie without retyping the full request.
Choosing a Default Mode
Users can choose which mode opens by default in Settings > UI Settings. Choose Executive Assistant if you primarily work conversationally and your automations handle most execution. Choose Operation Center if you usually start from dashboards and tables or need fine-grained control over records.
Dashboard
The Dashboard is the home page of Sales Assistant, providing a consolidated overview of your sales activity and pipeline at a glance.
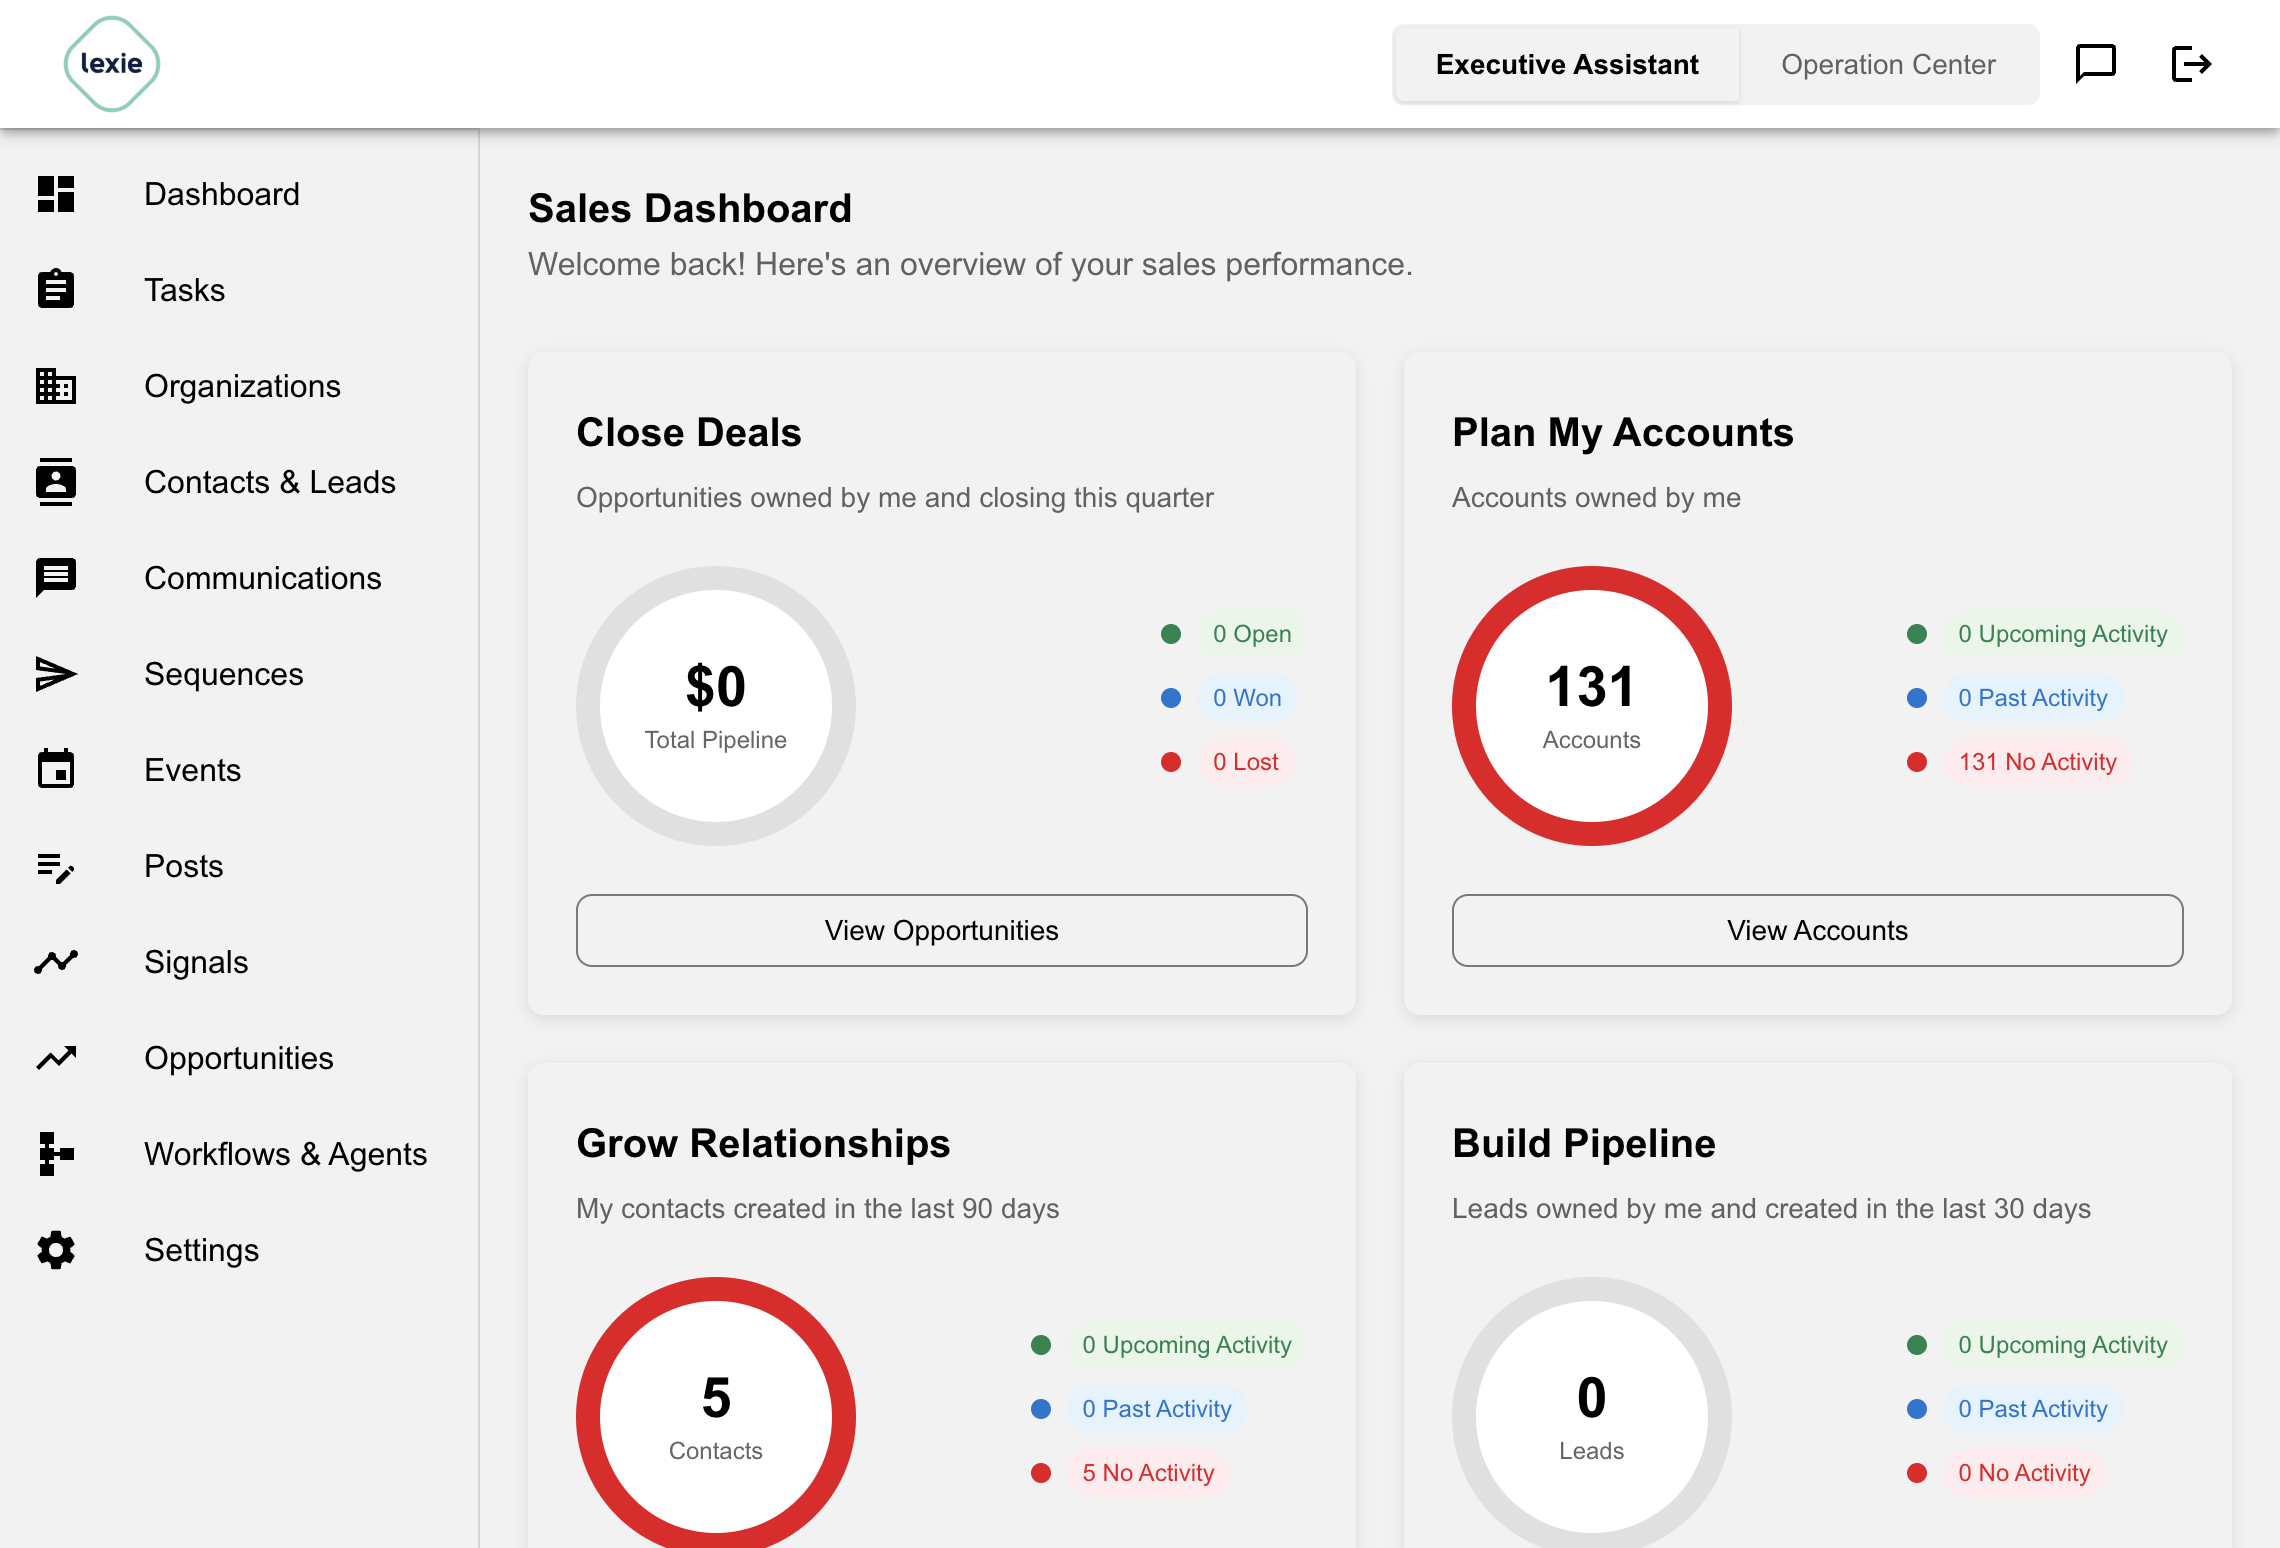
Dashboard Widgets
The Dashboard displays the following sections:
Close Deals
Shows your opportunities pipeline with a breakdown of:
- Open opportunities currently in progress
- Won deals that have been closed successfully
- Lost opportunities that did not convert
Plan My Accounts
Displays your organizations with key activity metrics, helping you see which accounts need attention and how recently they were engaged.
Grow Relationships
Shows your contacts along with activity metrics, so you can track relationship-building efforts and identify contacts that need follow-up.
Build Pipeline
Displays your leads with activity metrics, helping you monitor the top of your sales funnel and prioritize lead conversion efforts.
My Tasks
Provides a summary of your task progress across all statuses:
- Done - Completed tasks
- In Progress - Tasks currently being worked on
- Pending - Tasks waiting to be started
Today's Events
Lists your upcoming events and meetings for the current day, so you can stay on top of your schedule.
Recent Tasks
Shows a list of your most recent tasks for quick access and follow-up.
Tasks
Tasks are your to-do items and action items that help you track what needs to be done.
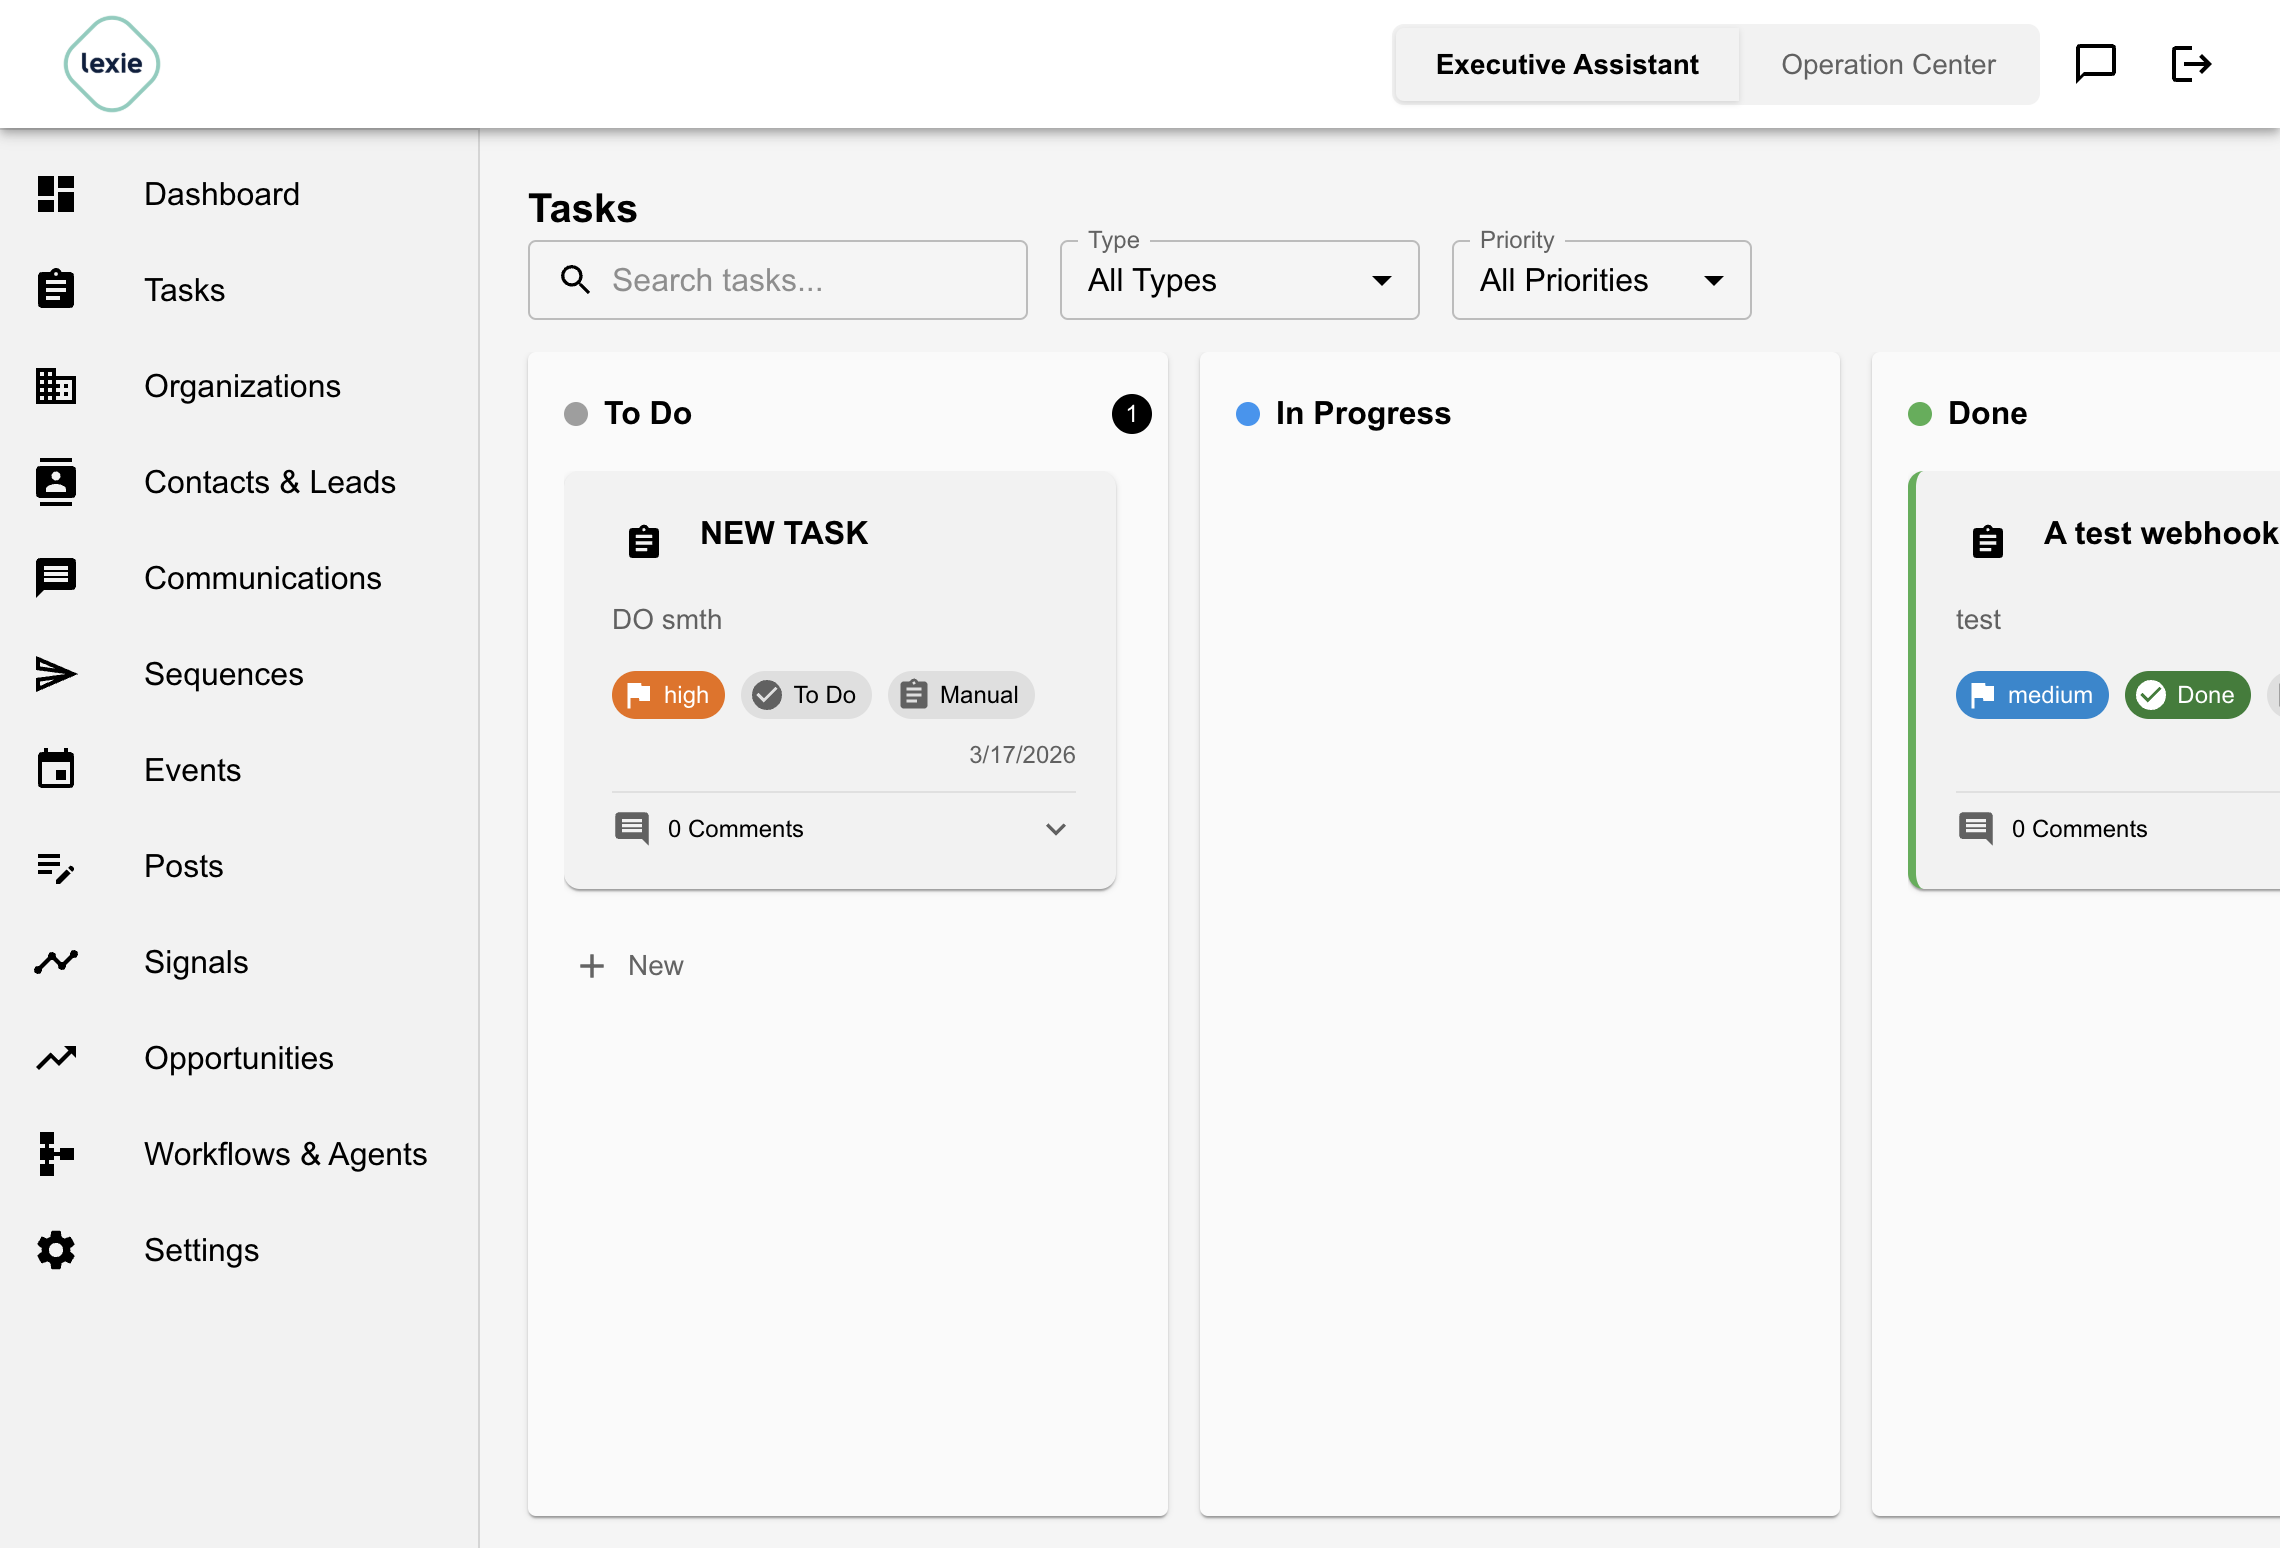
Task Management
View, create, and manage tasks from the Tasks page:
- Status tracking: Track task progress (pending, in progress, done, canceled). Drag and drop tasks between columns on the board to change their status.
- Type categorization: Organize tasks by type (call, email, meeting, manual)
- Contact association: Link tasks to specific contacts
- Organization association: Link tasks to organizations
Task Sources
Tasks can be created:
- Manually within Sales Assistant
- From a sequence — a common pattern is to add a manual task step after an automated email step. For example, if a contact opened your email and viewed a marketing asset but did not reply, the sequence can create a call task for you to follow up by phone.
- Synced from Salesforce (see Salesforce Integration in Settings)
- Generated by workflows
Organizations
Organizations are the list of companies that you want to reach out to and communicate with.
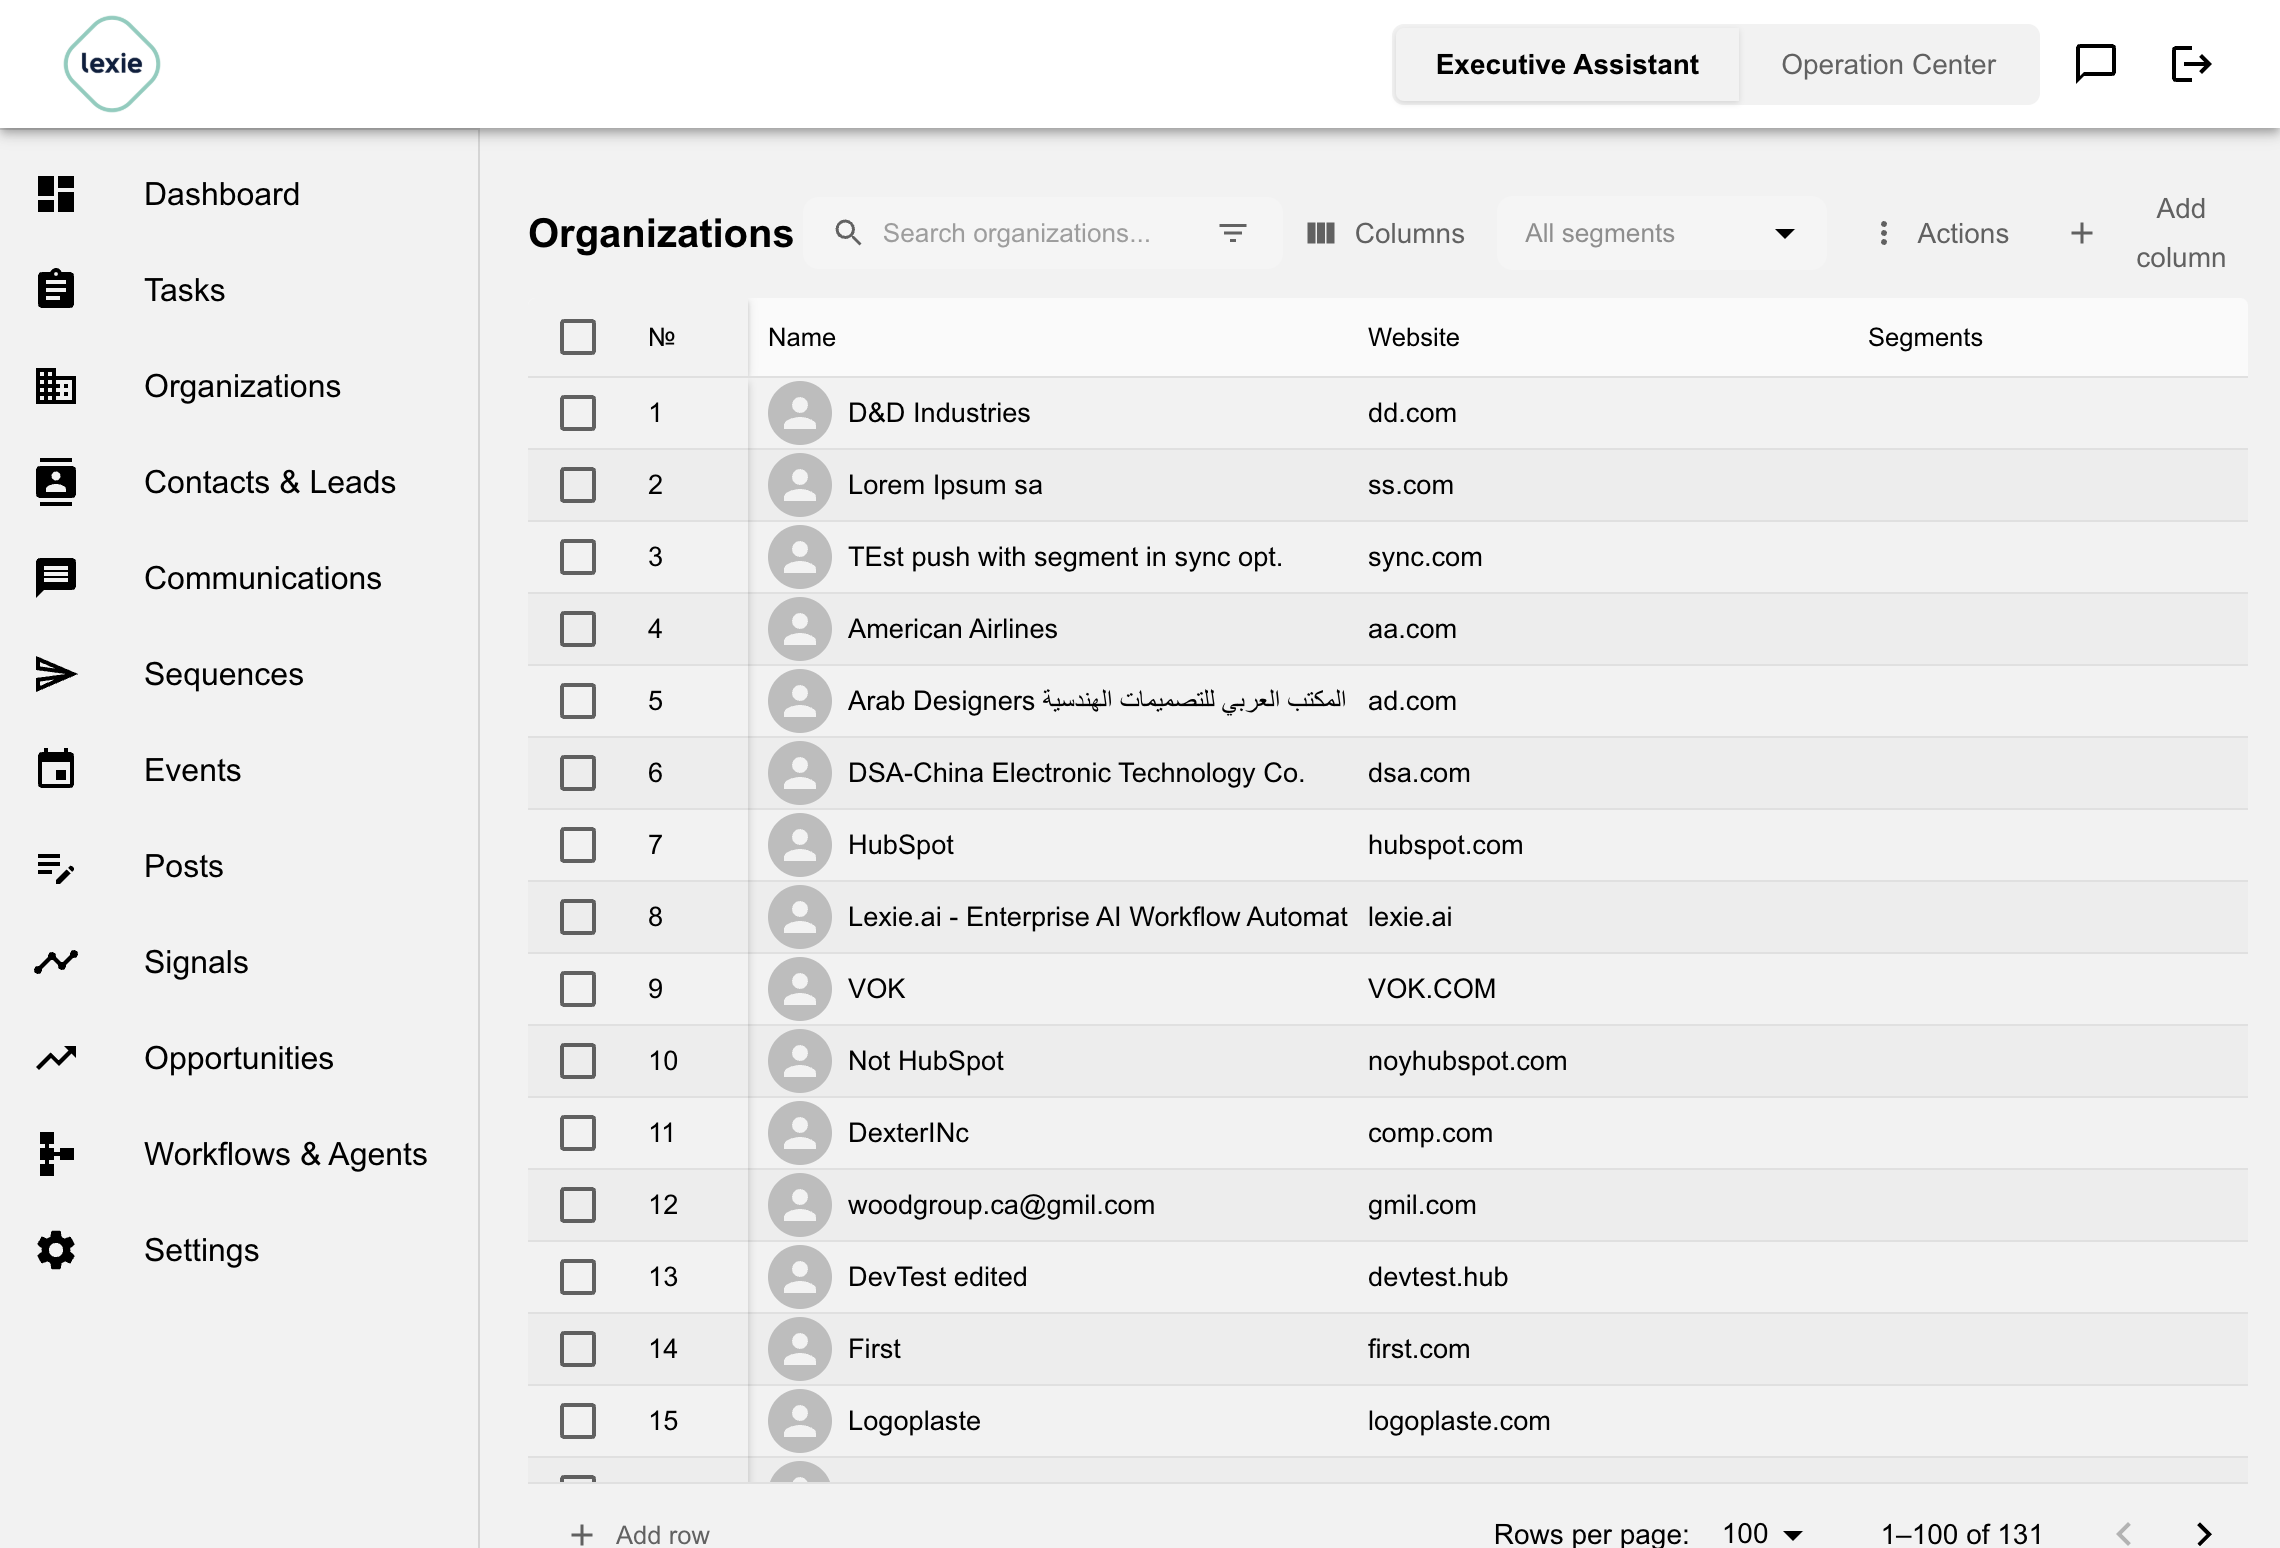
Organization Profile Page
Click an organization name in the Organizations table to open its profile page. The profile shows a header with the company logo (when available), name, industry, headquarters, website, size, and phone, plus quick actions such as Edit and Back to List.
Below the header, tabs organize the rest of the record:
- Details — native fields, overview, description, segments, offerings, tags, score, and custom properties scoped to the organization.
- Contacts — people linked to this account.
- Related — related records and activity context for the account.
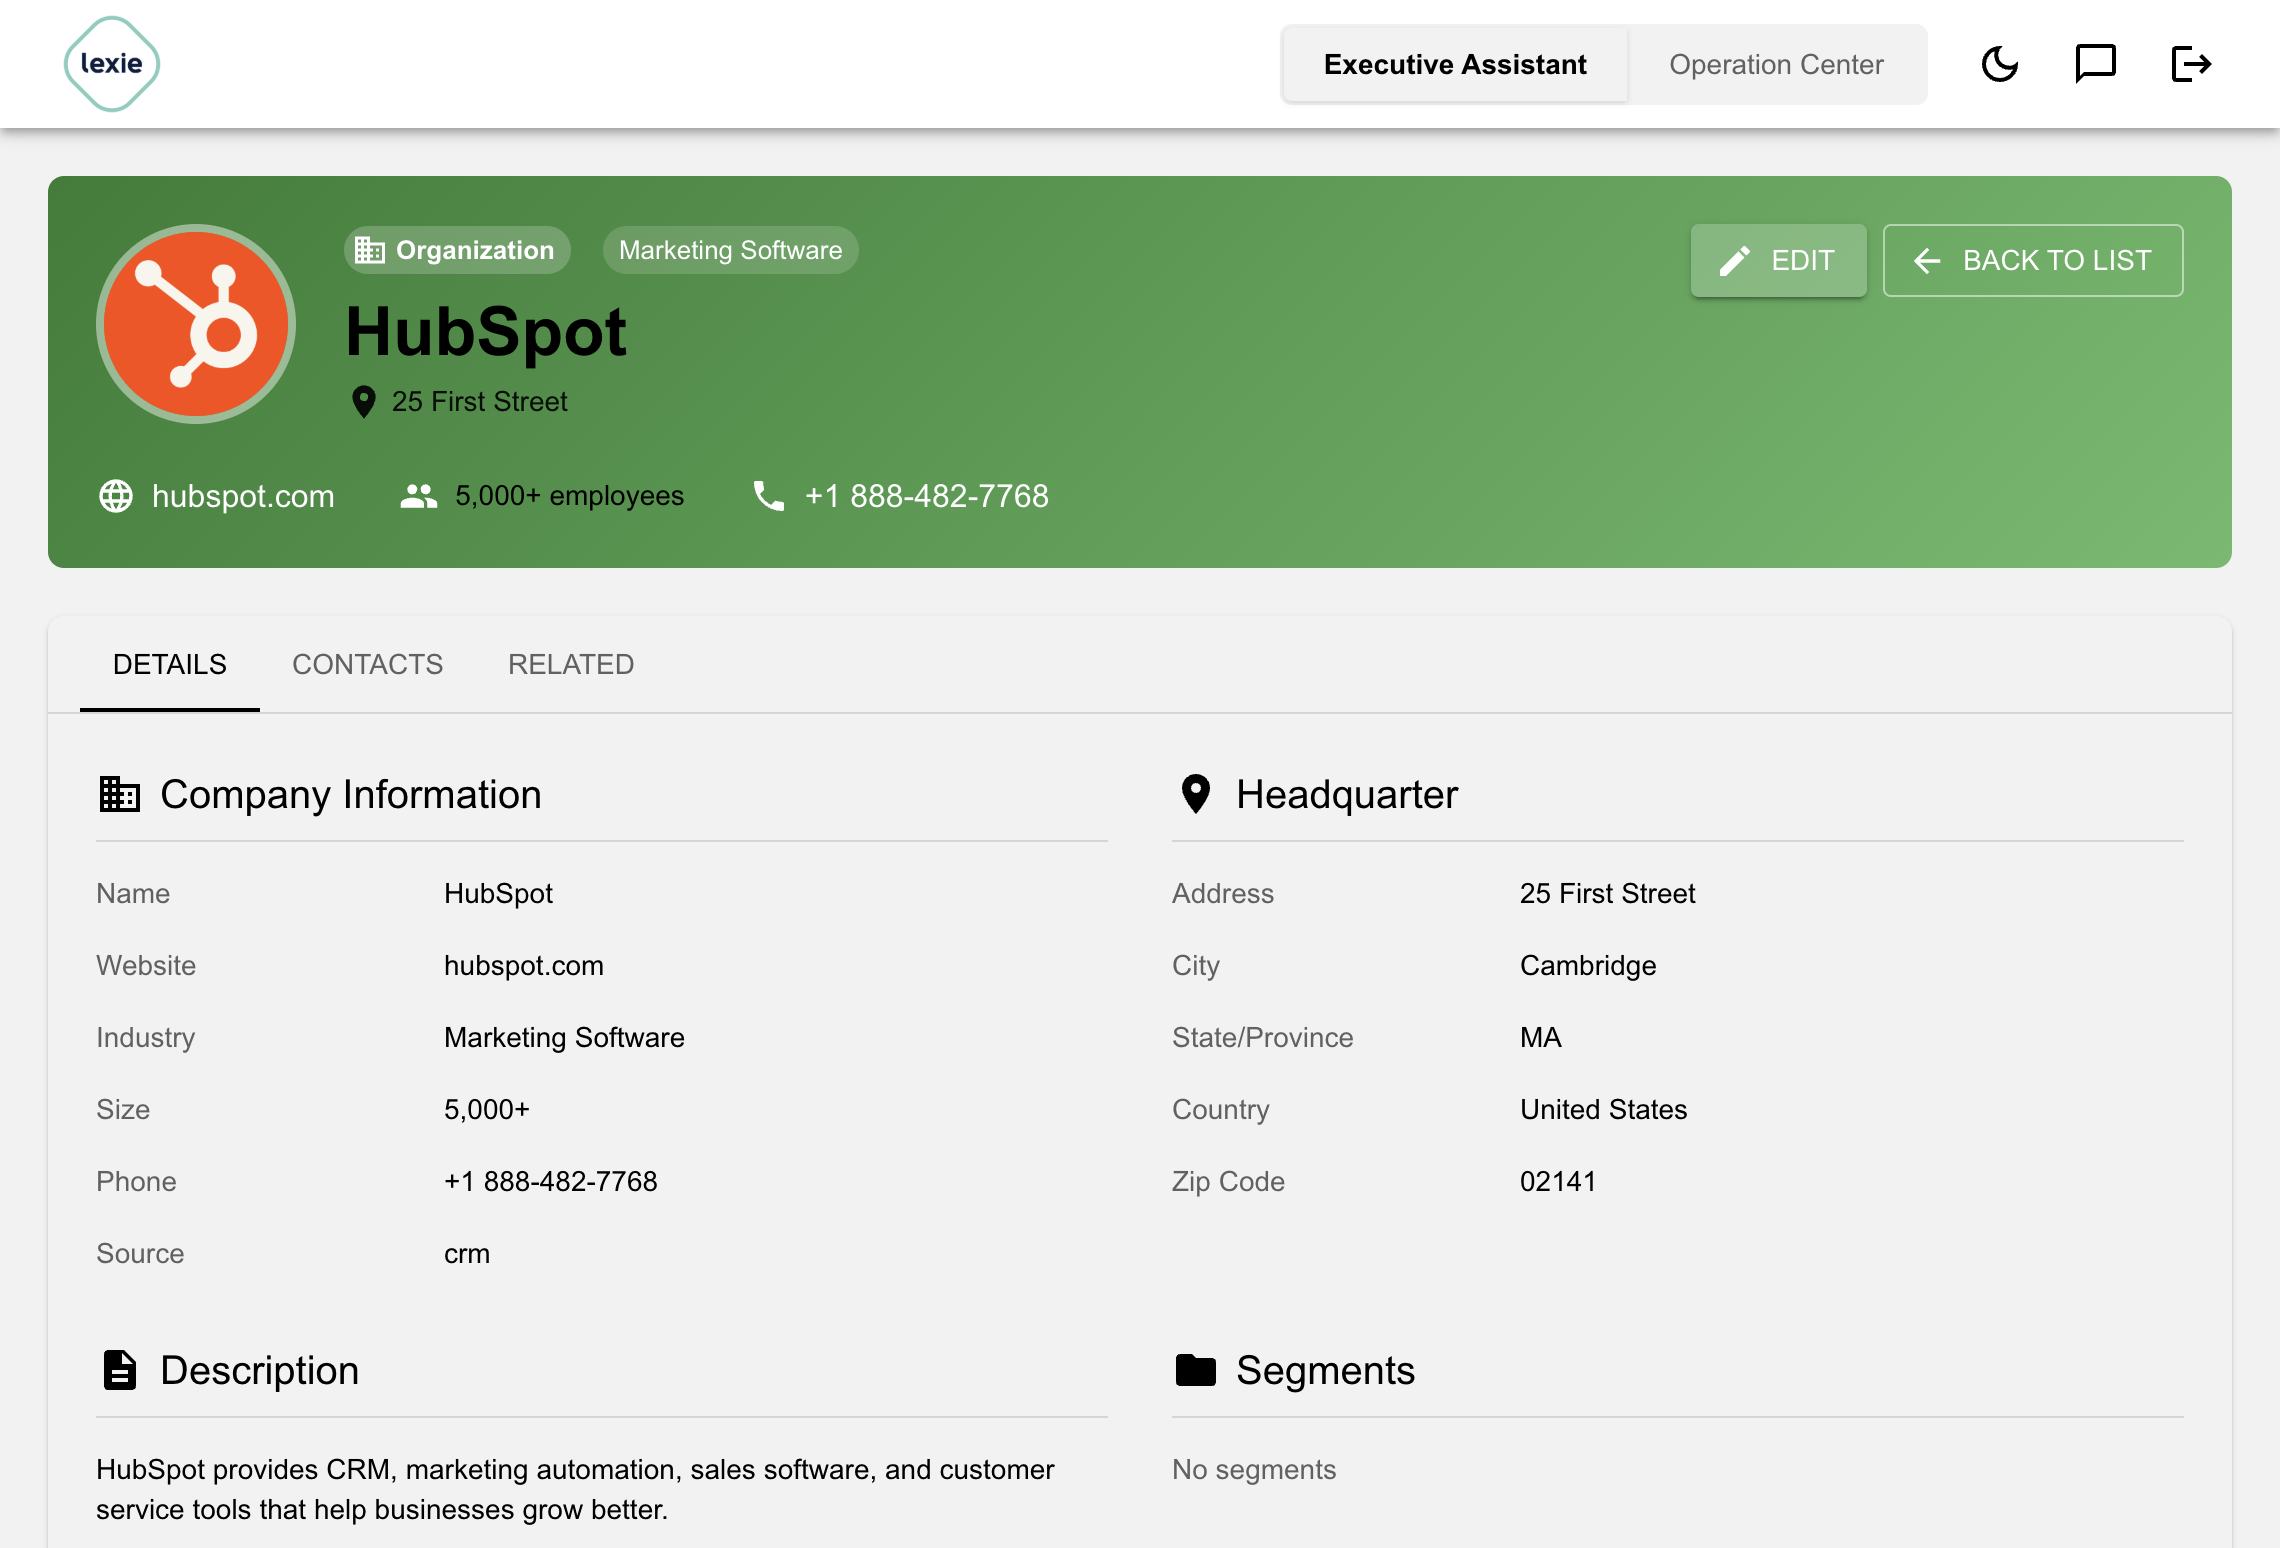
Edit Organization Modal
Click Edit on the profile page (or use row actions from the list) to open the Edit Organization modal. Use it to update native fields such as name, website, industry, headquarters, logo URL, overview, description, segments, offerings, tags, and any custom properties visible for that organization's segments.
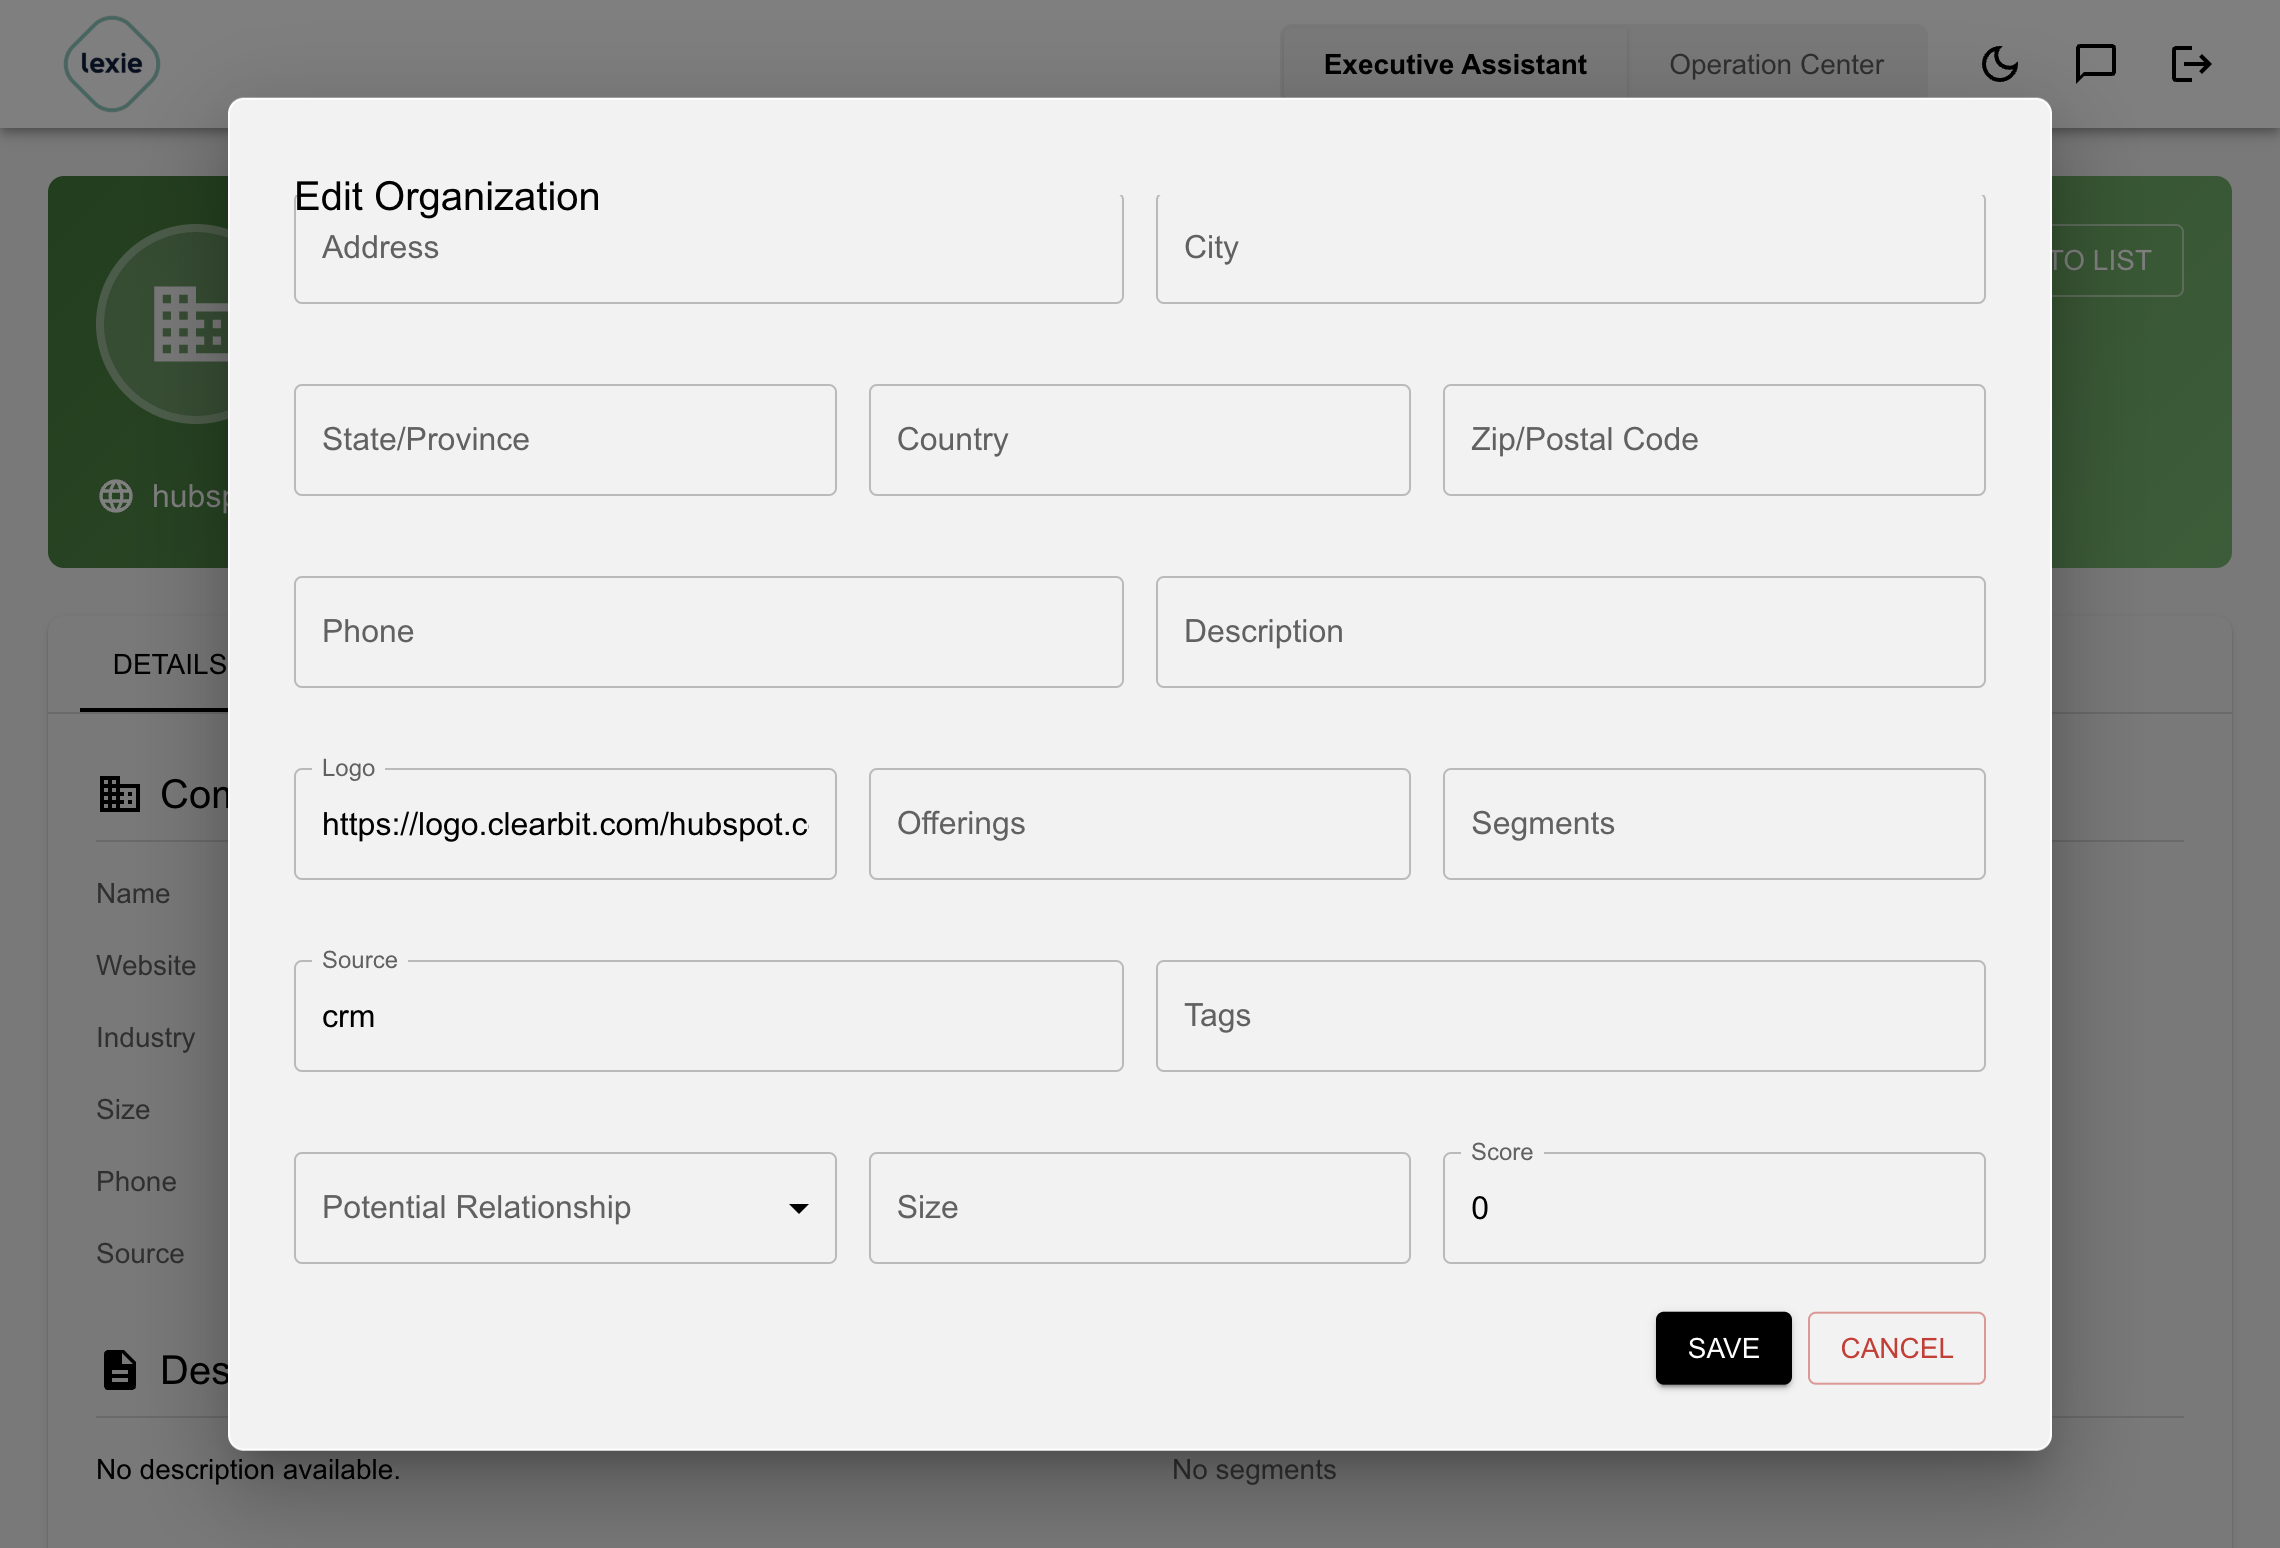
Native Organization Properties
Organizations include these built-in fields. Native properties are part of the core Sales Assistant organization model, so they are available without creating custom columns:
- Organization Name: Company or account name.
- Website: Company website URL.
- Company Size: Employee count or size range.
- Industry: Industry or sector.
- Headquarters: Address, city, state, country, ZIP code, and phone when available.
- Overview: Short organization summary.
- Description: Longer company description.
- Logo: Company logo when available.
- Source: Where the organization came from, such as CSV, RocketReach, Google Places, CRM sync, manual entry, or a workflow.
- Relationship / Fit Notes: Notes about relevance, relationship, or fit.
- Tags: Labels used for grouping or filtering organizations.
- Score: Scoring or ranking value.
- Offerings: Products, services, or offerings associated with the organization.
- Segments: Organization segments that include this organization.
- Record Owner: User who owns or created the record.
- CRM ID: External CRM identifier, such as a Salesforce Account ID or HubSpot Company ID.
- CRM Account ID: CRM account/company identifier used for sync linking.
- Created Date: Date and time the record was created.
- Updated Date: Date and time the record was last updated.
These native fields are the safest columns to use for common account operations, CRM sync, filtering, deduplication, and workflow prompts because Sales Assistant understands their meaning directly.
Custom Organization Properties
Custom organization properties let you add account-specific columns that are not part of the built-in schema. They are useful when your sales motion needs industry-specific or workflow-specific data, such as annual revenue, technology stack, qualification score, decision process, or target department.
Custom properties can be created from Add Column in the Organizations table, from Settings > Custom Properties, or by running enrichment workflows such as GenAI, Formula, WebRobot, import mapping, and Lexie-assisted workflows. When you create an organization custom property, scope it to one or more Segments so it appears where that data is relevant.
Custom Property Types
- Text: Short or medium-length text, such as an account tier, qualification note, ICP match reason, vendor name, or decision-maker title.
- Number: Numeric values used for scoring, employee count ranges, revenue estimates, usage volume, or ranking.
- Date: Dates such as renewal date, last funding date, next review date, contract expiration, or follow-up deadline.
- Collection: A list of values, such as technologies used, specialties, product categories, target departments, or regions served.
- Dictionary: Structured key/value data, such as a list of executives with names and titles, a pricing breakdown, or a workflow output with multiple fields.
- Tag: Label-style values that are useful for quick categorization and filtering.
- Boolean: True/false values, such as
is qualified,has Salesforce,uses Epic, orcompetitor customer. - Markdown Text: Longer formatted notes, research summaries, account plans, or AI-generated briefs.
Custom properties appear as columns in the Organizations table. They can also be used in filters, imports, exports, GenAI prompts, formula code, WebRobot extraction, and workflow outputs. If a CSV column matches an existing custom property name, the import can map into that property; otherwise, create the custom property first so the data has a visible typed column.
Native vs. Custom Organization Properties
Use native properties for universal company identity and CRM fields. Use custom properties for data that depends on a segment, ICP, campaign, workflow, or customer-specific process. For example, website and industry should stay native, while genome sequencing relevance, installed imaging systems, or pilot readiness should be custom.
Segments
Segments let you organize organizations into logical groups for targeted workflows, imports, and custom properties. An organization can belong to more than one segment at the same time—for example, both a regional segment and an industry segment.
On the Organizations page, use the segment dropdown above the table (next to Columns and Actions):
- All segments (default) — when no segment is selected, the table shows all organizations in the workspace.
- Select a segment — the table filters to show only organizations assigned to that segment. Column filters and custom properties also follow the selected segment context.
- Add segment — at the bottom of the dropdown, click Add segment to create a new segment without leaving the Organizations page. Enter the segment name and description, then save.
You can also create and manage segments from Settings > Segments:
- Go to Settings > Segments
- Click New Segment
- Enter the segment name and description
- Save the segment
Assign organizations to segments from the Edit Organization modal, the organization profile Details tab, or by editing the Segments column in the table.
Import Options
Open Actions > Import to choose lower-level import tools when you already have a file, a RocketReach search, or a Google Places query.
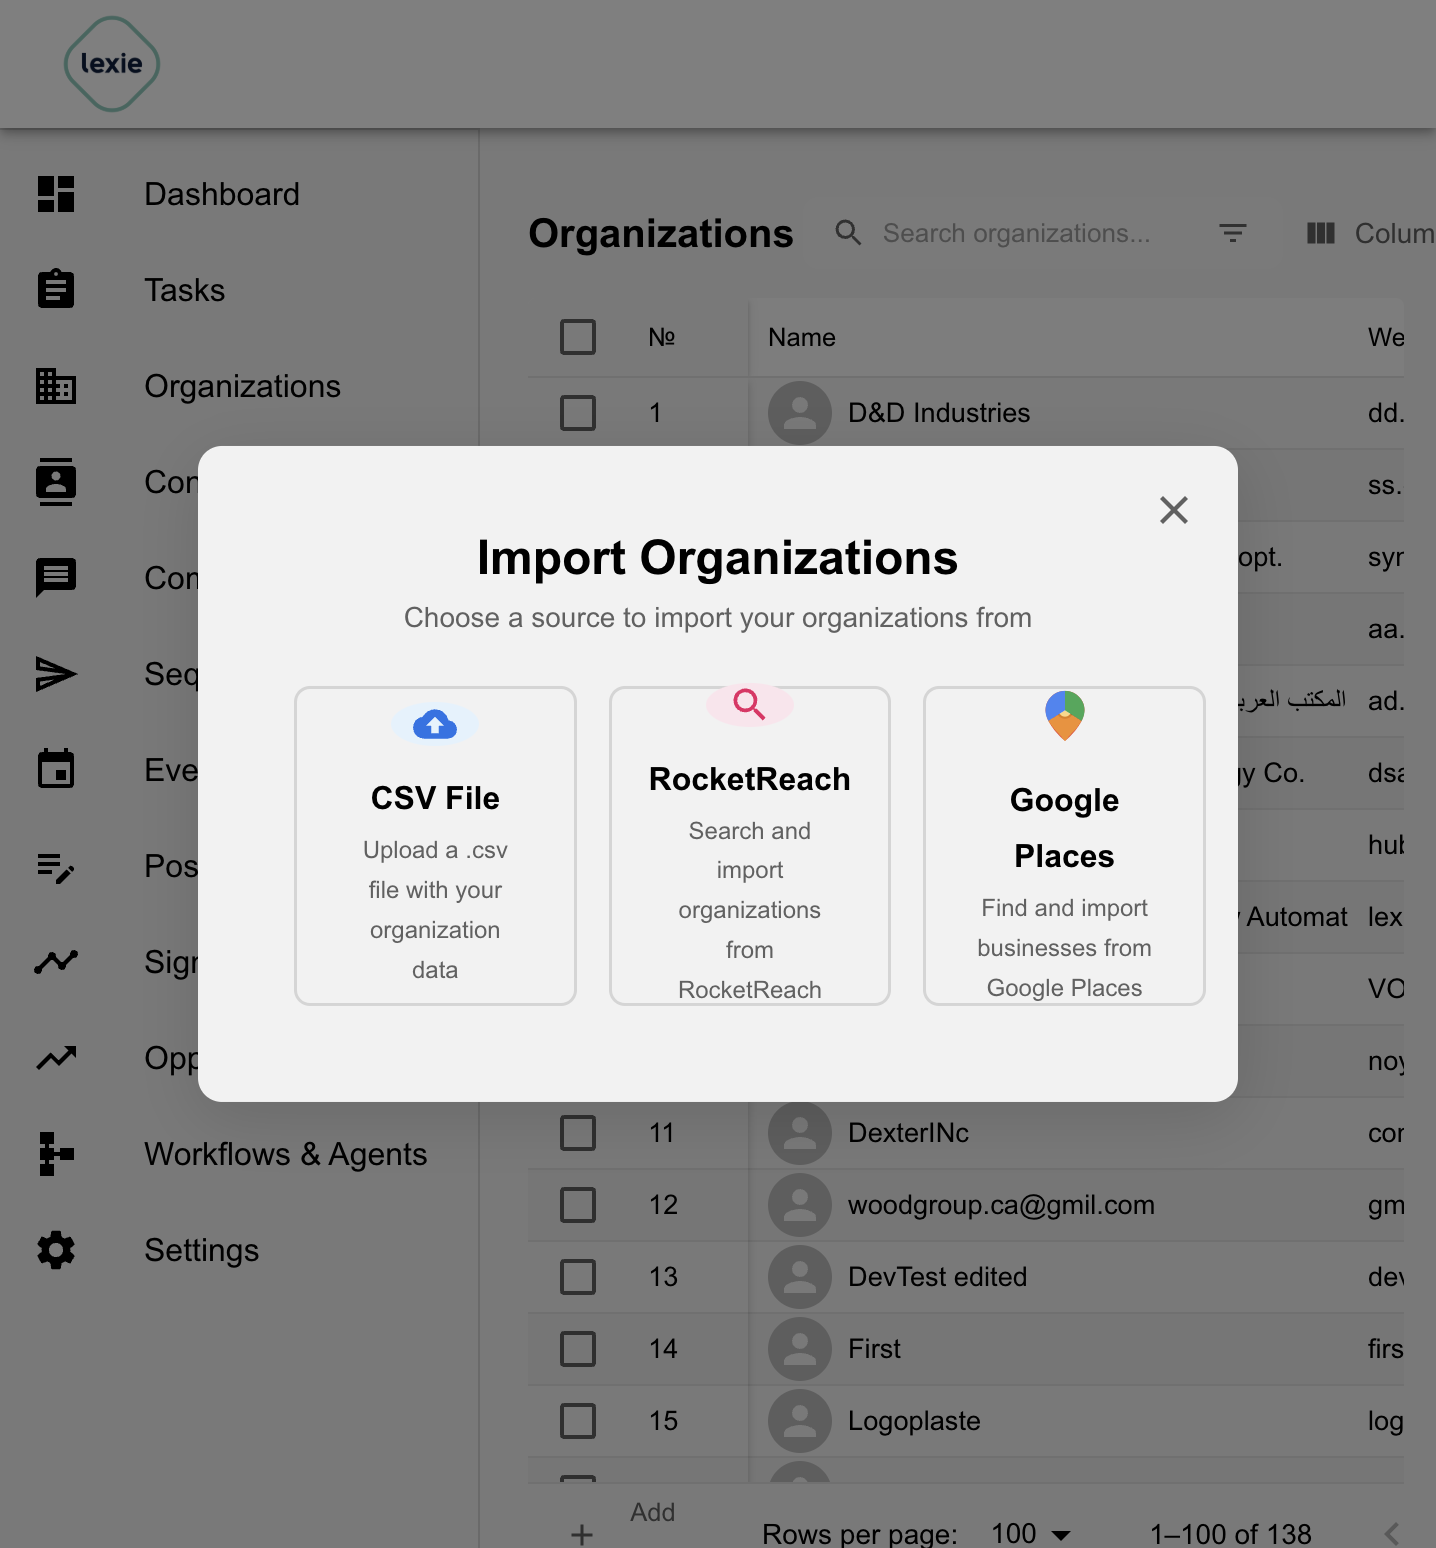
CSV Import
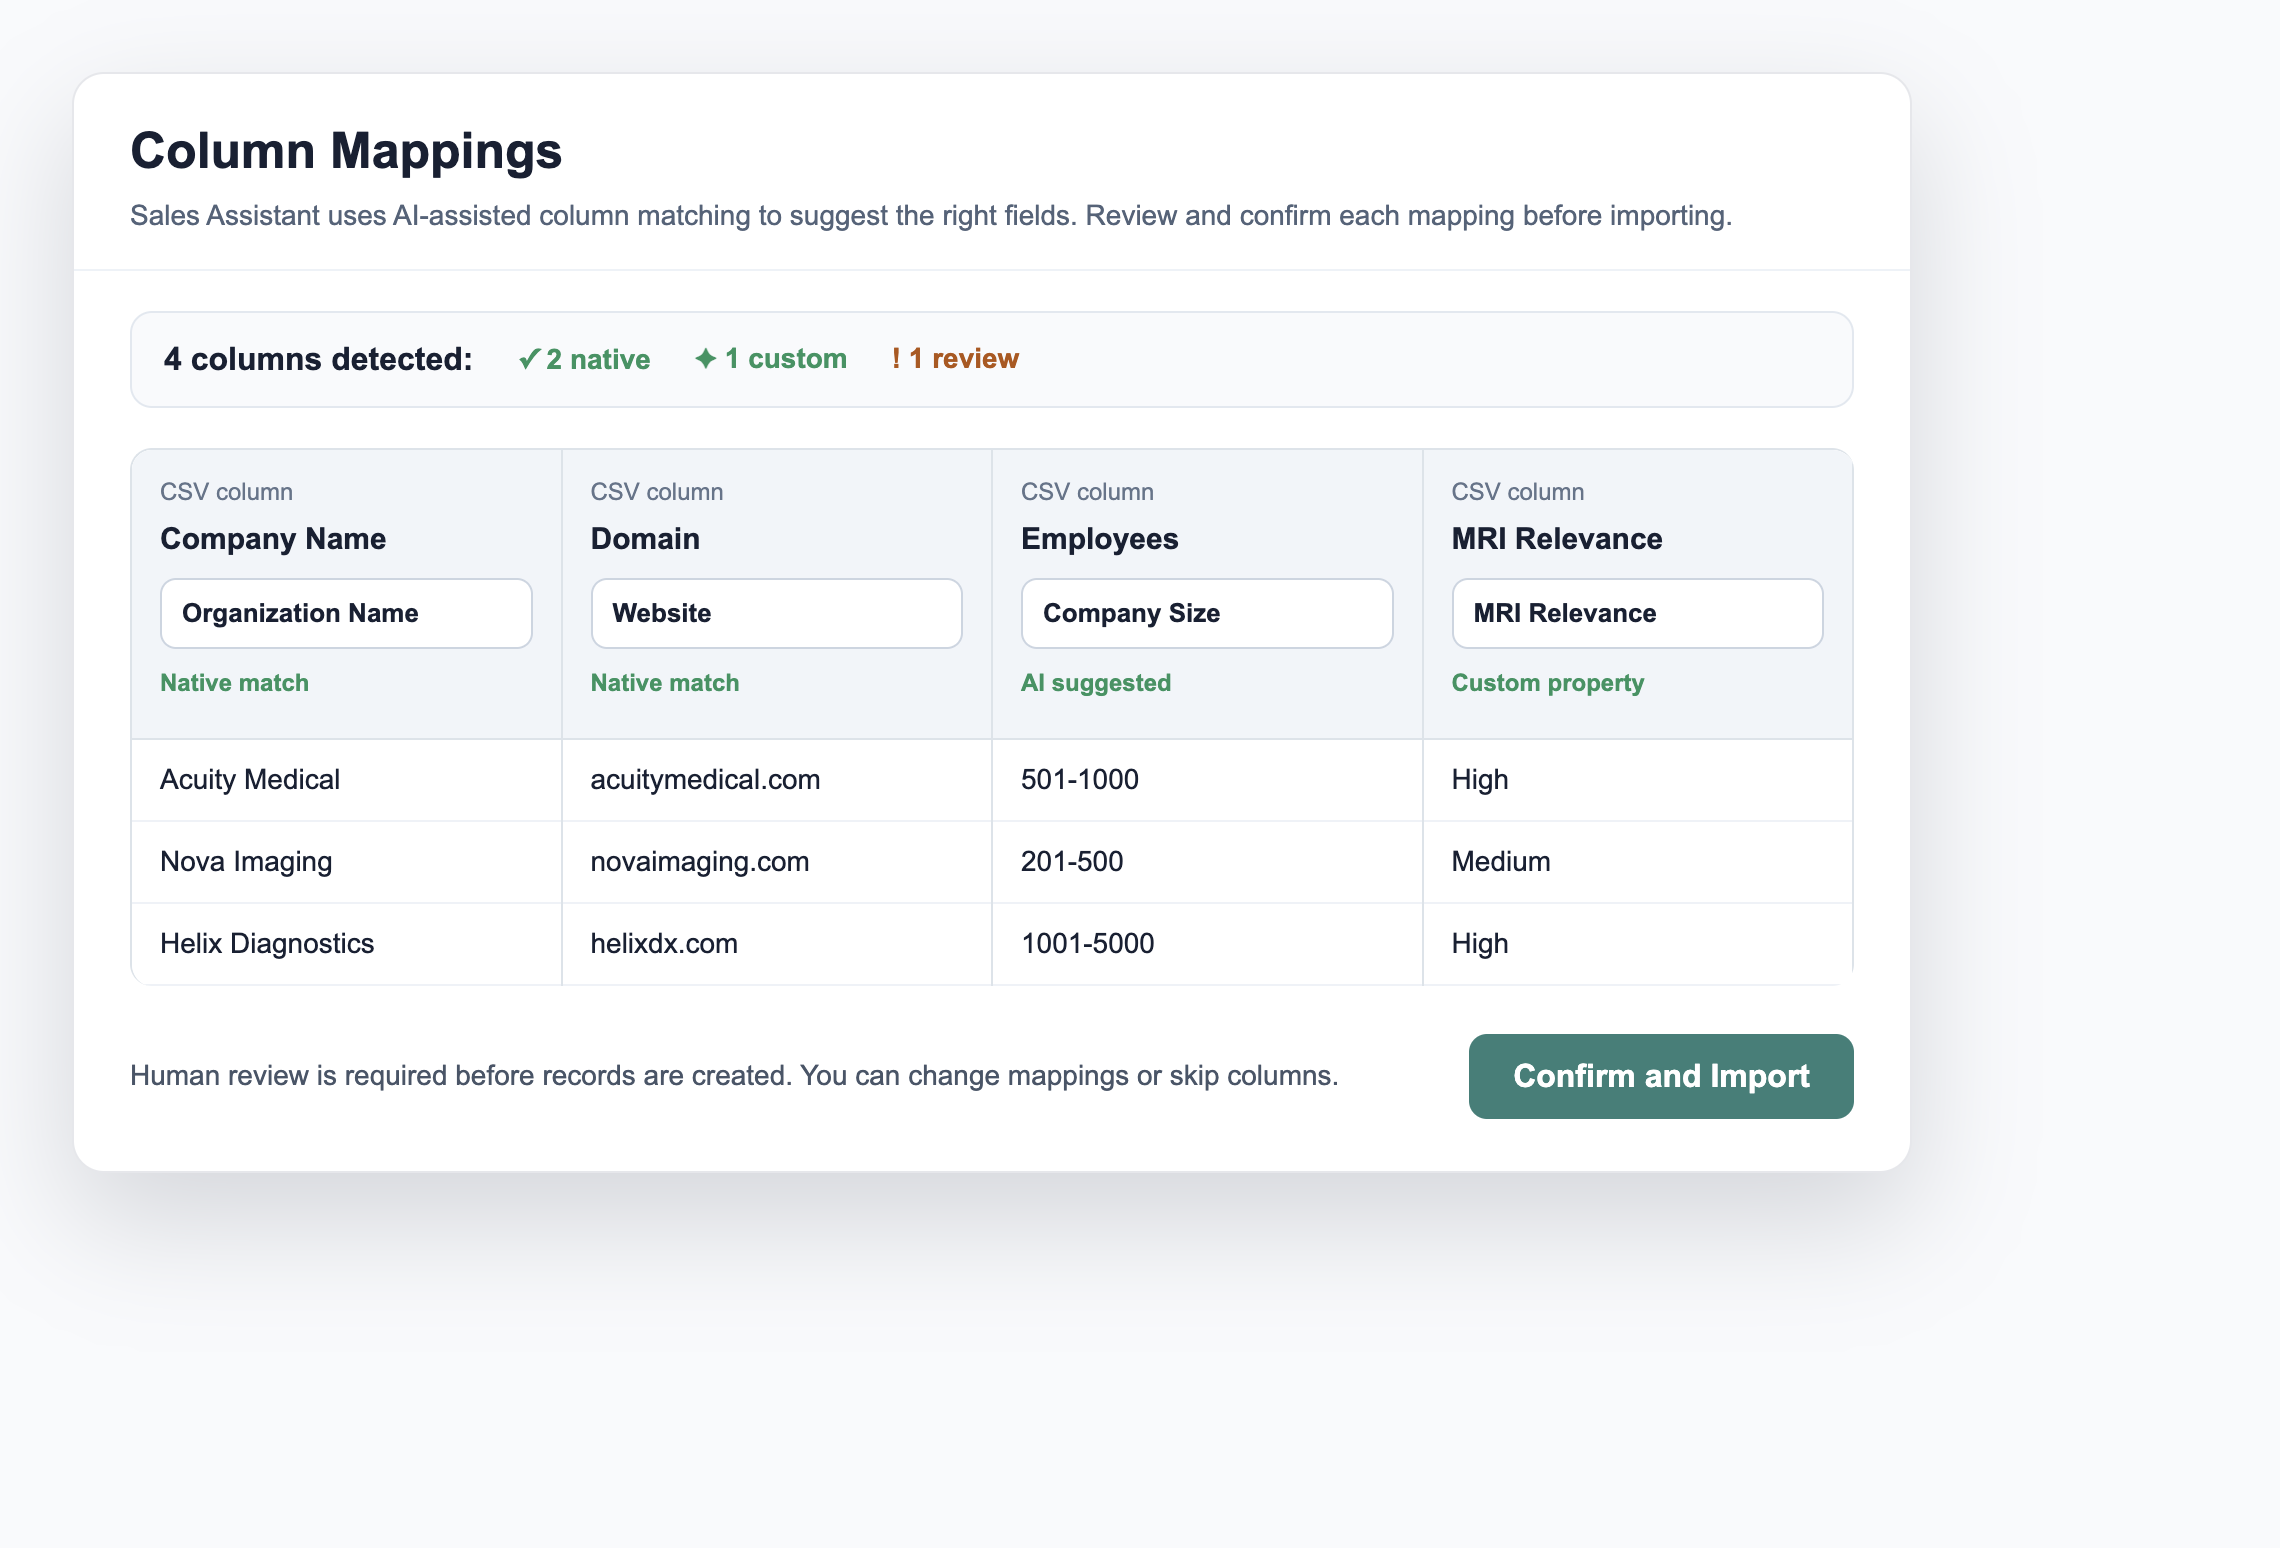
- Go to the Organizations section
- Select Actions > Import > CSV
- Select the segments whose custom properties should be included in column mapping
- Upload your CSV file
- Review the suggested column mapping before importing
- Sales Assistant reads the CSV headers and uses AI-assisted matching to suggest the best organization field for each column
- Exact column names are matched automatically when possible, such as Organization Name, Website, or an existing custom property
- If the system cannot confidently match a column, it can suggest creating a new custom property for that data
- You stay in control: review every suggested match, change any incorrect mapping, skip columns you do not want to import, and confirm before records are created
RocketReach Import
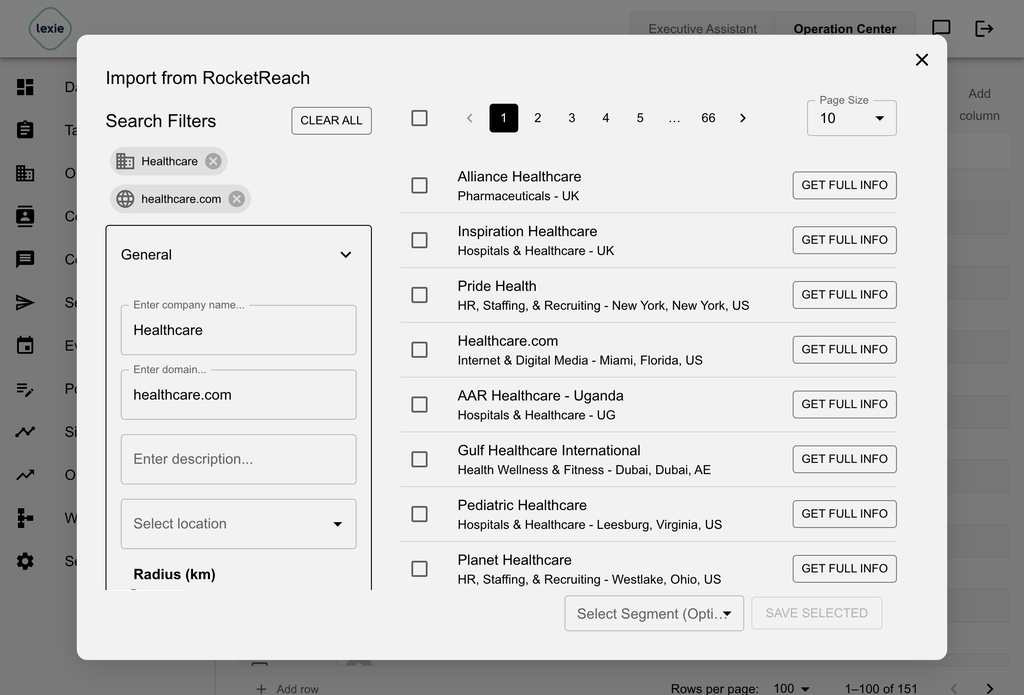
- Go to the Organizations section
- Select Actions > Import > RocketReach
- Configure the search parameters and run a search. For example, search for medical device providers related to MRI imaging or genome sequencing, review the returned organizations, and decide which ones should become Sales Assistant organization records.
- General Information: Enter company name, domain, and description
- Location: Select location and radius (up to 160 km)
- Technologies: Specify technologies used
- Metrics: Filter by employees, employee growth, and revenue ranges
- Review the returned companies, optionally request full info, choose the target segment, and save only the selected records. If you prefer not to configure the search manually, ask Lexie in the copilot panel to prepare the same organization list and pause for approval.
Industry Classifications
| Industry Group | Subcategories |
|---|---|
| Agriculture & Fishing | Agriculture, Crops, Farming Animals & Livestock, Fishery & Aquaculture, Ranching |
| Business Services | Accounting, Auctions, Call Centers, Engineering Services |
| Construction | Architecture, Building Construction, Specialty Trade Contractors |
| Consumer Services | Car Rental, Child Care, Funeral Homes, Veterinary Care |
| Education | Career Services, Colleges, E-learning, Education Management |
| Energy, Utilities & Waste | Electricity, Environmental Services, Oil & Gas, Renewables, Utilities |
| Finance | Banking, Financial Services, Investment Banking, Securities, Venture Capital |
| Government & Public Services | Conservation Programs, Fire Protection, Health Services, Law Enforcement, Public Safety |
| Healthcare | Biotechnology, Dentists, Healthcare, Hospitals, Pharmaceuticals |
| Leisure & Hospitality | Amusement Parks, Entertainment, Hotels, Museums, Restaurants, Sports |
| Manufacturing | Aerospace, Automotive, Consumer Goods, Electronics, Food Production, Textiles |
| Media & Internet | Animation, Broadcasting, Ecommerce, Internet Publishing, Social Media |
| Metals & Mining | Mining, Natural Resources |
| Organizations | Non-Profit, Professional Organizations, Religious Organizations |
| Real Estate | Commercial Real Estate, Leasing, Residential Real Estate |
| Research & Technology | Artificial Intelligence, Climate Data, Robotics, Technology |
| Retail | Apparel, Consumer Electronics, Grocery, Jewelry, Sporting Goods |
| IT & Software | Business Intelligence, Cloud Software, CRM, ERP, IT Systems |
| Telecommunications | Cable, Telecommunications, Wireless |
| Supply Chain & Logistics | Import & Export, Logistics, Warehousing, Wholesale |
| Transportation | Airlines, Delivery, Freight Services, Rail Transportation, Urban Transit Services |
Google Places Import
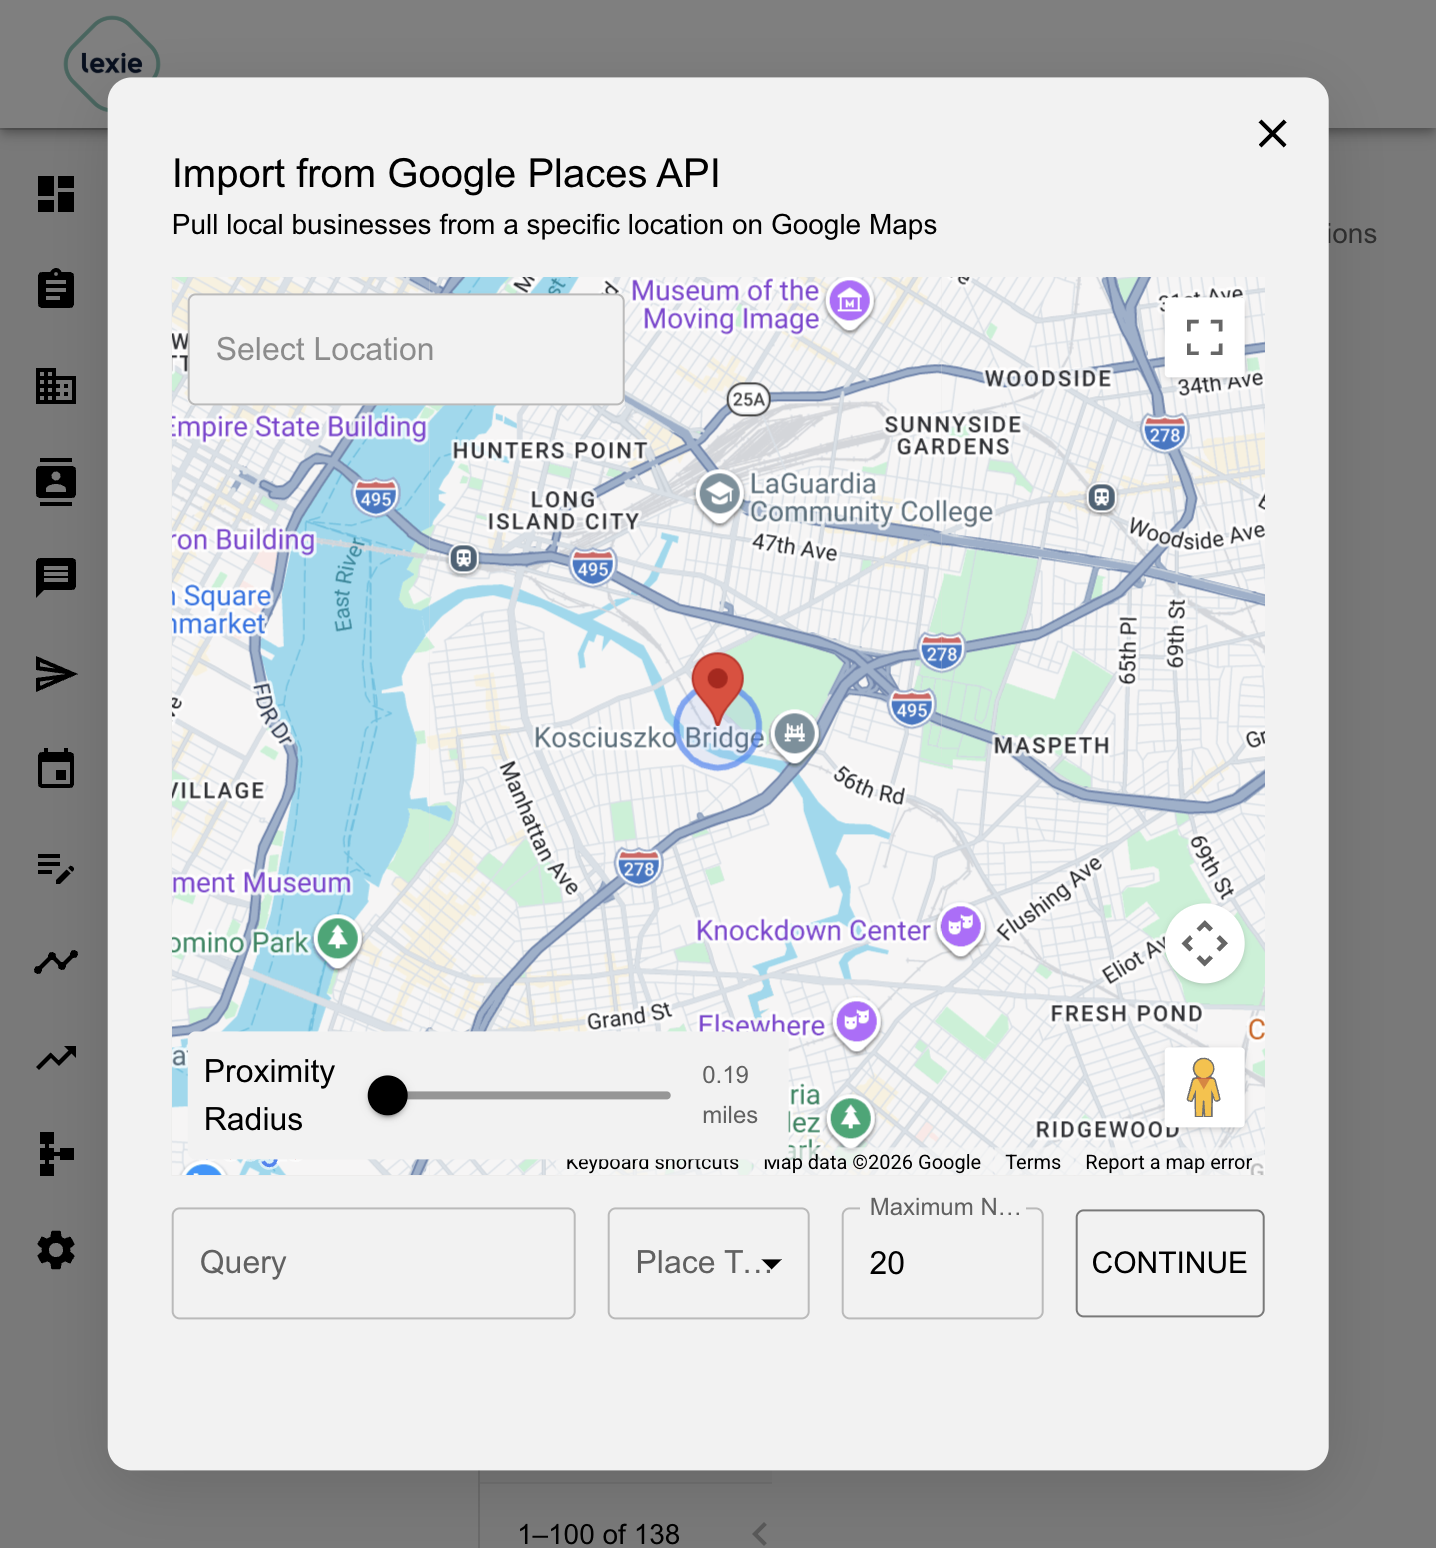
- Go to the Organizations section in the Sales Assistant
- Open the Google Maps Importer
- Set the following parameters:
- Center and Radius: Define the center location (e.g., an address in Los Altos) and the radius (e.g., 3 miles)
- Place Type: Select from options such as hospitals, clinics, pharmacies, and more
- Location Query: Enter keywords (e.g., "clinics") to refine your search
- Number of Results: Specify the maximum number of locations to retrieve
- Click Fetch Results
- Select all results and assign them to the desired organization segment
Place Types
Automotive
- Car Dealer, Car Rental, Car Repair, Car Wash, Gas Station, Parking
Business
- Farm
Culture
- Art Gallery, Museum
Education
- Library, School, University
Entertainment
- Amusement Park, Aquarium, Bowling Alley, Casino, Movie Theater, Night Club, Park, Tourist Attraction, Zoo
Finance
- ATM, Bank
Food and Drink
- Bakery, Bar, Cafe, Meal Delivery, Meal Takeaway, Restaurant
Geographical
- Country, Locality, Postal Code
Government
- City Hall, Courthouse, Embassy, Fire Station, Local Government Office, Police, Post Office
Health and Wellness
- Dentist, Doctor, Hospital, Pharmacy
Lodging
- Hotel, Lodging
Places of Worship
- Church, Hindu Temple, Mosque, Synagogue
Services
- Beauty Salon, Electrician, Florist, Laundry, Locksmith, Moving Company, Plumber, Real Estate Agency, Storage, Veterinary Care
Shopping
- Book Store, Clothing Store, Convenience Store, Department Store, Electronics Store, Furniture Store, Grocery Store, Hardware Store, Home Goods Store, Jewelry Store, Liquor Store, Market, Pet Store, Shoe Store, Shopping Mall, Supermarket
Sports
- Golf Course, Gym, Stadium, Swimming Pool
Transportation
- Airport, Bus Station, Subway Station, Taxi Stand, Train Station
Additional
- Establishment, Natural Feature, Point Of Interest, Political, Premise, Route, Street Address, Sublocality
Export
With the export option, you can export the organization list to a CSV file.
Organization Management
Select Organization Segment
You can select the segment you want to work on using the dropdown on top of the organization table.
Add Organization
You can add an organization using the Add Row button under the organization table.
Filter Organizations
You can leverage the filter mechanism to select a subset of organizations. The filter can be a collection of AND/OR expressions. Each expression is based on:
- (i) One of the columns
- (ii) An operator which is dependent on the type of the column
- (iii) An optional constant (depending on the operator)
Available Filter Operators:
- String fields: contains, not contain, equals, starts with, ends with, is empty, is not empty
- Number fields: =, !=, >, >=, <, <=, is empty, is not empty
- Array/Collection fields: contains, does not contain, is empty, is not empty
- Boolean fields: is, is not
Delete Organization(s)
Single Delete:
You can delete organizations by using the actions menu at the last column of the table.
Bulk Delete:
You can do bulk delete under the Actions dropdown. When bulk deleting, you can either:
- Delete the organizations from all segments, or
- If a particular segment is selected, delete only from the current segment
Progress Tracking:
When performing bulk delete operations, a progress bar will show the status of the deletion process.
Edit Organization
Edit/Review in the Dedicated Form:
You can see the organization's fields and edit them using the edit action at the last column of the table. The form will show all the columns including custom properties.
In-Place Editing:
You can also edit the columns in place by clicking directly on any cell in the table.
Copy Organization
You can copy the selected organizations to another segment:
- Choose whether to copy the custom properties or not
- Choose to create the target org segment if it does not exist yet
Scroll Through Organizations
You can flip through the pages of the organizations with different page sizes.
Add/Hide/Move Columns
- Add a native property or custom property using the Add Column mechanism
- Hide them by selecting the column control
- The columns you choose for organizations will be persisted across all organizations
- You can also move columns around (the position will not be persisted)
Organization Add Column Workflows
Open Add column > Workflow to create computed organization properties.
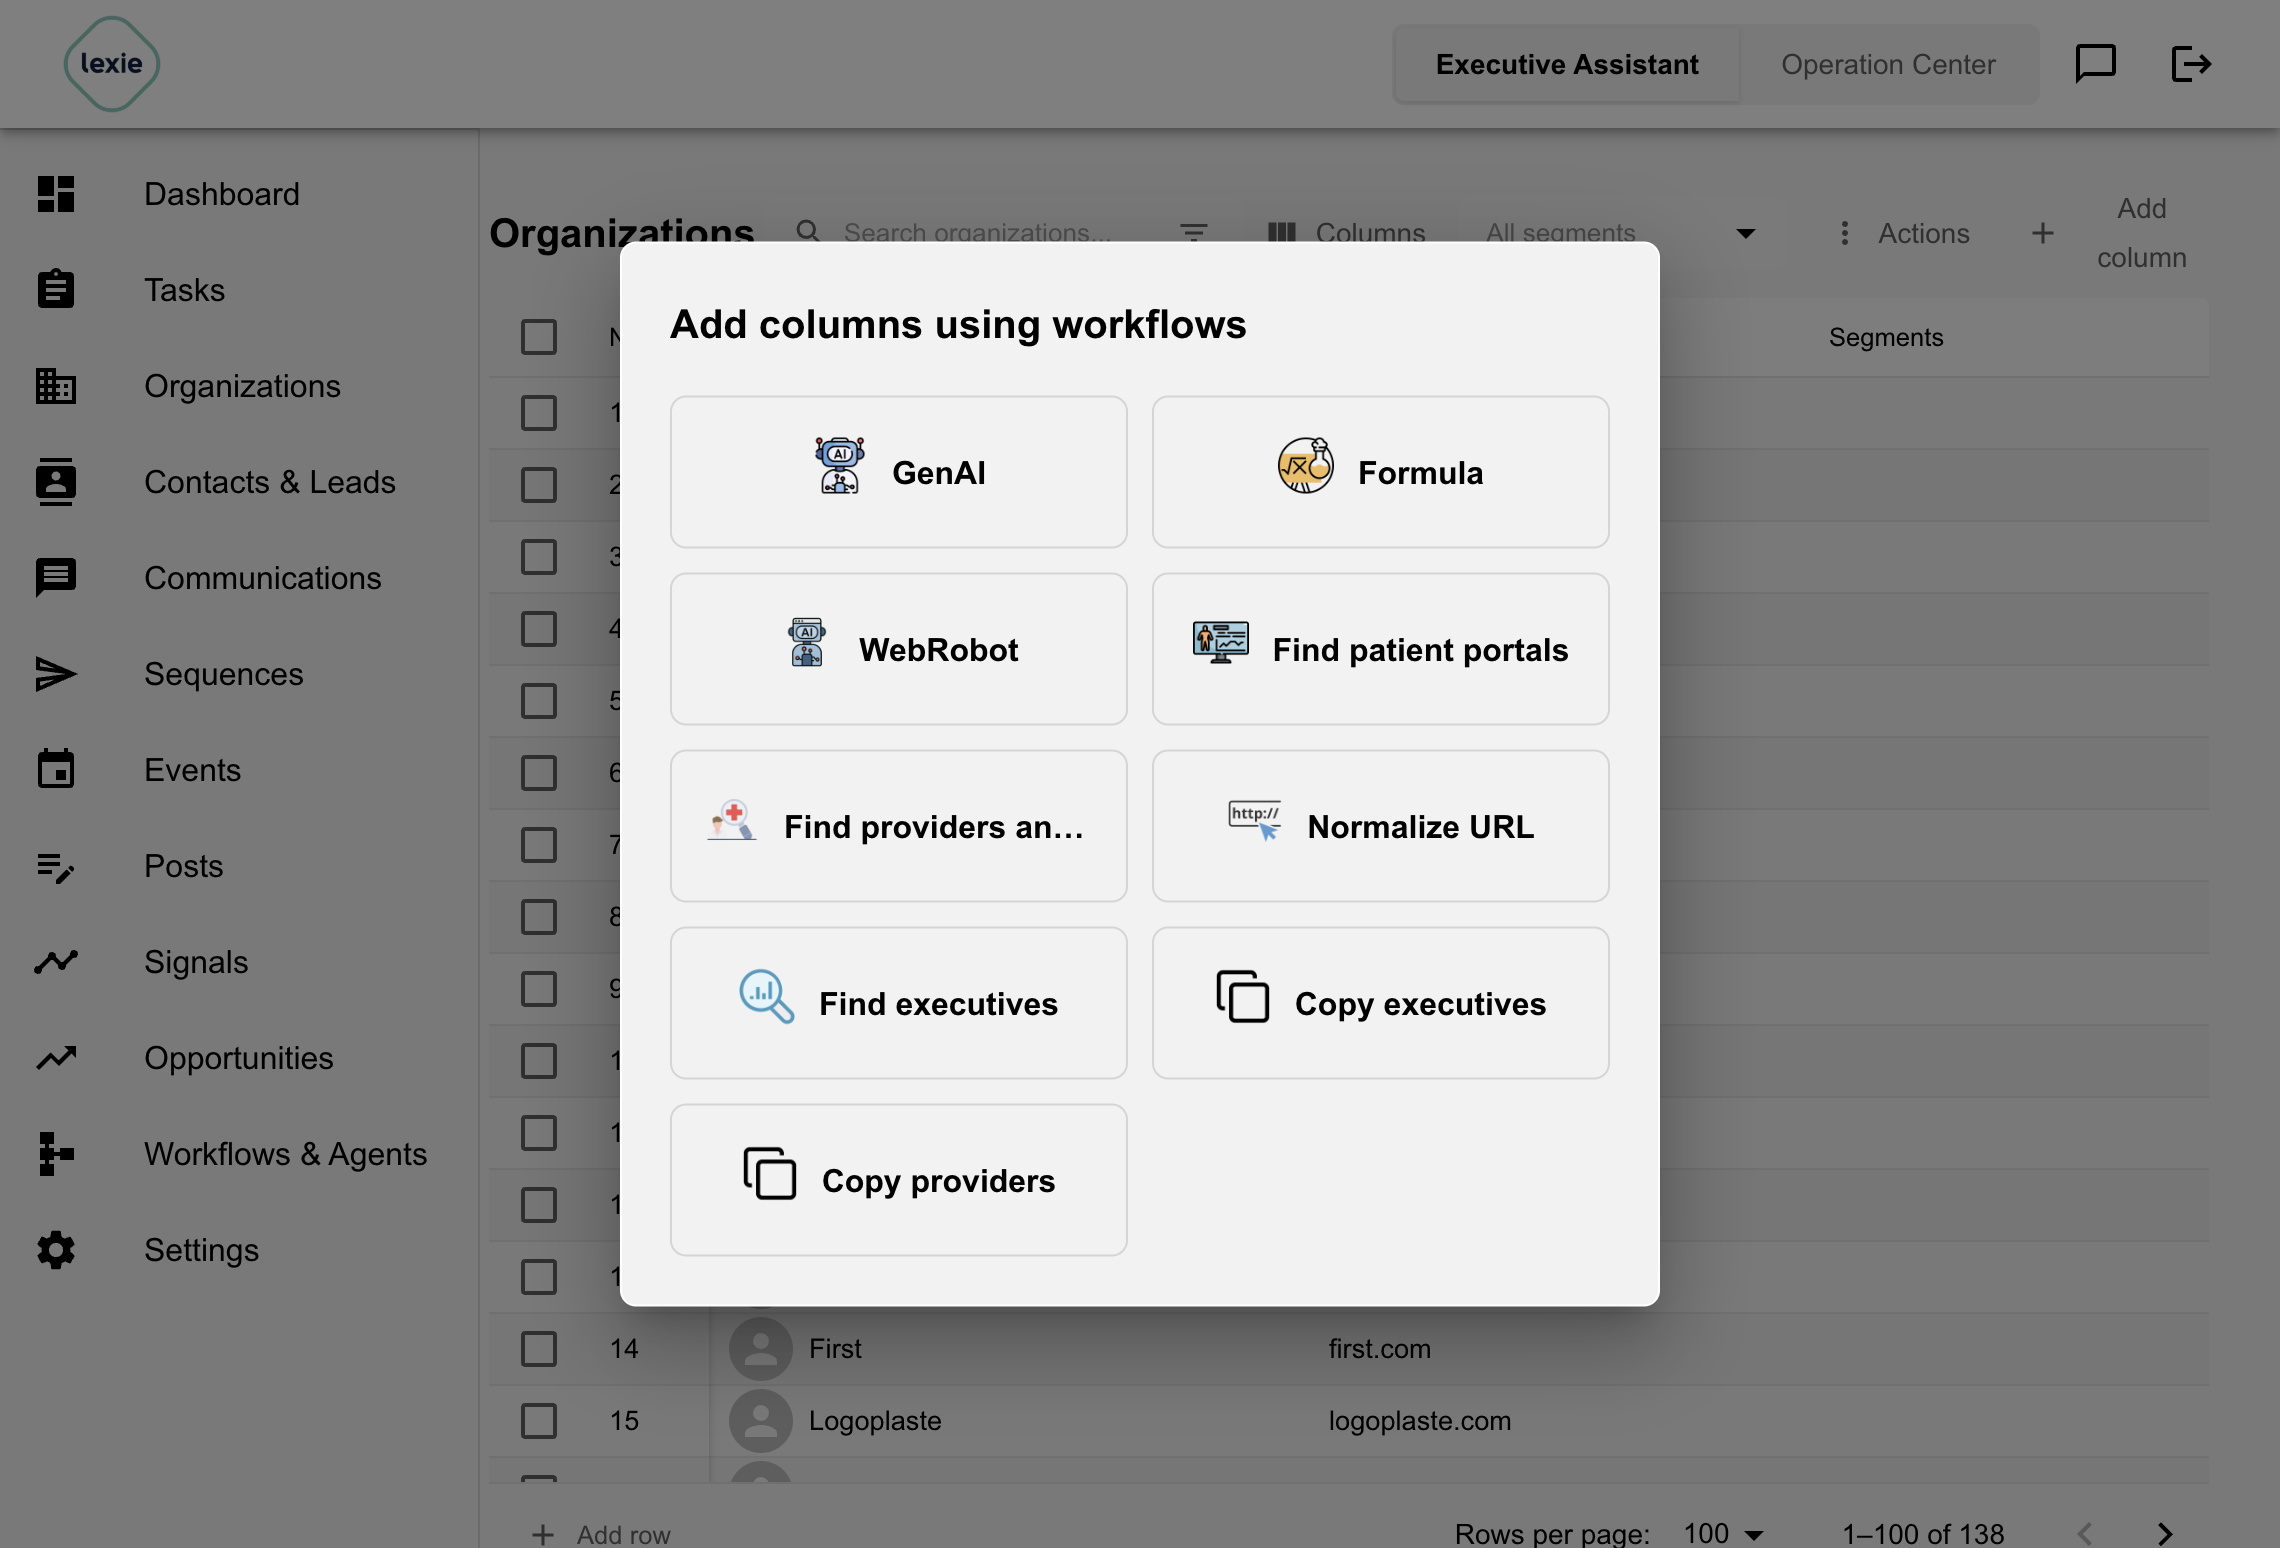
GenAI
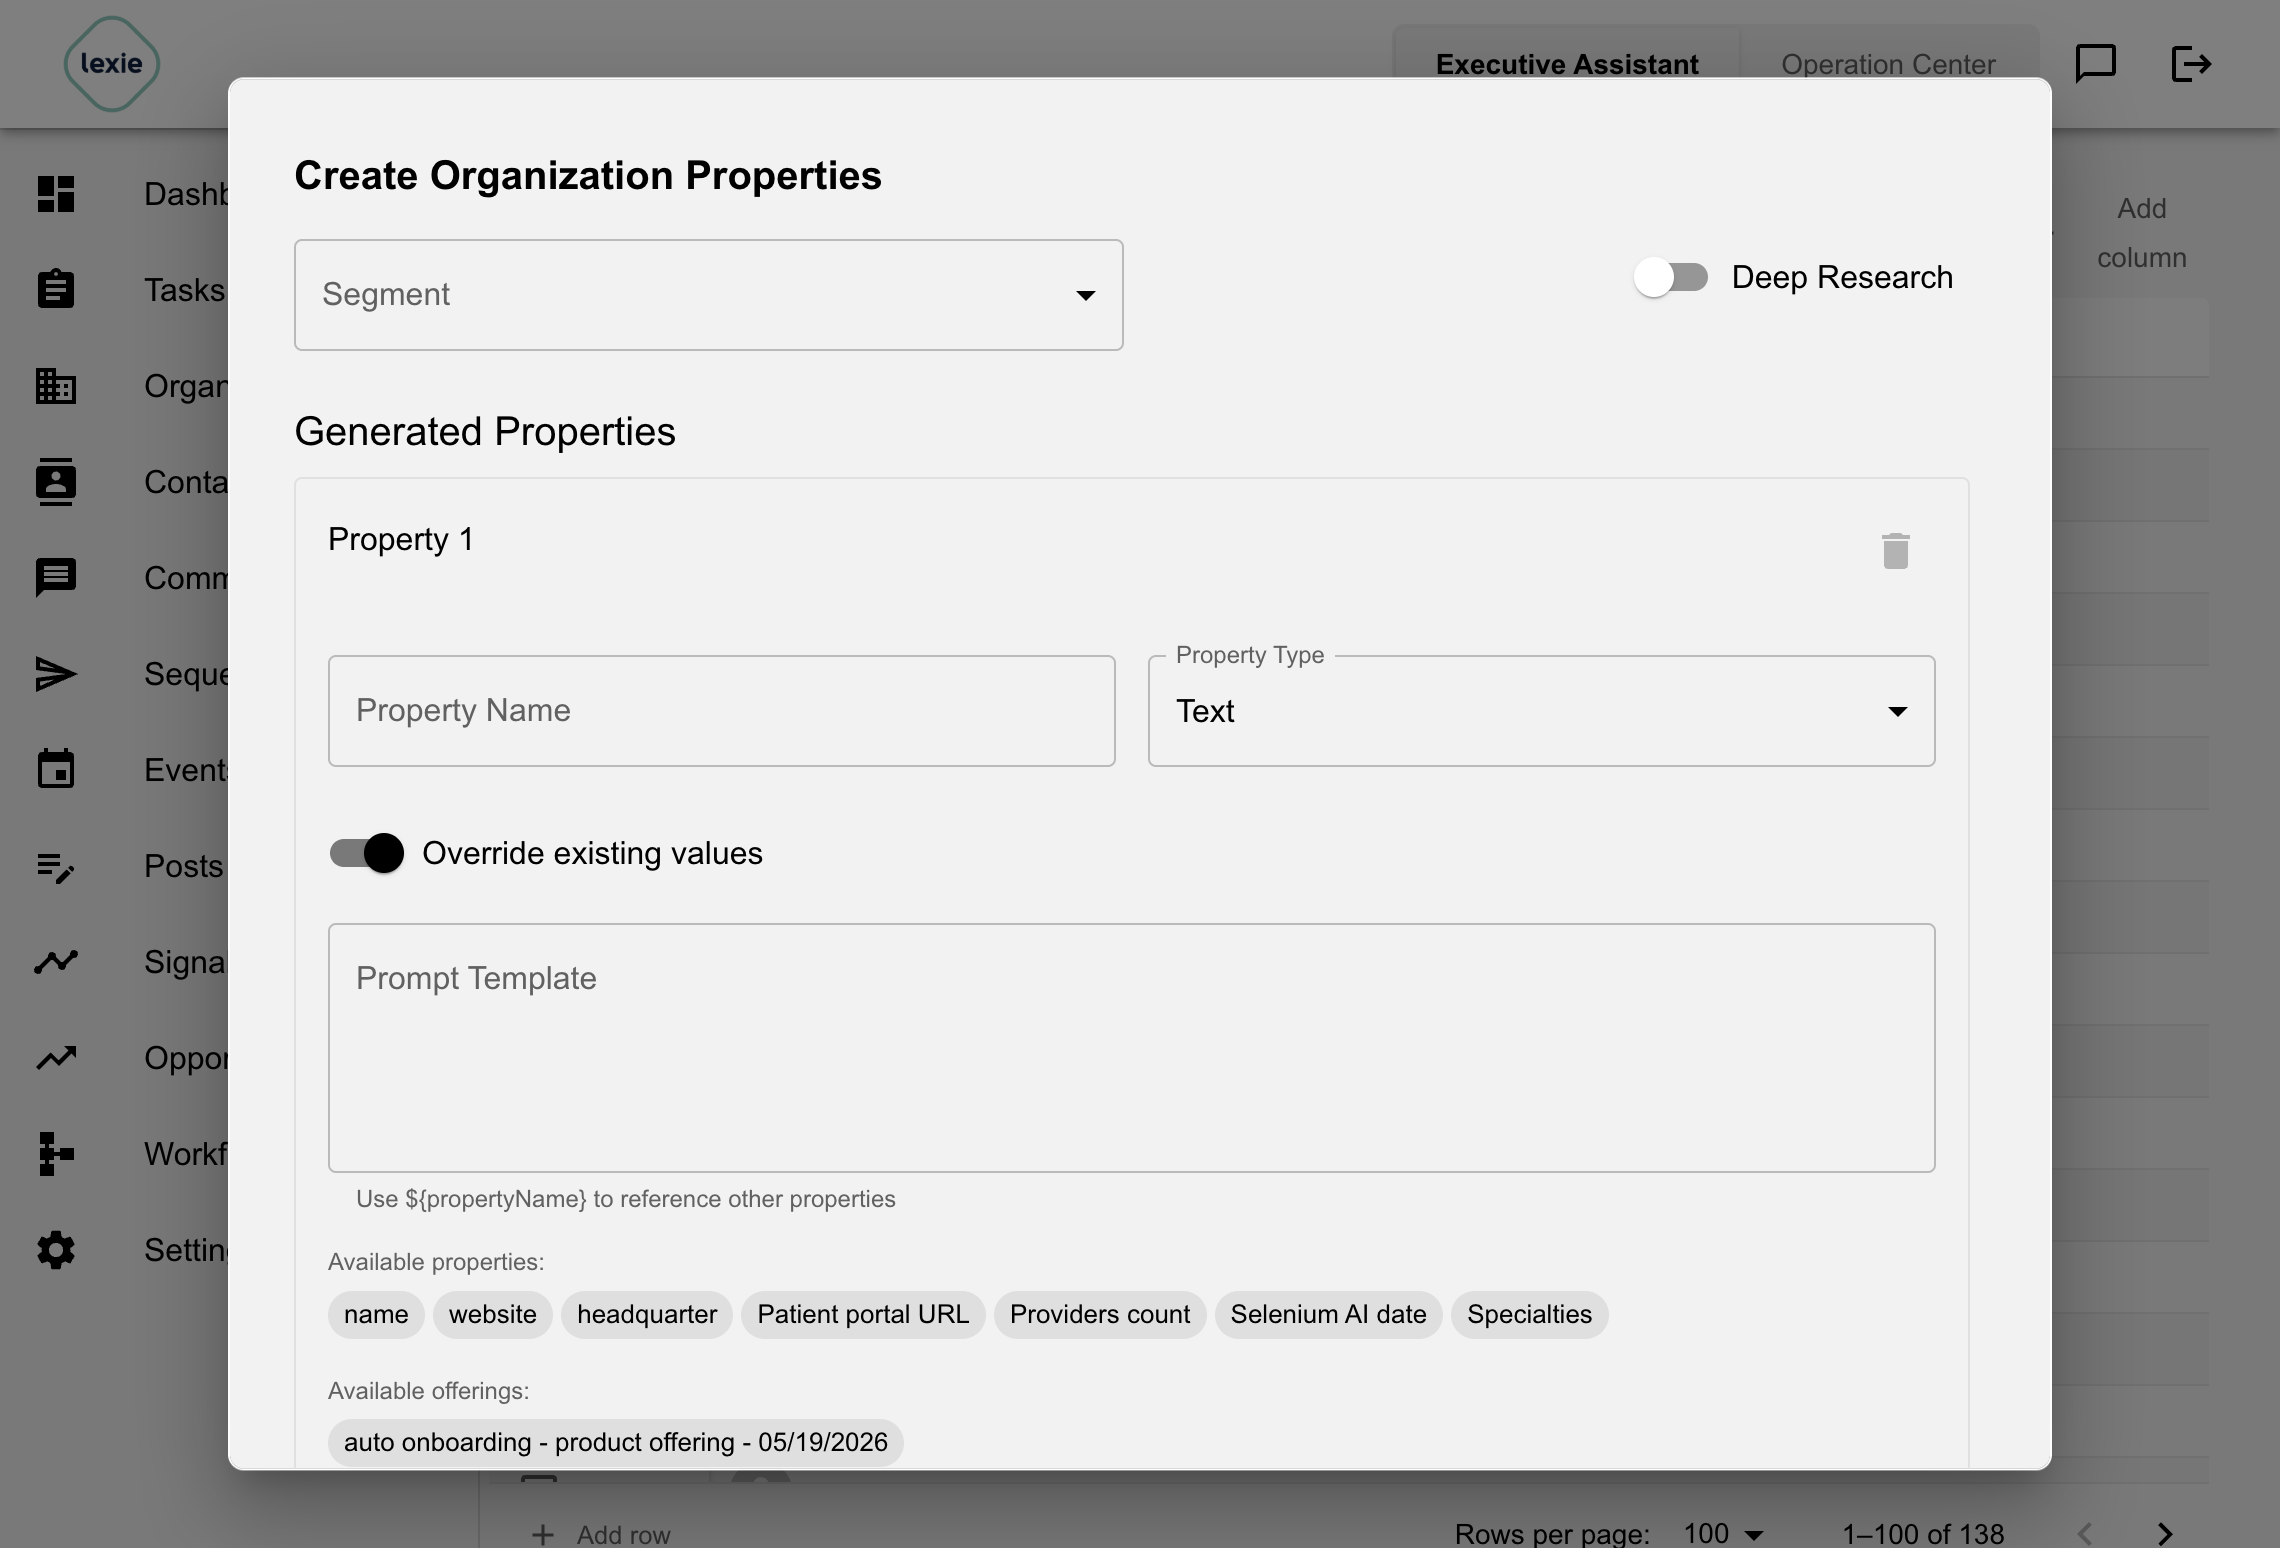
Using GenAI, you can create new custom properties for a segment. We will process one org at a time and use the provided prompts to generate the properties.
Configuration:
- Set the name of the property
- Set the type using the dropdown: Text, Number, Date, Collection, Dictionary, Boolean
- Provide the prompt that describes how to generate the new property
- The prompt is a template and can use existing/available properties associated with the organization
- Properties can be inserted in the form of
${property_name_we_want_to_use}
Deep Research Mode:
- When choosing this, you can only generate one property
- Uses Gemini LLM + Google Search for deep research
- Example: "Who are the list of executives of this company?"
Normal Mode:
- Can define multiple properties at once
- Deep research mode limits to one property
Workflow Execution:
- View progress (percentage and output values)
- Stop the workflow by going to GenAI and pushing the stop button
- Set the type of output property (e.g., text, list, boolean, number)
Formula
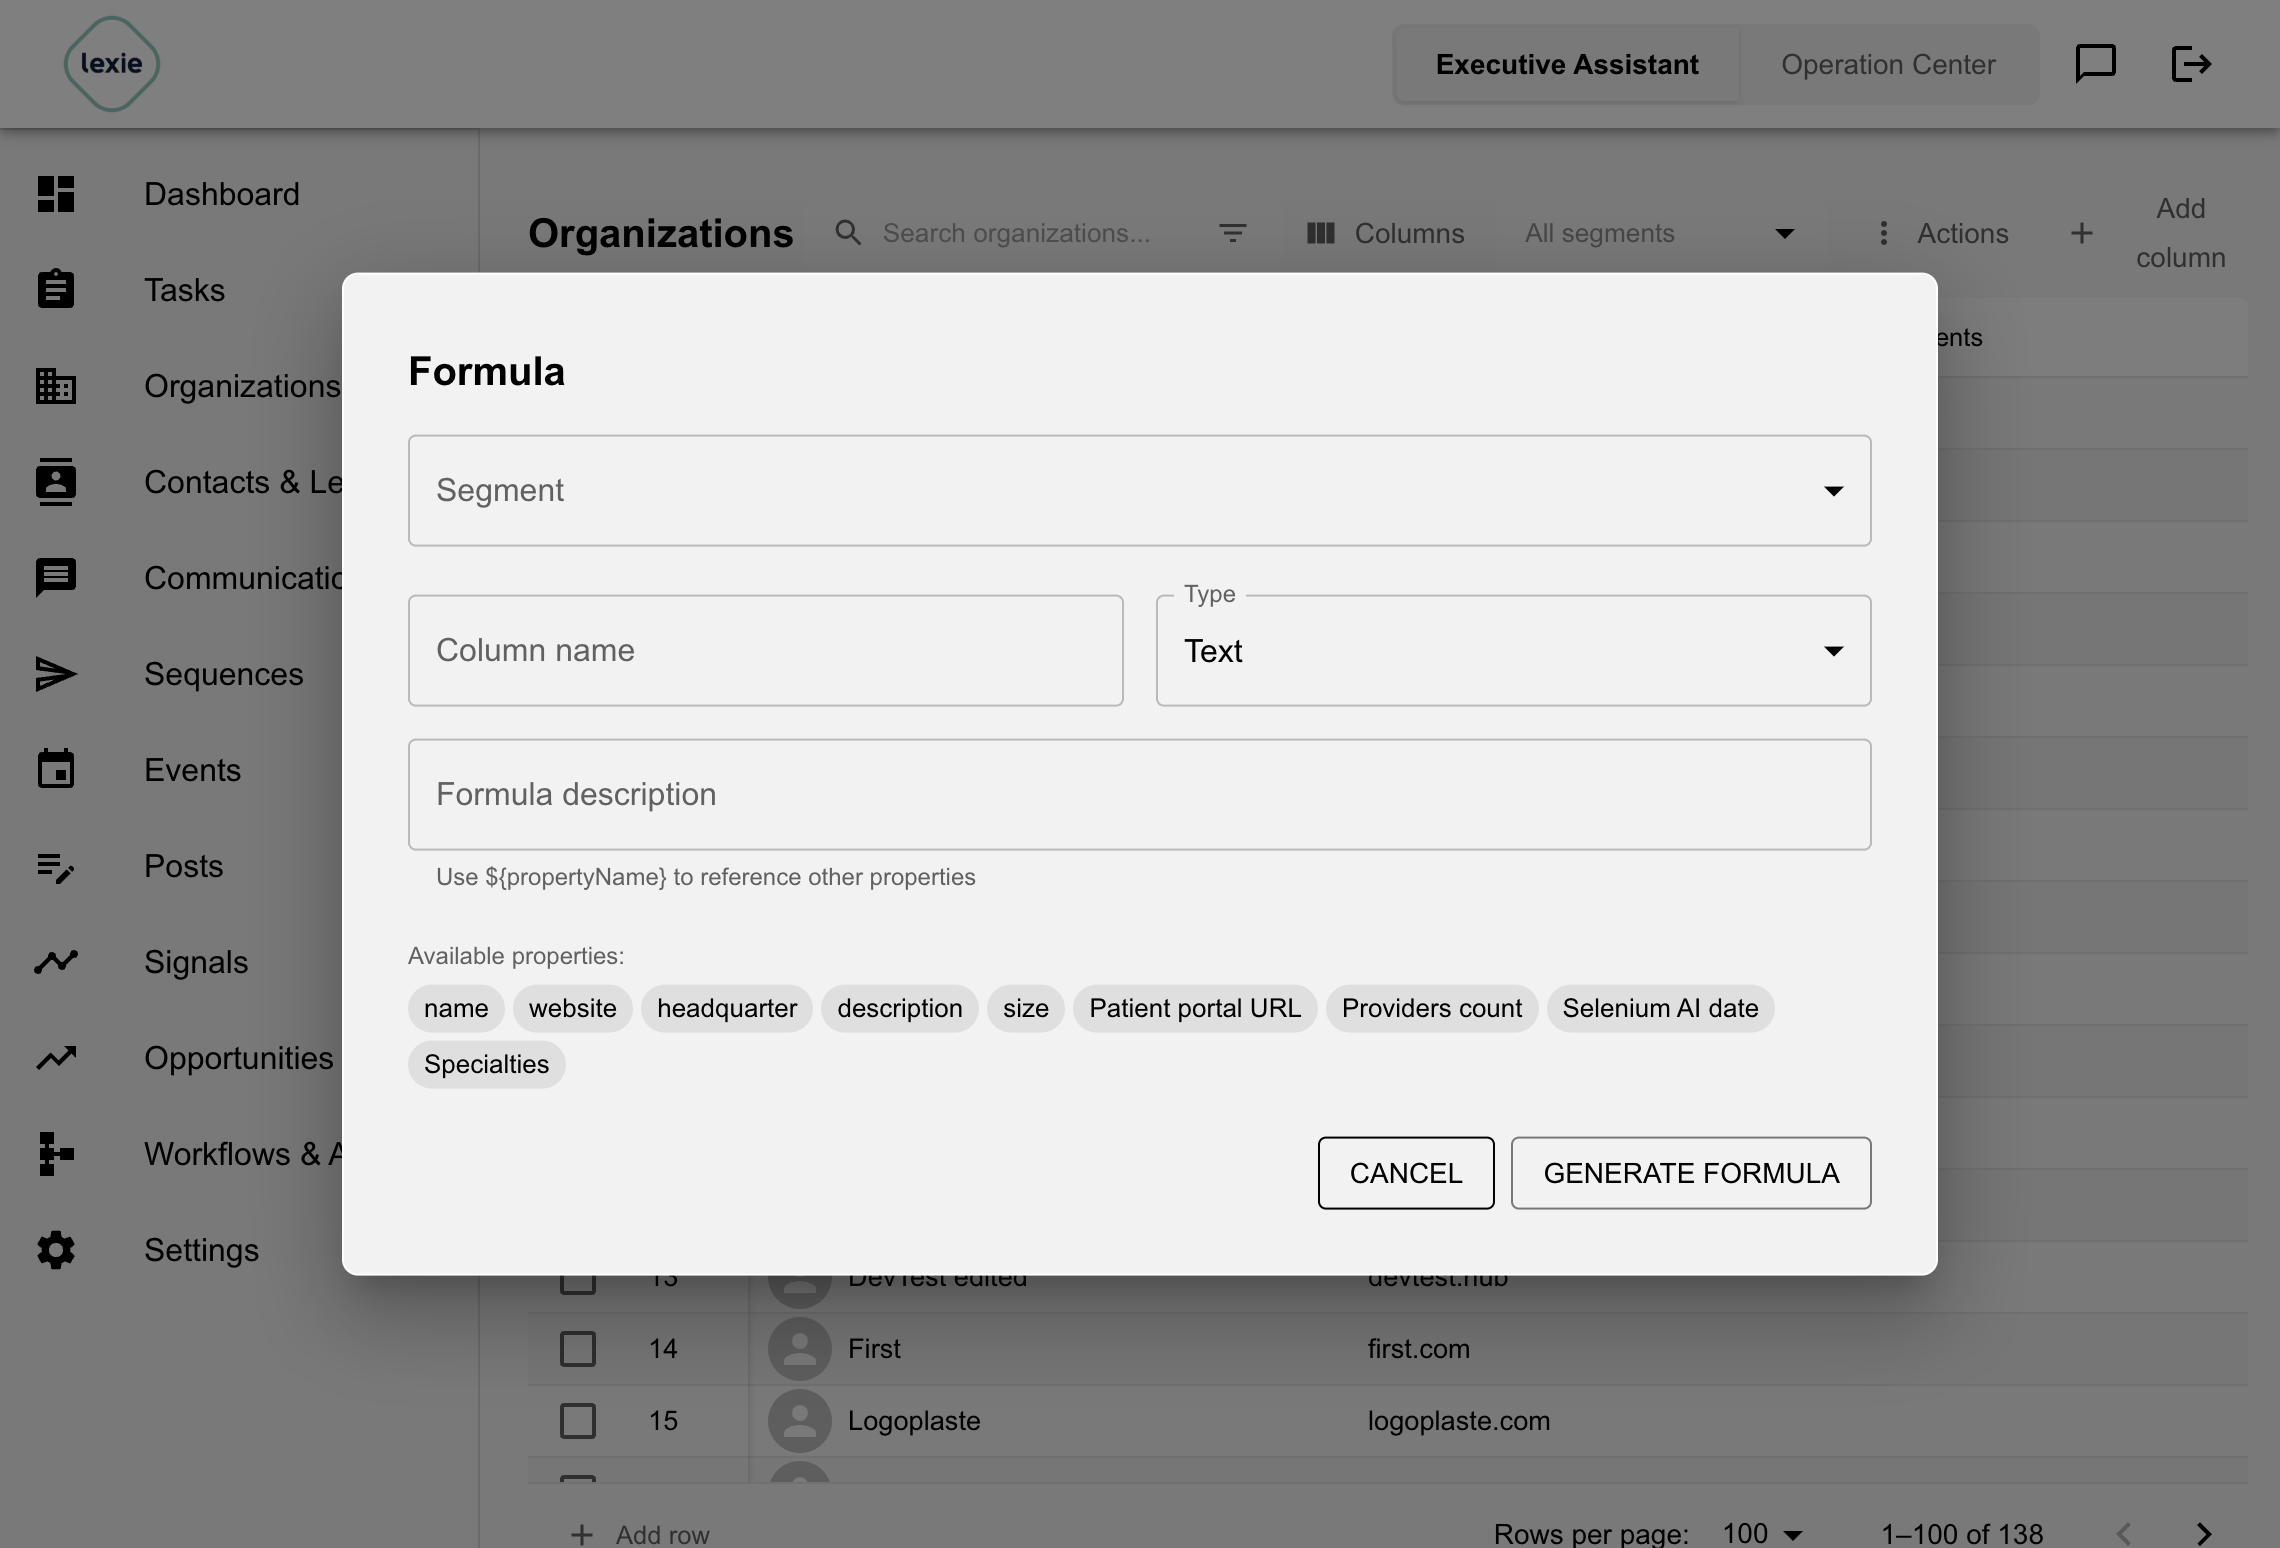
Using Formula, you can create new custom properties for a segment:
- Generate code from your prompt
- Review the generated code
- Launch the workflow
- Process one org at a time and run the generated code for each org to populate the target property
Example: Check whether an organization is a qualified customer based on:
- Size matches certain criteria
- Competitor field is set to False
- Is not just a recruiting company
Workflow Execution:
- View progress (percentage and output values)
- Stop the workflow by going to Formula and pushing the stop button
- Set the type of output property (e.g., text, list, boolean, number)
WebRobot
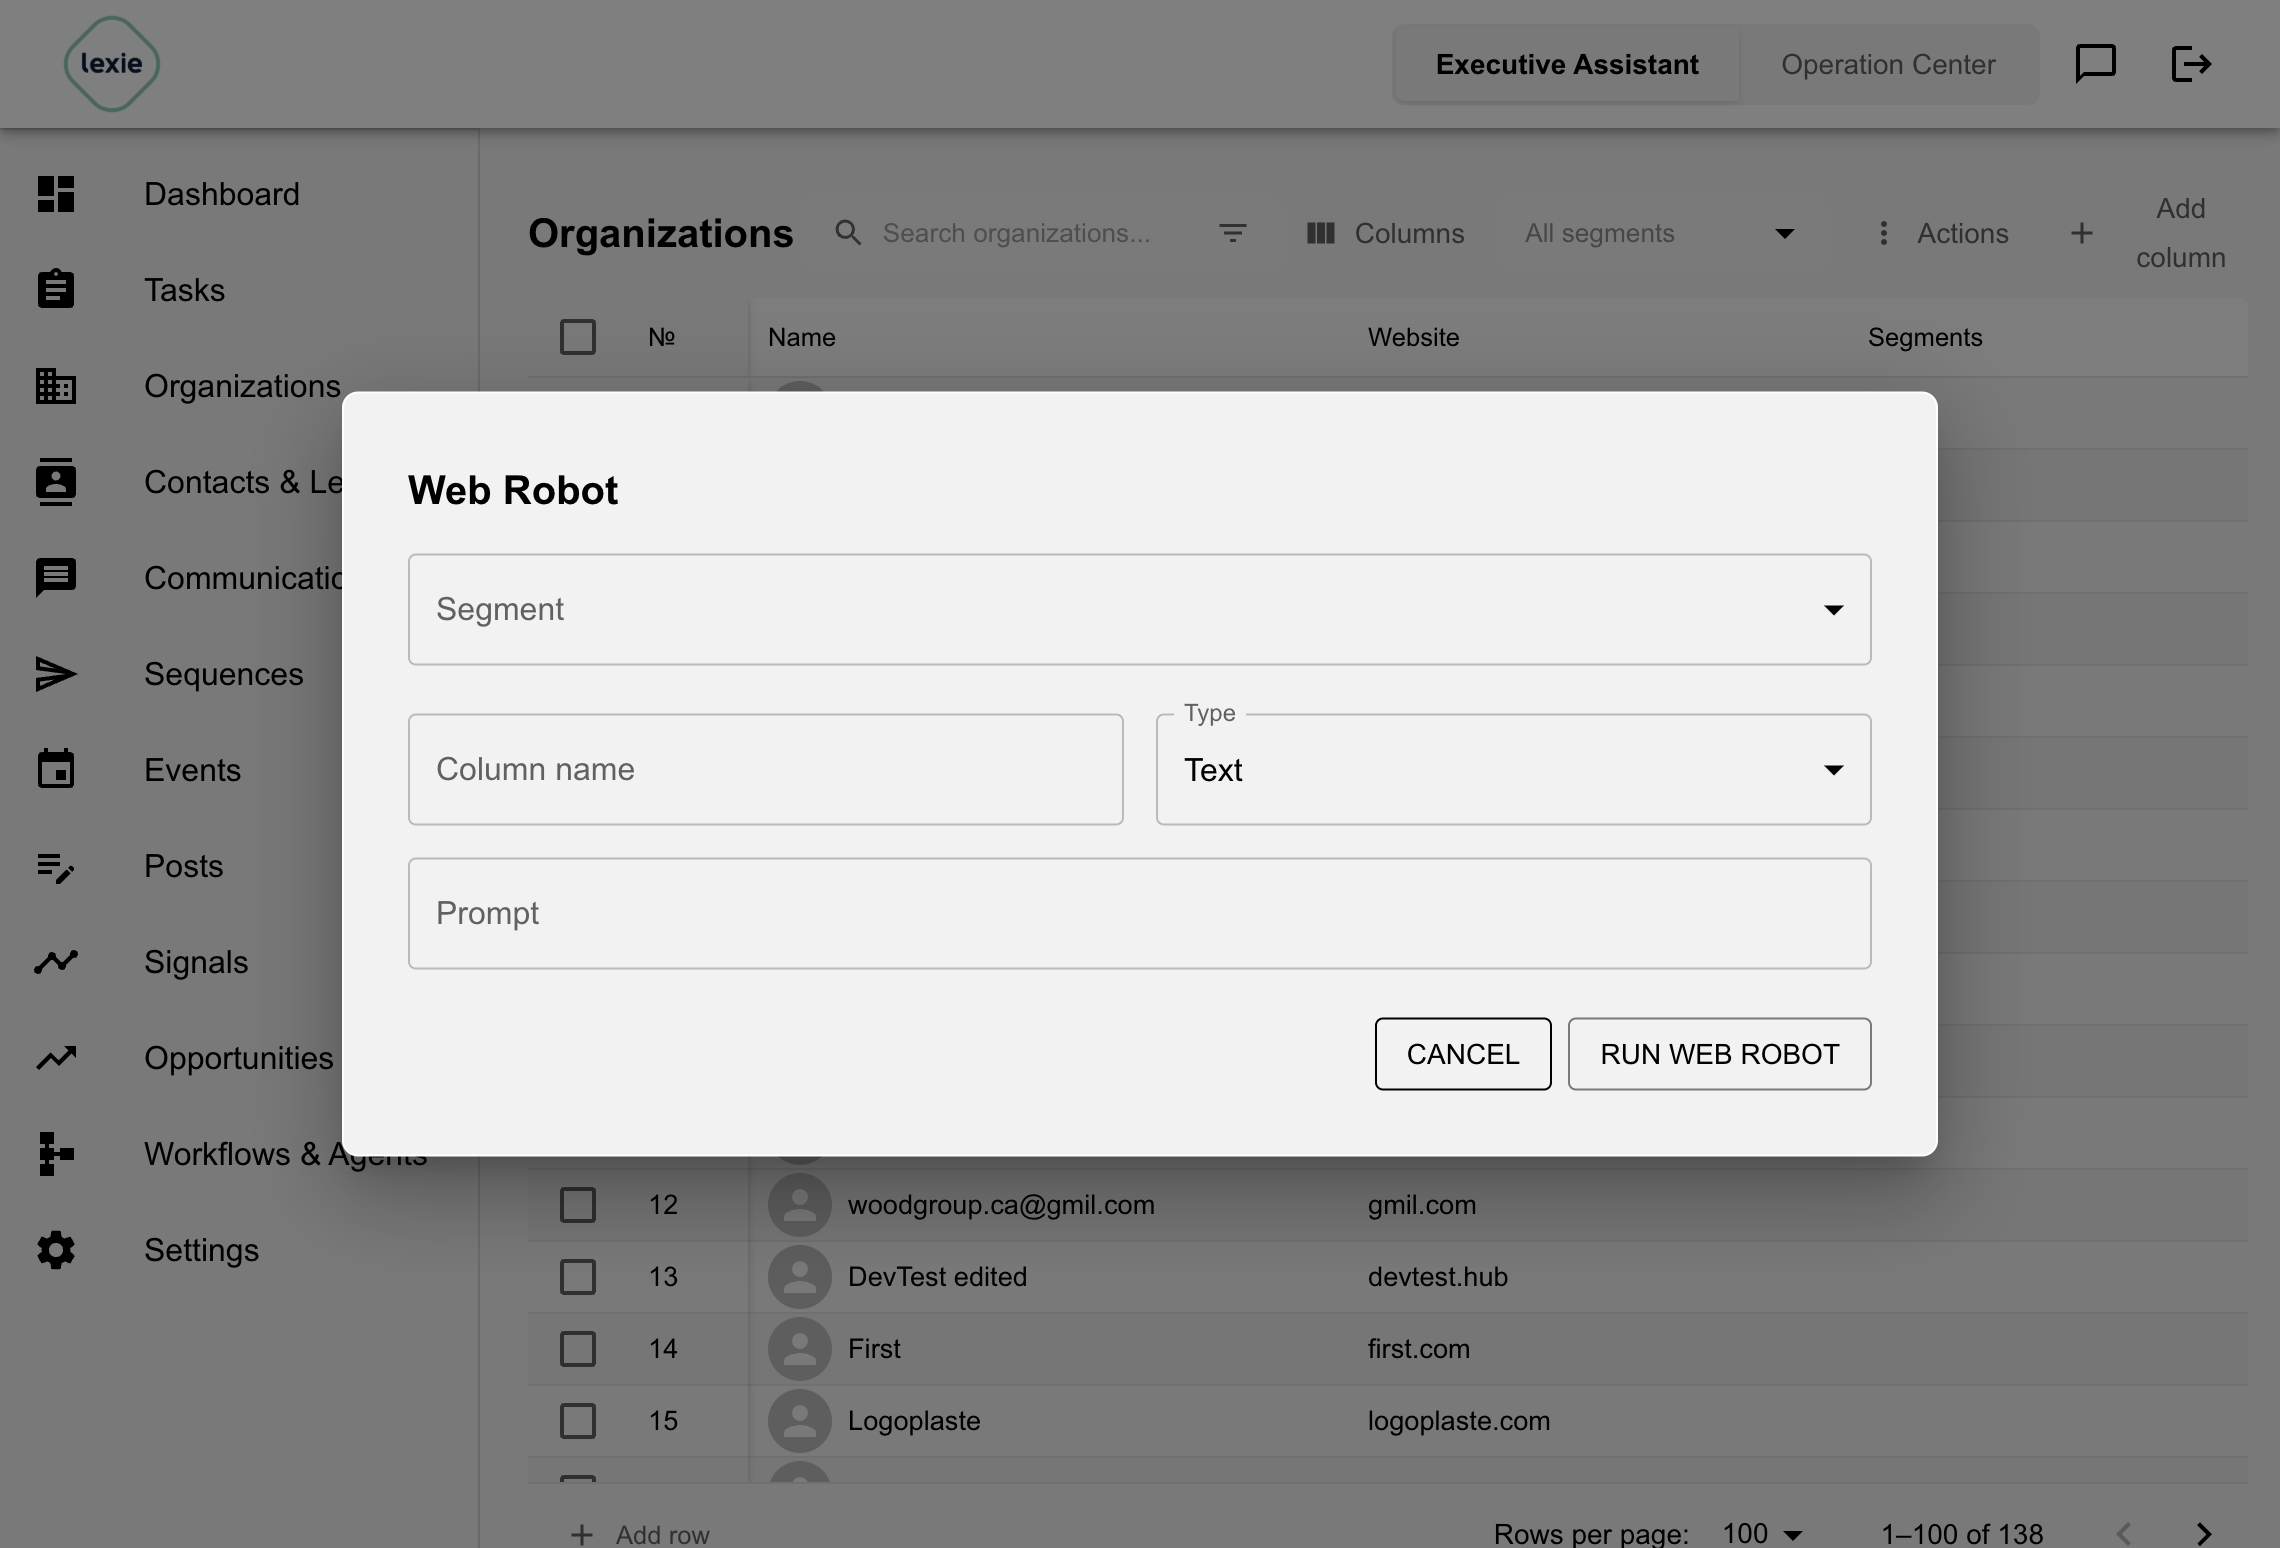
Using Webrobot, you can scrape the website of each organization and extract information from the website.
Examples:
- Main offering
- List of products
- List of executives
How it works:
- Process orgs one at a time
- LLM looks at the HTML content
- Fills the target property based on the prompt set by the user
Organization Generic Workflows under Actions
Create Contact from Property
Given:
- (i) A source segment
- (ii) A source property (that needs to be a list of dictionaries)
- (iii) A target contact group
We create contacts with the same name, last name, and connect that contact to the same organization.
Example: When you have the list of executives of an org in a column, you can copy them into the target contact group.
Contacts & Leads
Contacts and Leads are the individuals you want to reach out to. Each contact can optionally be associated with an organization. Leads are typically pre-conversion contacts that may later become full contacts.
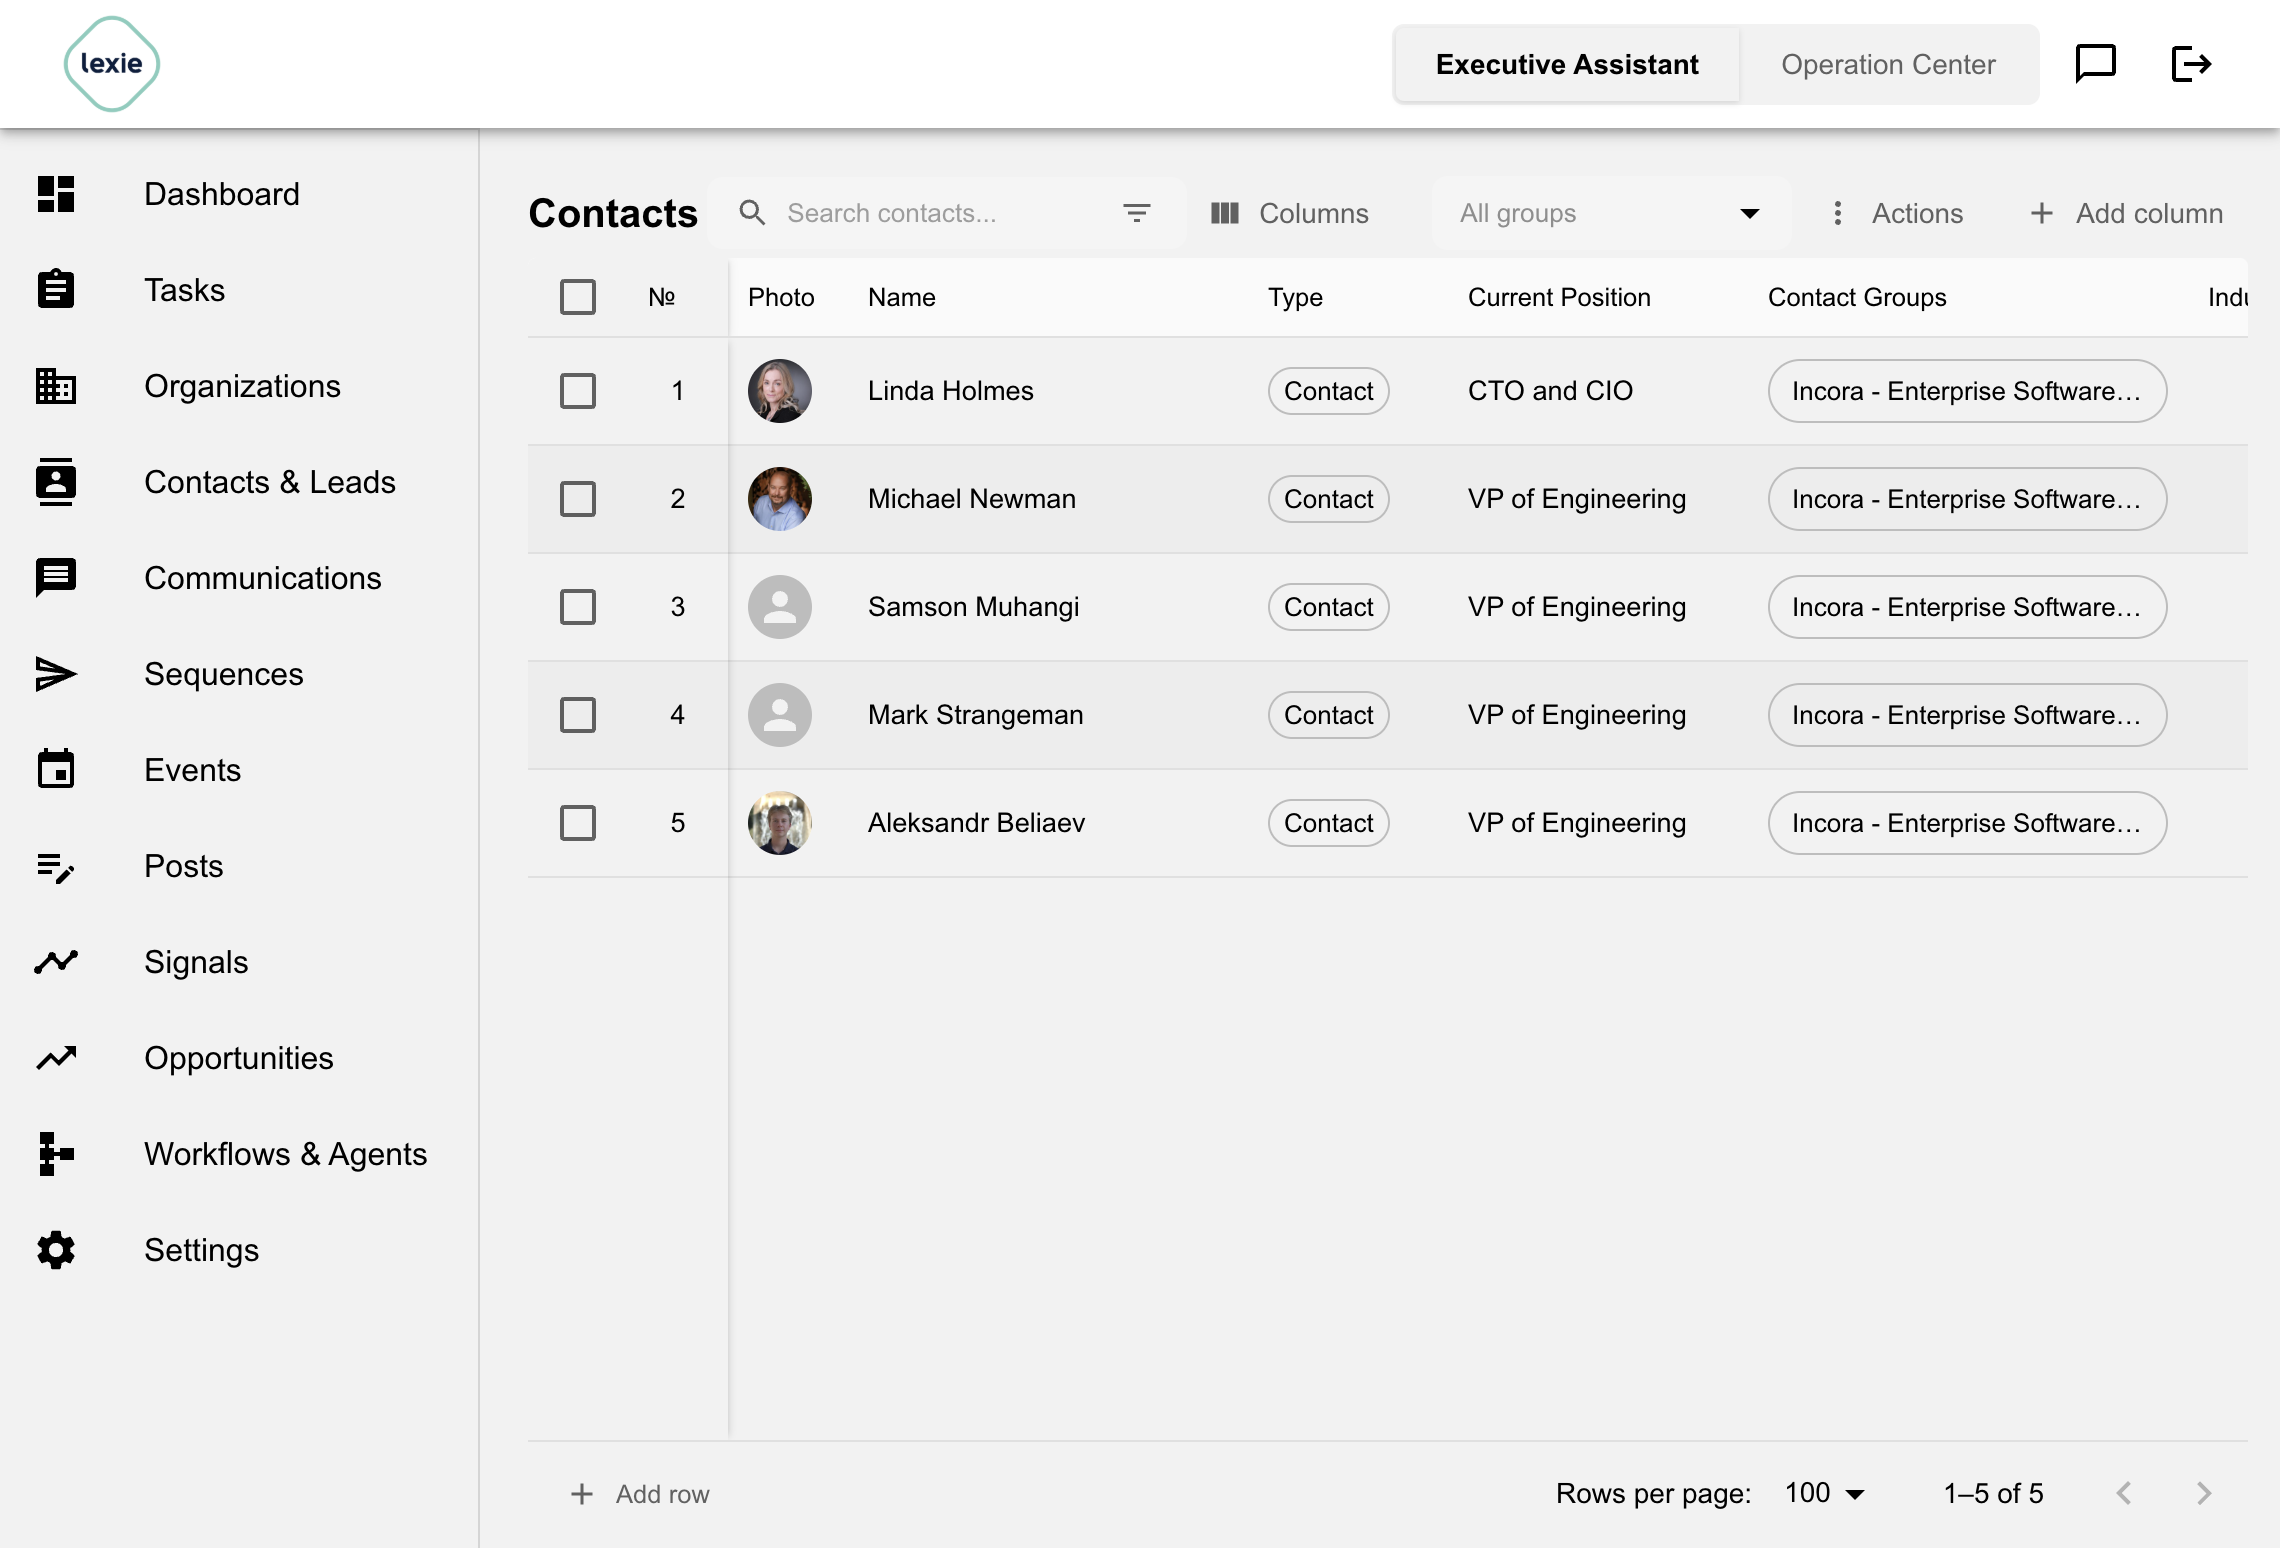
Contact Profile Page
Click a contact name in the Contacts & Leads table to open the contact profile page. The header shows the contact photo (when available), name, role, linked organization, email, phone, and social profile links, along with quick communication actions and Edit.
Tabs on the profile page include:
- Details — native contact fields, organization link, contact groups, tags, score, and custom properties.
- Activity — communications and engagement history for the person.
- Related — related records tied to the contact.
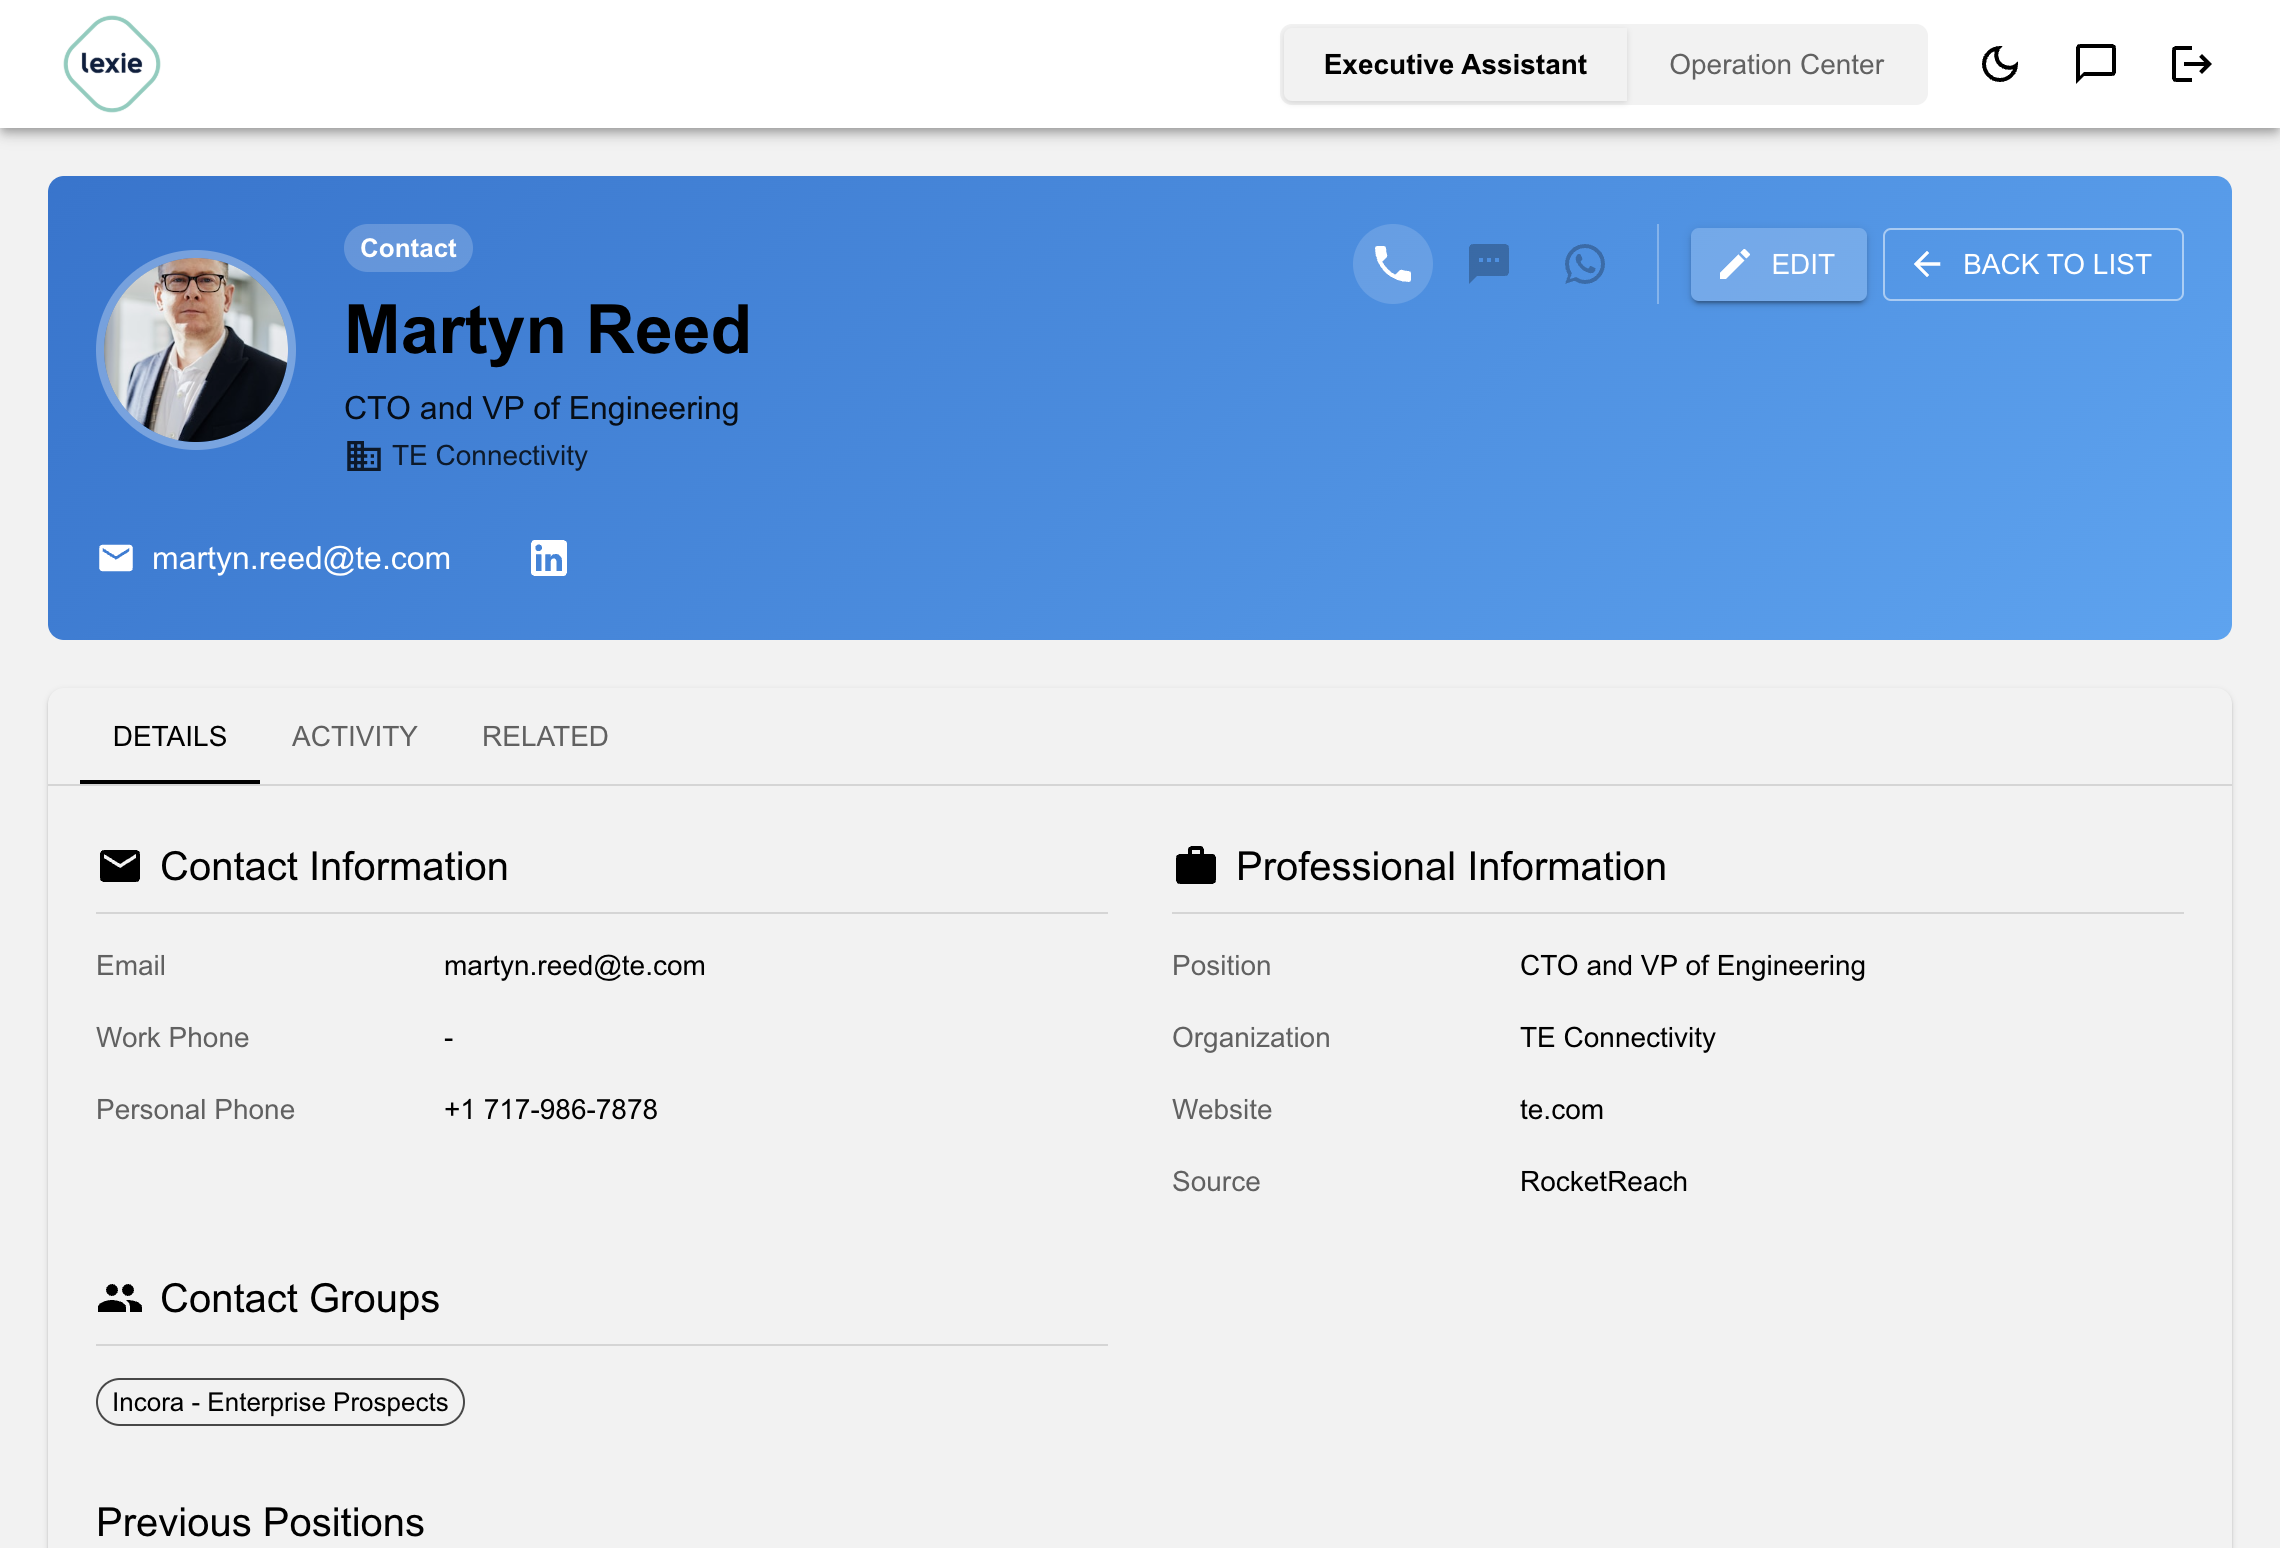
Edit Contact Modal
Click Edit on the profile page (or use row actions from the list) to open the Edit Contact modal. Use it to update fields such as name, email, phones, current and previous positions, photo URL, organization, contact groups, tags, custom properties, and relationship notes.
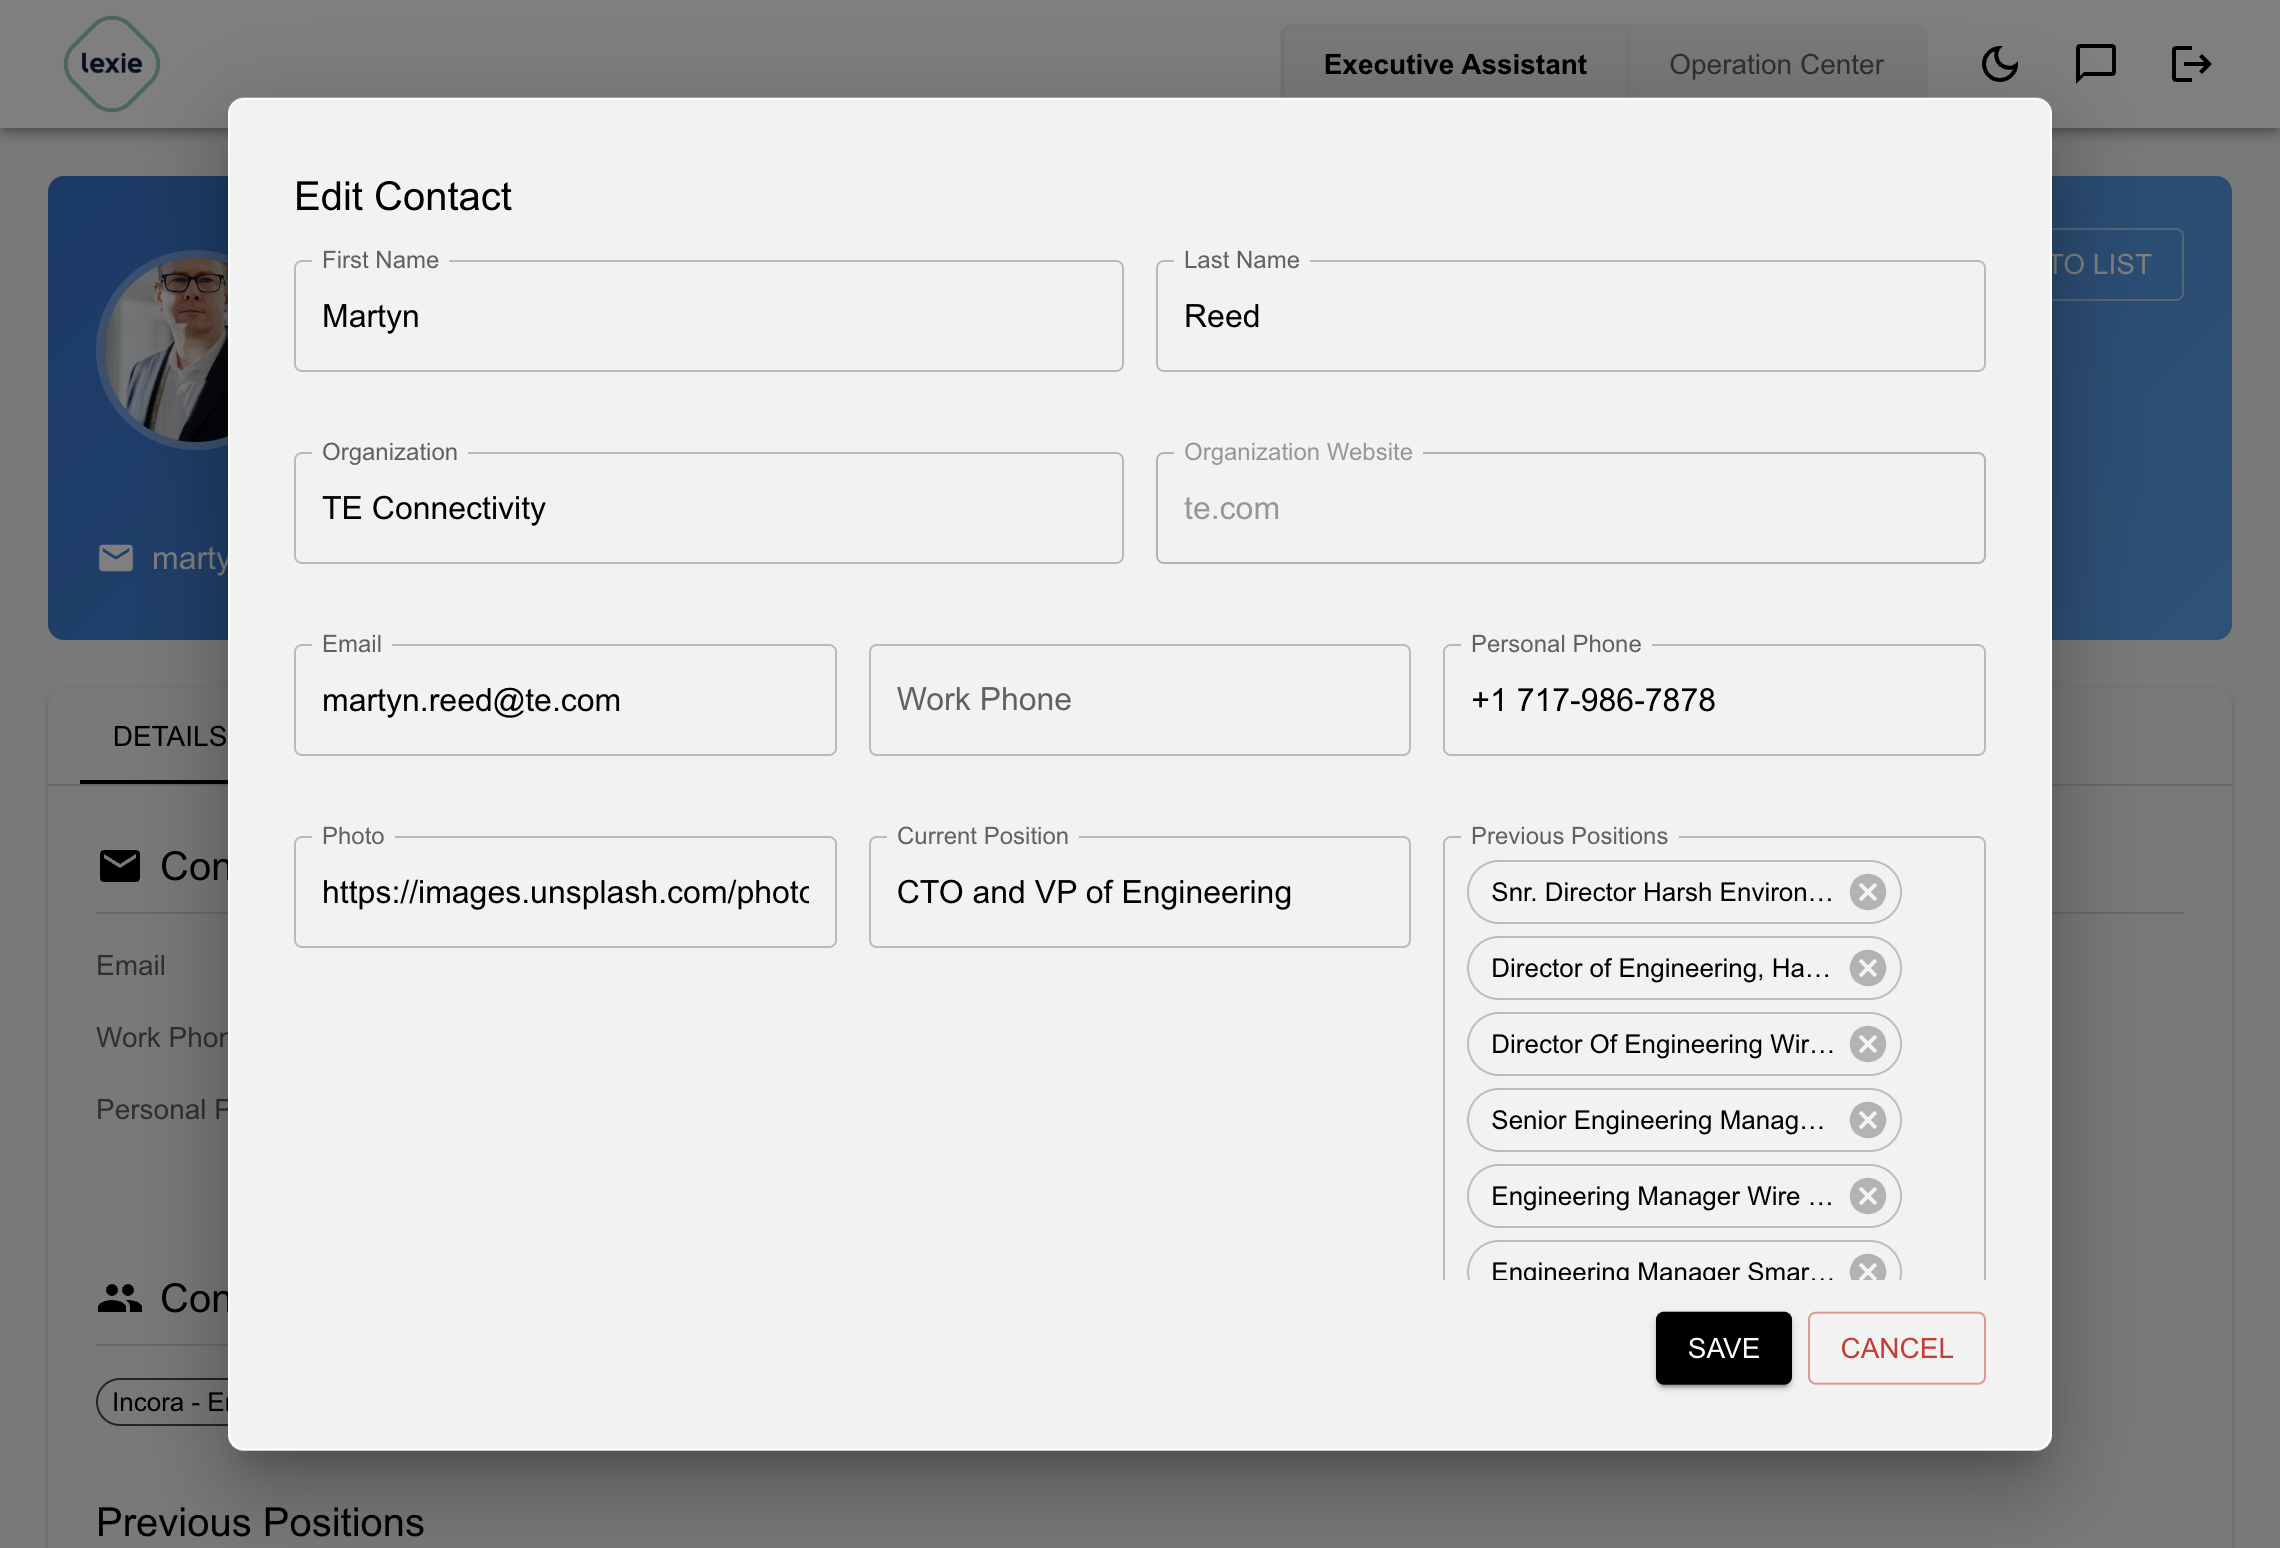
Native Contact Properties
Contacts include these built-in fields. Native contact properties are part of the core Sales Assistant contact and lead model:
- First Name: Contact's first name.
- Last Name: Contact's last name.
- Email: Email address.
- Work Phone: Work phone number.
- Personal Phone: Personal phone number.
- Current Position: Current job title or role.
- Previous Positions: Previous job titles or roles.
- Photo: Contact photo when available.
- Source: Where the contact came from, such as CSV, RocketReach, LinkedIn enrichment, CRM sync, manual entry, or workflow output.
- Relationship / Fit Notes: Notes about relevance, relationship, or fit.
- CRM Record Type: Whether the CRM source treats this person as a contact or lead.
- CRM ID: External CRM identifier, such as a Salesforce Contact/Lead ID or HubSpot Contact ID.
- CRM Account / Company ID: External CRM account or company identifier used for sync linking.
- Company Name: Company name for lead-style records that are not yet linked to an organization.
- Tags: Labels used for grouping or filtering contacts.
- Activity Count: Number of activities associated with the contact.
- Score: Scoring or ranking value.
- External Profiles: Social or external profile data, such as LinkedIn when available.
- Organization: Organization associated with the contact.
- Contact Groups: Contact groups that include this contact.
- Record Owner: User who owns or created the record.
- Created Date: Date and time the record was created.
- Updated Date: Date and time the record was last updated.
These native fields are the best place for universal identity, communication, CRM sync, and relationship data. They are also the fields most commonly used in imports, filters, sequence variables, and CRM mappings.
Custom Contact Properties
Custom contact properties let you add person-specific columns that are not part of the built-in schema. For example, you might add fields such as LinkedIn status, seniority, persona, buying committee role, last enrichment source, conference attended, preferred channel, or personalized opener.
Custom contact properties can be created from Add Column in the Contacts table, from Settings > Custom Properties, or by running GenAI, Formula, LinkedIn enrichment, RocketReach enrichment, import mapping, and Lexie-assisted workflows. When you create a contact custom property, scope it to one or more Contact Groups so it appears for the right audience or campaign.
Custom Contact Property Types
- Text: Short text such as persona, seniority, role, LinkedIn status, or outreach angle.
- Number: Scores, priority ranks, engagement counts, or numeric qualification data.
- Date: Last touched date, event date, renewal date, or next follow-up date.
- Collection: Lists such as interests, skills, buyer concerns, topics, or recent signals.
- Dictionary: Structured values such as
{ "name": "...", "title": "...", "source": "..." }for extracted people, enrichment payloads, or multi-field research outputs. - Tag: Label-style values for quick grouping and filtering.
- Boolean: True/false flags such as
is decision maker,replied,connected on LinkedIn, ordo not contact. - Markdown Text: Longer notes, research summaries, call prep, or AI-generated personalization context.
Custom contact properties appear as columns in the Contacts table and can be used in filters, CSV imports/exports, GenAI prompts, formula workflows, sequence variables, and communication templates.
Organization and Indirect Properties on Contacts
When a contact is connected to an organization, Sales Assistant can also show organization-level context on the contact view. These indirect properties are useful when writing sequence variables or filtering people by their company's attributes, such as industry, segment, company size, or a custom organization property. Indirect properties should be treated as organization-owned data, while custom contact properties should be used for person-specific data.
Contact Groups
Contact groups allow you to organize contacts into logical segments for targeted communication and workflows. You can create, manage, and assign contacts to different groups based on criteria such as company, role, or custom properties.
To create a new contact group:
- Go to Settings > Contact Groups
- Click New Contact Group
- Enter the group name and description
- Save the contact group
Import Options
CSV Import
- Go to the Contacts section
- Select Actions > Import > CSV
- Upload your CSV file and review the suggested column mappings before importing
Column Mapping:
- The CSV upload wizard shows a preview of your data
- Sales Assistant reads the CSV headers and uses AI-assisted matching to suggest the best contact field for each column
- Exact column names are matched automatically when possible, such as First Name, Last Name, Email, or an existing custom property
- If the system cannot confidently match a column, it can suggest creating a new custom contact property for that data
- You stay in control: review every suggested match, change incorrect mappings, skip columns that are not needed, and confirm before records are created
- The system remembers mappings for future imports when applicable
RocketReach Import
- Go to the Contacts section
- Select Actions > Import > RocketReach
- Configure the search criteria such as name, company, and title
Export
With the export option, you can export the contacts list to a CSV file.
Contact Management
Add Contact
- Select the contact group you want to work on using the dropdown on top of the contacts table
- Add a contact using the Add Row button under the contacts table
Filter Contacts
You can leverage the filter mechanism to select a subset of contacts. The filter can be a collection of AND/OR expressions. Each expression is based on:
- (i) One of the columns
- (ii) An operator which is dependent on the type of the column
- (iii) An optional constant (depending on the operator)
Delete Contact(s)
Single Delete:
You can delete contacts using the actions menu at the last column of the table.
Bulk Delete:
You can do bulk delete under the Actions dropdown. When bulk deleting, you can either:
- Delete the contacts from all contact groups, or
- If a particular contact group is selected, delete only from the current contact group
Progress Tracking:
When performing bulk delete operations, a progress bar will show the status of the deletion process.
Edit Contact
Edit/Review in the Dedicated Form:
You can see the contact's fields and edit them using the edit action at the last column of the table. The form will show all the columns including custom properties.
In-Place Editing:
You can also edit the columns in place by clicking directly on any cell in the table.
Copy Contact
You can copy the selected contacts to another contact group:
- Choose whether to copy the custom properties or not
- Choose to create the target contact group if it does not exist yet
Scroll Through Contacts
You can flip through the pages of the contacts with different page sizes.
Add/Hide/Move Columns
- Add a native property or custom property using the Add Column mechanism
- Hide them by selecting the column control
- The columns you choose for contacts will be persisted across all contacts
- You can also move columns around (the position will not be persisted)
Contact Add Column Workflows
GenAI
Using GenAI, you can create new custom properties for a contact group. We will process one contact at a time and use the provided prompts to generate the properties. Each prompt can use the existing properties associated with the contact.
Configuration:
- Set the name of the property
- Set the type using the dropdown: Text, Number, Date, Collection, Dictionary, Boolean
- Provide the prompt that describes how to generate the new property
- The prompt is a template and can use existing/available properties
- Properties can be inserted in the form of
${property_name_we_want_to_use}
Deep Research Mode:
- When choosing this, you can only generate one property
- Uses Gemini LLM + Google Search for deep research
- Example: "What is the current role of this person?"
Normal Mode:
- Can define multiple properties at once
- Deep research mode limits to one property
Workflow Execution:
- View progress (percentage and output values)
- Stop the workflow by going to GenAI and pushing the stop button
- Set the type of output property (e.g., text, list, boolean, number)
Formula
Using Formula, you can create new custom properties for a contact group:
- Generate code from your prompt
- Review the generated code
- Launch the workflow
- Process one contact at a time and run the generated code for each contact to populate the target property
Example: Check whether a contact is a decision maker based on their title and company size.
Workflow Execution:
- View progress (percentage and output values)
- Stop the workflow by going to Formula and pushing the stop button
- Set the type of output property (e.g., text, list, boolean, number)
Enrich using LinkedIn
Using LinkedIn enrichment, you can enhance contact information by leveraging LinkedIn's professional network data. This workflow processes contacts one at a time and extracts additional information such as:
- Current position and company
- Professional experience
- Profile picture and bio
The workflow uses the contact's name and company information to find and enrich their LinkedIn profile data. You can set the type of the output property (e.g., text, list, boolean, number) and specify which LinkedIn data fields to extract.
Enrich using RocketReach
Using RocketReach enrichment, you can enhance contact information by leveraging RocketReach's comprehensive business contact database. Note: The contact needs to have a LinkedIn URL for this workflow to work.
This workflow processes contacts one at a time and extracts additional information such as:
- Professional email addresses
- Phone numbers
- Social media profiles
- Company information
- Professional background
- Contact verification status
The workflow uses the contact's name and company information to find and enrich their professional contact data.
Contact Generic Workflows under Actions
Connect on LinkedIn
This workflow allows you to connect with contacts on LinkedIn automatically. The workflow will:
- Use the contact's LinkedIn profile information and send connection requests
Properties
Properties are the columns and fields users see on Organizations and Contacts & Leads. They are used for table views, filters, imports, exports, sequence variables, workflow inputs, and workflow outputs.
There are three kinds of properties in Sales Assistant: native properties, indirect properties, and custom properties.
Native Properties
Native properties are built into Sales Assistant. They cover the common fields that most teams expect on organization and contact records.
Organization Native Properties
- Organization Name: Company or account name.
- Website: Company website URL.
- Company Size: Employee count or size range.
- Industry: Industry or sector.
- Headquarters: Address, city, state, country, ZIP code, and phone when available.
- Overview: Short organization summary.
- Description: Longer company description.
- Logo: Company logo when available.
- Source: Where the organization came from, such as CSV, RocketReach, Google Places, CRM sync, manual entry, or a workflow.
- Relationship / Fit Notes: Notes about relevance, relationship, or fit.
- Tags: Labels used for grouping or filtering organizations.
- Score: Scoring or ranking value.
- Offerings: Products, services, or offerings associated with the organization.
- Segments: Organization segments that include this organization.
- Record Owner: User who owns or created the record.
- CRM ID: External CRM identifier, such as a Salesforce Account ID or HubSpot Company ID.
- CRM Account ID: CRM account/company identifier used for sync linking.
- Created Date: Date and time the record was created.
- Updated Date: Date and time the record was last updated.
Contact Native Properties
- First Name: Contact's first name.
- Last Name: Contact's last name.
- Email: Email address.
- Work Phone: Work phone number.
- Personal Phone: Personal phone number.
- Current Position: Current job title or role.
- Previous Positions: Previous job titles or roles.
- Photo: Contact photo when available.
- Source: Where the contact came from, such as CSV, RocketReach, LinkedIn enrichment, CRM sync, manual entry, or workflow output.
- Relationship / Fit Notes: Notes about relevance, relationship, or fit.
- CRM Record Type: Whether the CRM source treats this person as a contact or lead.
- CRM ID: External CRM identifier, such as a Salesforce Contact/Lead ID or HubSpot Contact ID.
- CRM Account / Company ID: External CRM account or company identifier used for sync linking.
- Company Name: Company name for lead-style records that are not yet linked to an organization.
- Tags: Labels used for grouping or filtering contacts.
- Activity Count: Number of activities associated with the contact.
- Score: Scoring or ranking value.
- External Profiles: Social or external profile data, such as LinkedIn when available.
- Organization: Organization associated with the contact.
- Contact Groups: Contact groups that include this contact.
- Record Owner: User who owns or created the record.
- Created Date: Date and time the record was created.
- Updated Date: Date and time the record was last updated.
Use native properties for universal identity, communication, CRM sync, ownership, and relationship data.
Indirect Properties
Indirect properties are organization properties shown on contacts through the contact's linked organization. They help users filter or personalize contact workflows using company-level context without copying the same account data onto each person.
For example, if a contact is associated with an organization whose Industry is Healthcare, the contact can show Healthcare as an organization-derived property in the Contacts table. The value belongs to the organization and updates when the organization value changes.
Indirect properties are useful for:
- Filtering contacts by company attributes such as industry, segment, company size, or region.
- Personalizing sequence variables with organization context.
- Running contact workflows that need account-level information.
- Avoiding duplicated data between organizations and contacts.
Custom Properties
Custom properties are user-defined fields that extend Sales Assistant beyond the built-in organization and contact schemas. They let a team model the exact information needed for a specific market, campaign, ICP, workflow, integration, or sales process without changing product code.
Use custom properties when the value is important to your workflow but is not a universal native field. For example, a healthcare GTM team may track clinical specialty or patient volume, while a SaaS team may track tech stack, renewal date, champion strength, or implementation complexity.
Where Custom Properties Apply
Custom properties are associated with one entity type:
- Organization custom properties: Account-level fields shown on Organizations and scoped to one or more Segments.
- Contact custom properties: Person-level fields shown on Contacts & Leads and scoped to one or more Contact Groups.
This scoping keeps tables focused. A property that only matters for healthcare accounts can be attached to a healthcare segment, while a property that only matters for executive contacts can be attached to the relevant contact group.
Custom Property Types
- Text: Freeform text for names, statuses, notes, categories, short summaries, or extracted values.
- Number: Numeric fields for scores, rankings, counts, budgets, employee numbers, revenue estimates, or model outputs.
- Date: Calendar dates such as renewal date, next follow-up, last funding date, event date, contract expiration, or onboarding milestone.
- Collection: Lists of values such as technologies, specialties, locations, products, objections, interests, or signal topics.
- Dictionary: Structured key/value data for richer workflow outputs, such as executives with titles, product lists with descriptions, or research summaries with multiple fields.
- Tag: Label-style values used for quick categorization, filtering, and table organization.
- Boolean: True/false values such as qualified/not qualified, uses Salesforce, connected on LinkedIn, has budget, or do-not-contact.
- Markdown Text: Long-form formatted text for account briefs, contact research, meeting prep, ICP reasoning, or generated playbook notes.
How Custom Properties Are Created
You can create custom properties in several ways:
- Use Add Column from the Organizations or Contacts table.
- Go to Settings > Custom Properties and click New Custom Property.
- Map a CSV column into an existing custom property during import.
- Create workflow-generated properties through GenAI, Formula, WebRobot, LinkedIn enrichment, RocketReach enrichment, or Lexie-assisted workflows.
When creating a property, choose the name, type, description, associated entity, and the segments or contact groups where it should appear.
How Custom Properties Are Used
Custom properties appear as normal table columns. Users can edit them directly, show or hide them, use them in filters, export them, and use them as inputs or outputs in workflows.
They are especially important for AI and automation because they turn unstructured research into reusable structured data. A GenAI workflow can write an ICP fit reason, a WebRobot workflow can extract products listed on website, and a Formula workflow can calculate qualification score. Once saved as custom properties, those outputs can drive filters, sequences, reporting, and follow-up actions.
As a rule of thumb, keep identity and CRM-sync fields native, keep account-specific enrichment on organizations, keep person-specific enrichment on contacts, and use indirect properties when contacts need visibility into their organization's data.
Communications
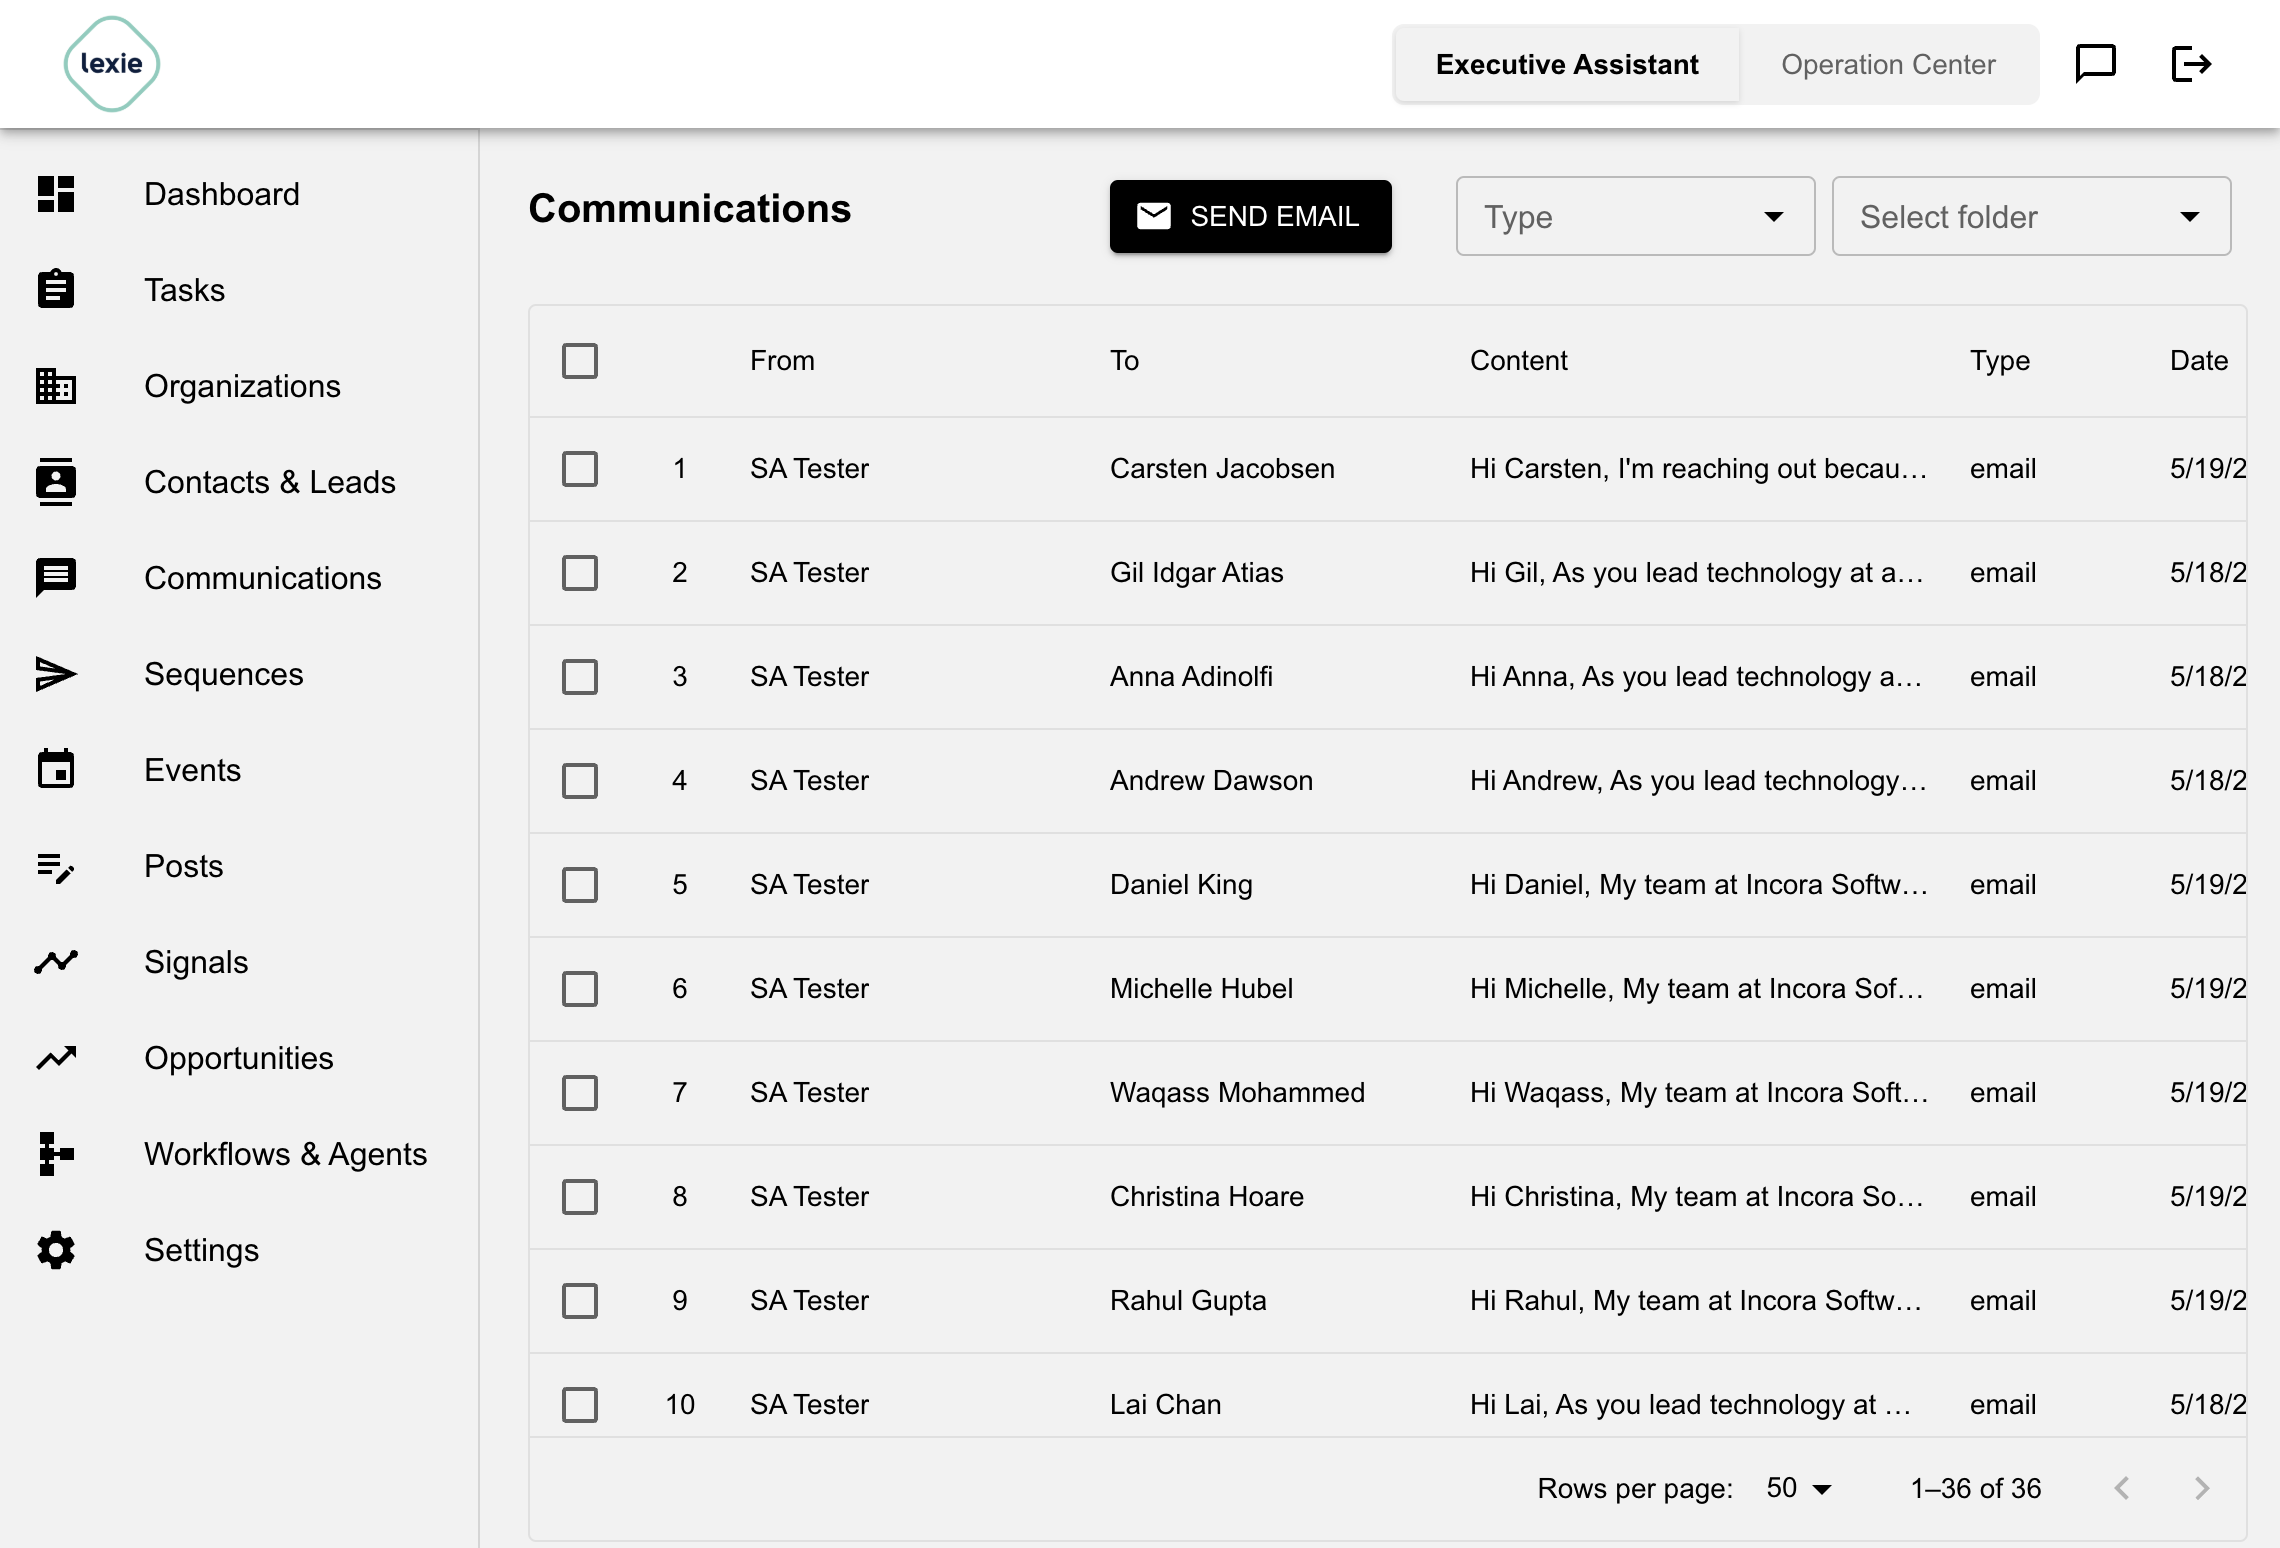
Communications are your outreach messages, emails, and interaction logs with contacts.
Type Filter
Filter communications by type using the dropdown on the top right:
- Email: Email communications
- Call: Phone call logs
- SMS: Text message communications
- Meeting: Meeting notes and logs
- LinkedIn Message: LinkedIn communications
Folder Selection
Communications are organized into folders for better management. You can select the folder using the dropdown on the top right of the communications table.
To create a new communication folder:
- Go to Settings > Communication Folders
- Click New Folder
- Enter the folder name and description
- Save the folder
Communication Listing
View, edit, and create communications. Each communication has:
- Status: drafted, sent, received
- Type: email, call, sms, meeting, linkedin
- Content: The message content (HTML is automatically stripped for display in the table view)
Communication Editing
Use the action in the rightmost column associated with the communication to see the details and edit it.
Editor Features:
- Rich text formatting
- Variable insertion from contact properties
- Template support
- Preview mode
- HTML editing capability
- Dynamic label: Shows "Email Body" for emails, "Content" for other types
Add Communication
Use the Add Row button to add a communication.
Sequences
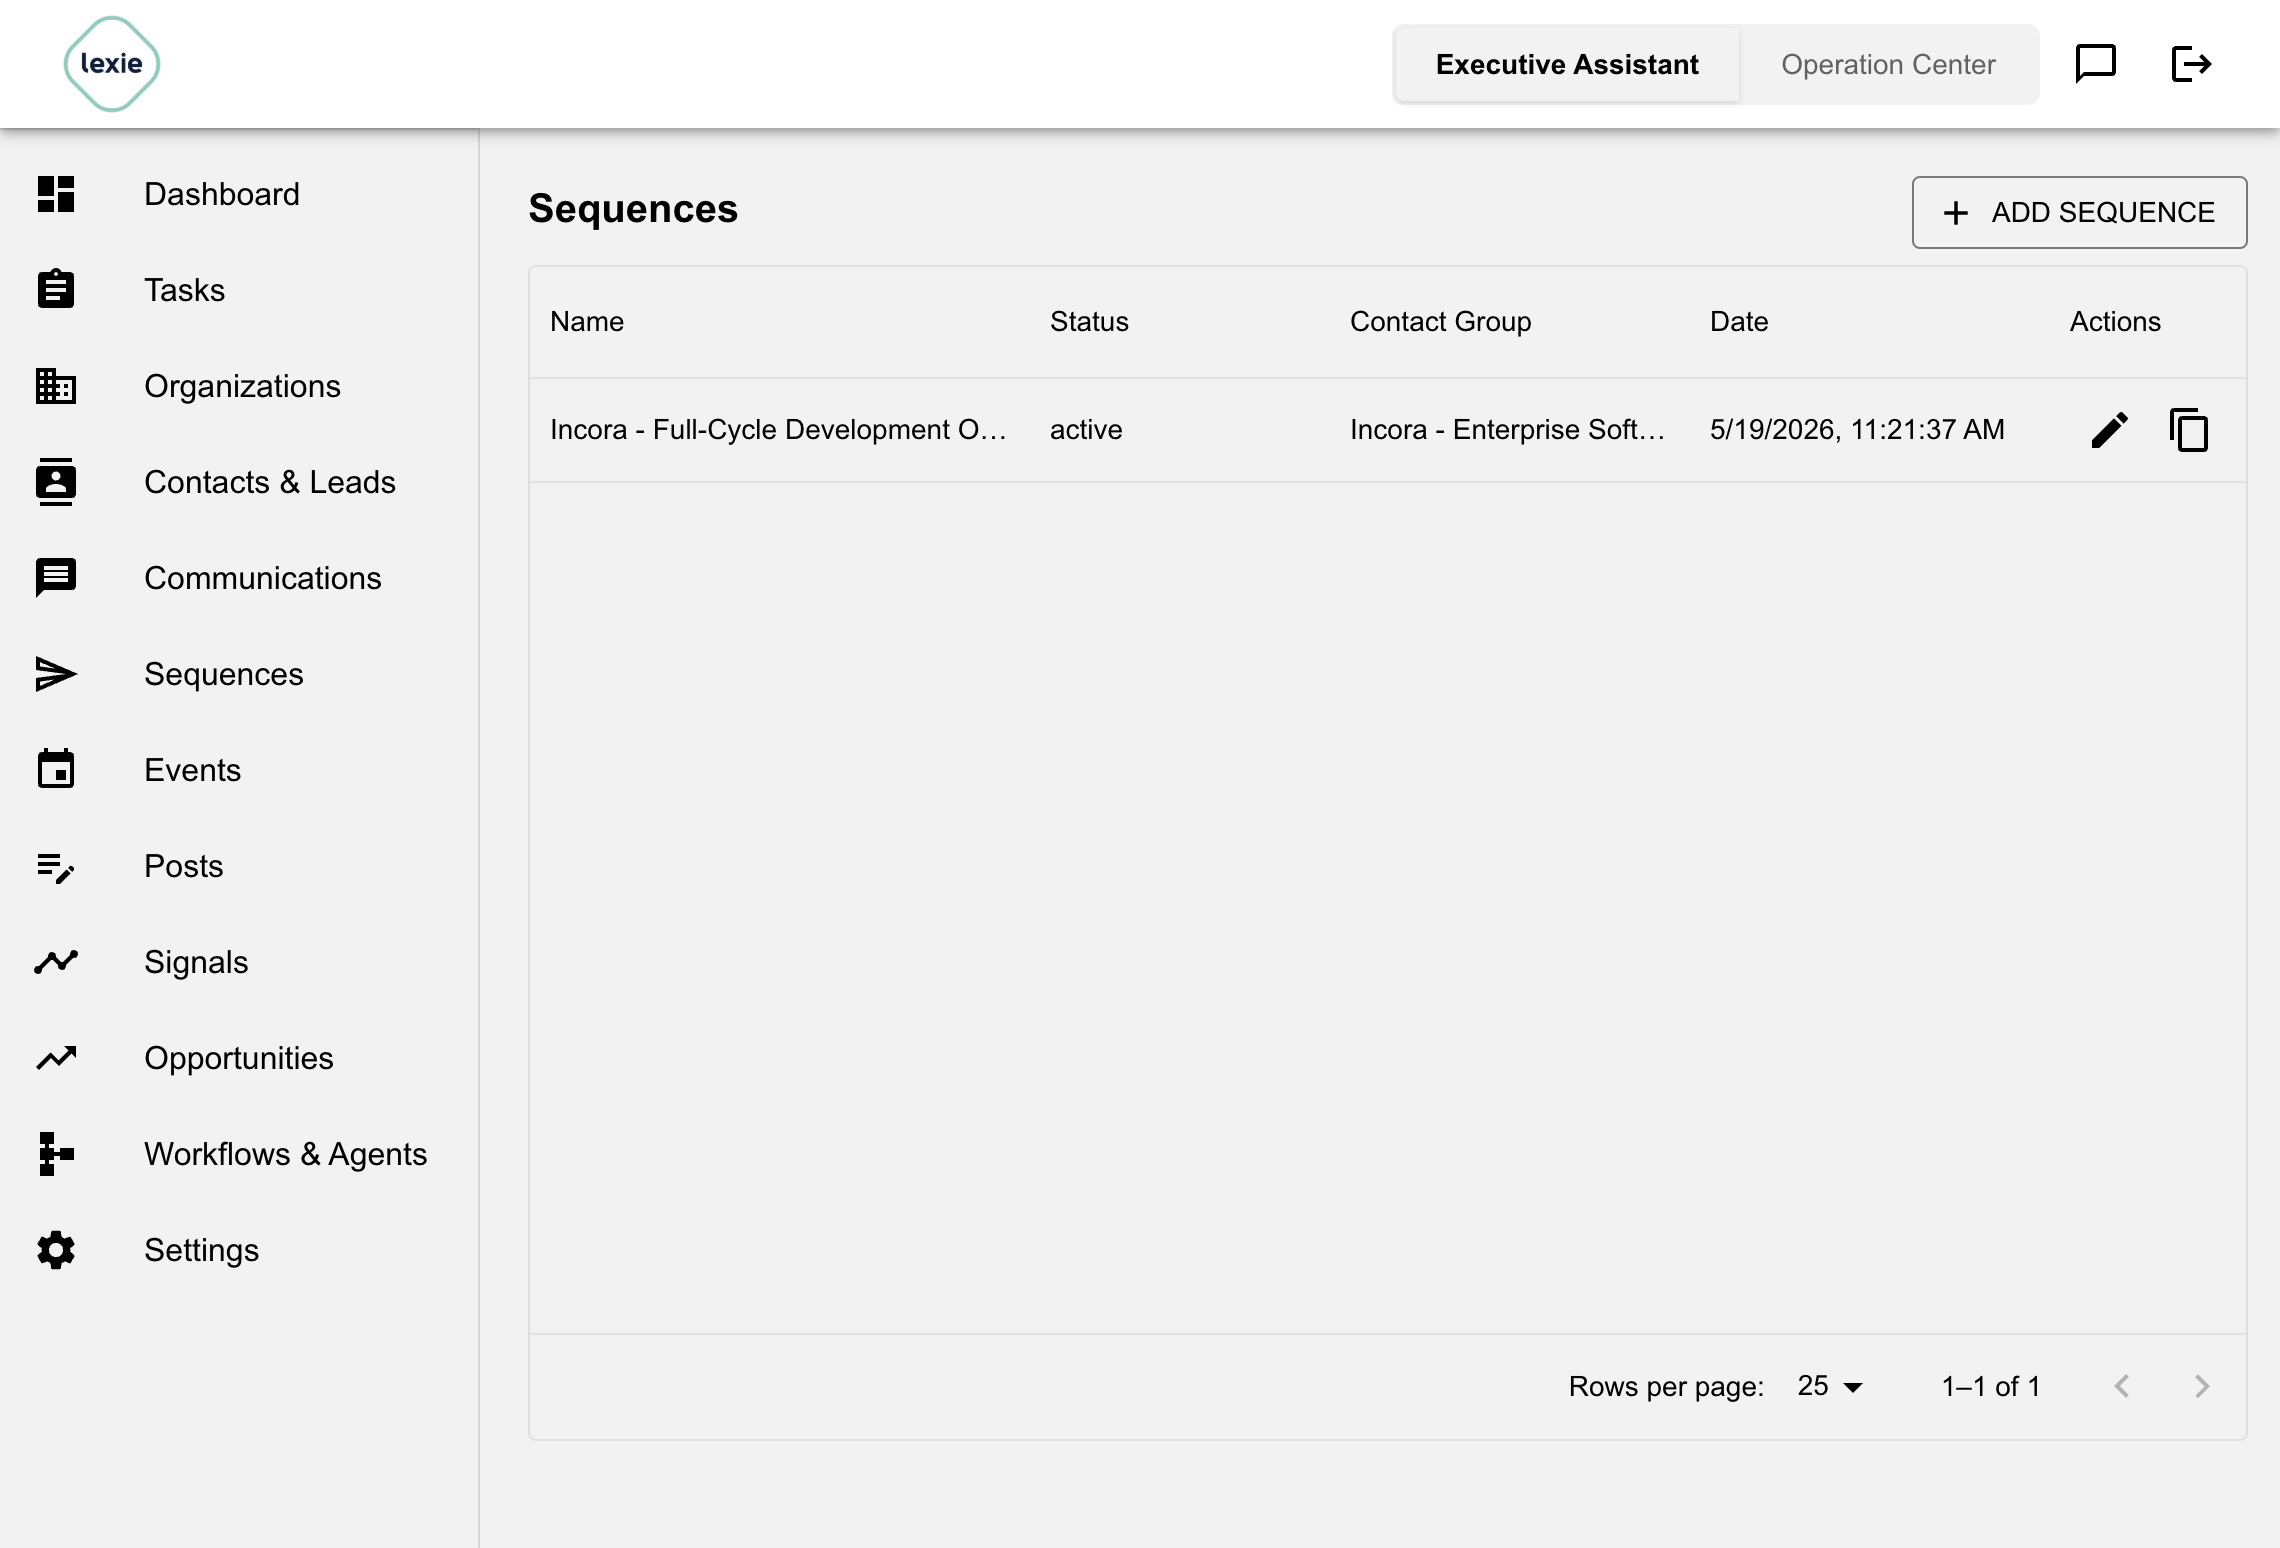
Sequences allow you to create automated, multi-step communication campaigns to reach out to contacts at scale.
Creating Sequences
- Go to Sequences in the left sidebar
- Click Add Sequence to start building a new sequence (campaign)
- Define the sequence name and target contact group
- Set up the sequence steps with appropriate timing and content
Sequence Configuration
Basic Settings:
- Name: Give your sequence a descriptive name
- Contact Group: Select which contact group this sequence will target
- Status: Choose from drafted, active, paused, or completed
- Schedule & Timezone: Click Configure Schedule to set:
- The allowed send window by day of week (e.g., 9 AM – 5 PM)
- The timezone used for step execution
Sequence Steps
Each sequence can include multiple step types. Steps can be automated, such as sending an email, or manual task-style steps that create work for the user to complete.
Send Email Step
Configure email outreach with the following options:
- Step Name: Descriptive name for this step
- Subject: Email subject line (supports variable insertion, e.g.,
${firstName},${organization.name}) - Body: Email content (rich text editor with variables)
- Variables: Use
${property_name}syntax to insert contact or organization properties. - Available Variables:
- Contact:
${firstName},${lastName},${title},${email},${phone} - Organization:
${organizationName},${organizationWebsite}, - Custom Properties: Use the exact name of your custom property, e.g.,
${personalizedIntro} - Add signature at the end: When enabled, your saved Email Signature will be appended to this email when the sequence is saved.
- If you haven't set a signature, the system will fall back to a default format:
firstName lastNameposition | companyName- Preview Email: Shows a materialized preview (subject + body) using the first contact in the selected contact group, including the signature if enabled.
- Preview requires a contact group to be selected and to have at least one contact.
- Attach Files: Add attachments to the email step, subject to the attachment size limits.
- Predicate Condition: Optionally run the email only when a condition is met, such as Replied or Not Replied.
LinkedIn Steps
Use LinkedIn steps when a sequence includes social selling or relationship-building actions:
- LinkedIn Connect: Create a task to connect with the contact on LinkedIn.
- LinkedIn Message: Create a task to send a LinkedIn message.
Each LinkedIn step has a step name and task instructions/notes so the assignee knows what to do.
Manual and Task Steps
Sequences can include task-oriented steps that are not email sends:
- Manual Task: A general task for custom follow-up or review.
- Call: A phone-call task.
- Meeting: A meeting-related task.
- Gift: A gifting or direct-mail style task.
- Research: A research task before or after outreach.
These steps use Task Instructions / Notes to explain what should happen. They are useful when the sequence needs human judgment, research, calling, social touchpoints, or offline actions between automated emails.
Wait After a Step
Wait is configured from the No wait / Wait after control inside each step. When enabled, enter the wait duration in hours. Sales Assistant stores this as a wait step behind the scenes, but in the editor it appears as timing attached to the previous step.
Example Sequence:
- Step 1: Send initial outreach email, then wait 48 hours.
- Step 2: LinkedIn Connect task, then wait 24 hours.
- Step 3: Research task to review the account or trigger signal.
- Step 4: Call task for direct follow-up.
- Step 5: Send follow-up email if the contact has not replied.
- Step 6: Gift or meeting task for high-priority contacts.
Sequence Management
Available Actions:
- Edit: Modify sequence steps, timing, or content
- Duplicate: Create a copy of an existing sequence
- View Logs: See detailed execution logs for the sequence
- View Dashboard: Access analytics and performance metrics
- Run Sequence: Start or resume sequence execution
- Delete: Remove the sequence
Sequence Status:
- Drafted: Sequence is being configured and not yet active
- Active: Sequence is running and processing contacts
- Paused: Sequence execution is temporarily stopped
- Completed: All contacts have completed the sequence
Sequence Dashboard
The Sequence Dashboard provides comprehensive analytics:
Metrics Displayed:
- Sent: Total emails sent
- Delivered: Successfully delivered emails
- Deferred: Emails temporarily delayed
- Replied: Contacts who responded
Filter Options:
- View metrics for all steps combined
- Filter by individual sequence steps
- Visual bar charts for easy comparison
How to Access:
- Go to Sequences in the left sidebar
- Click the Dashboard icon next to your sequence
- Use the toggle buttons to filter by step
Sequence Logs
View detailed execution logs for each sequence:
Log Information:
- Contact name and details
- Step executed
- Execution timestamp
- Status (sent, delivered, replied, etc.)
- Any errors or issues
How to Access:
- Go to Sequences in the left sidebar
- Click the Logs icon next to your sequence
- Filter and search through execution history
Best Practices for Sequences
- Start Simple: Begin with 2-3 steps and refine based on results
- Personalize: Use contact properties in email variables
- Timing Matters: Wait 3-5 days between emails
- Test First: Create a small test sequence before going large-scale
- Monitor Dashboard: Check metrics regularly and adjust strategy
- Respect Replies: Sequence automatically stops for contacts who respond
Events
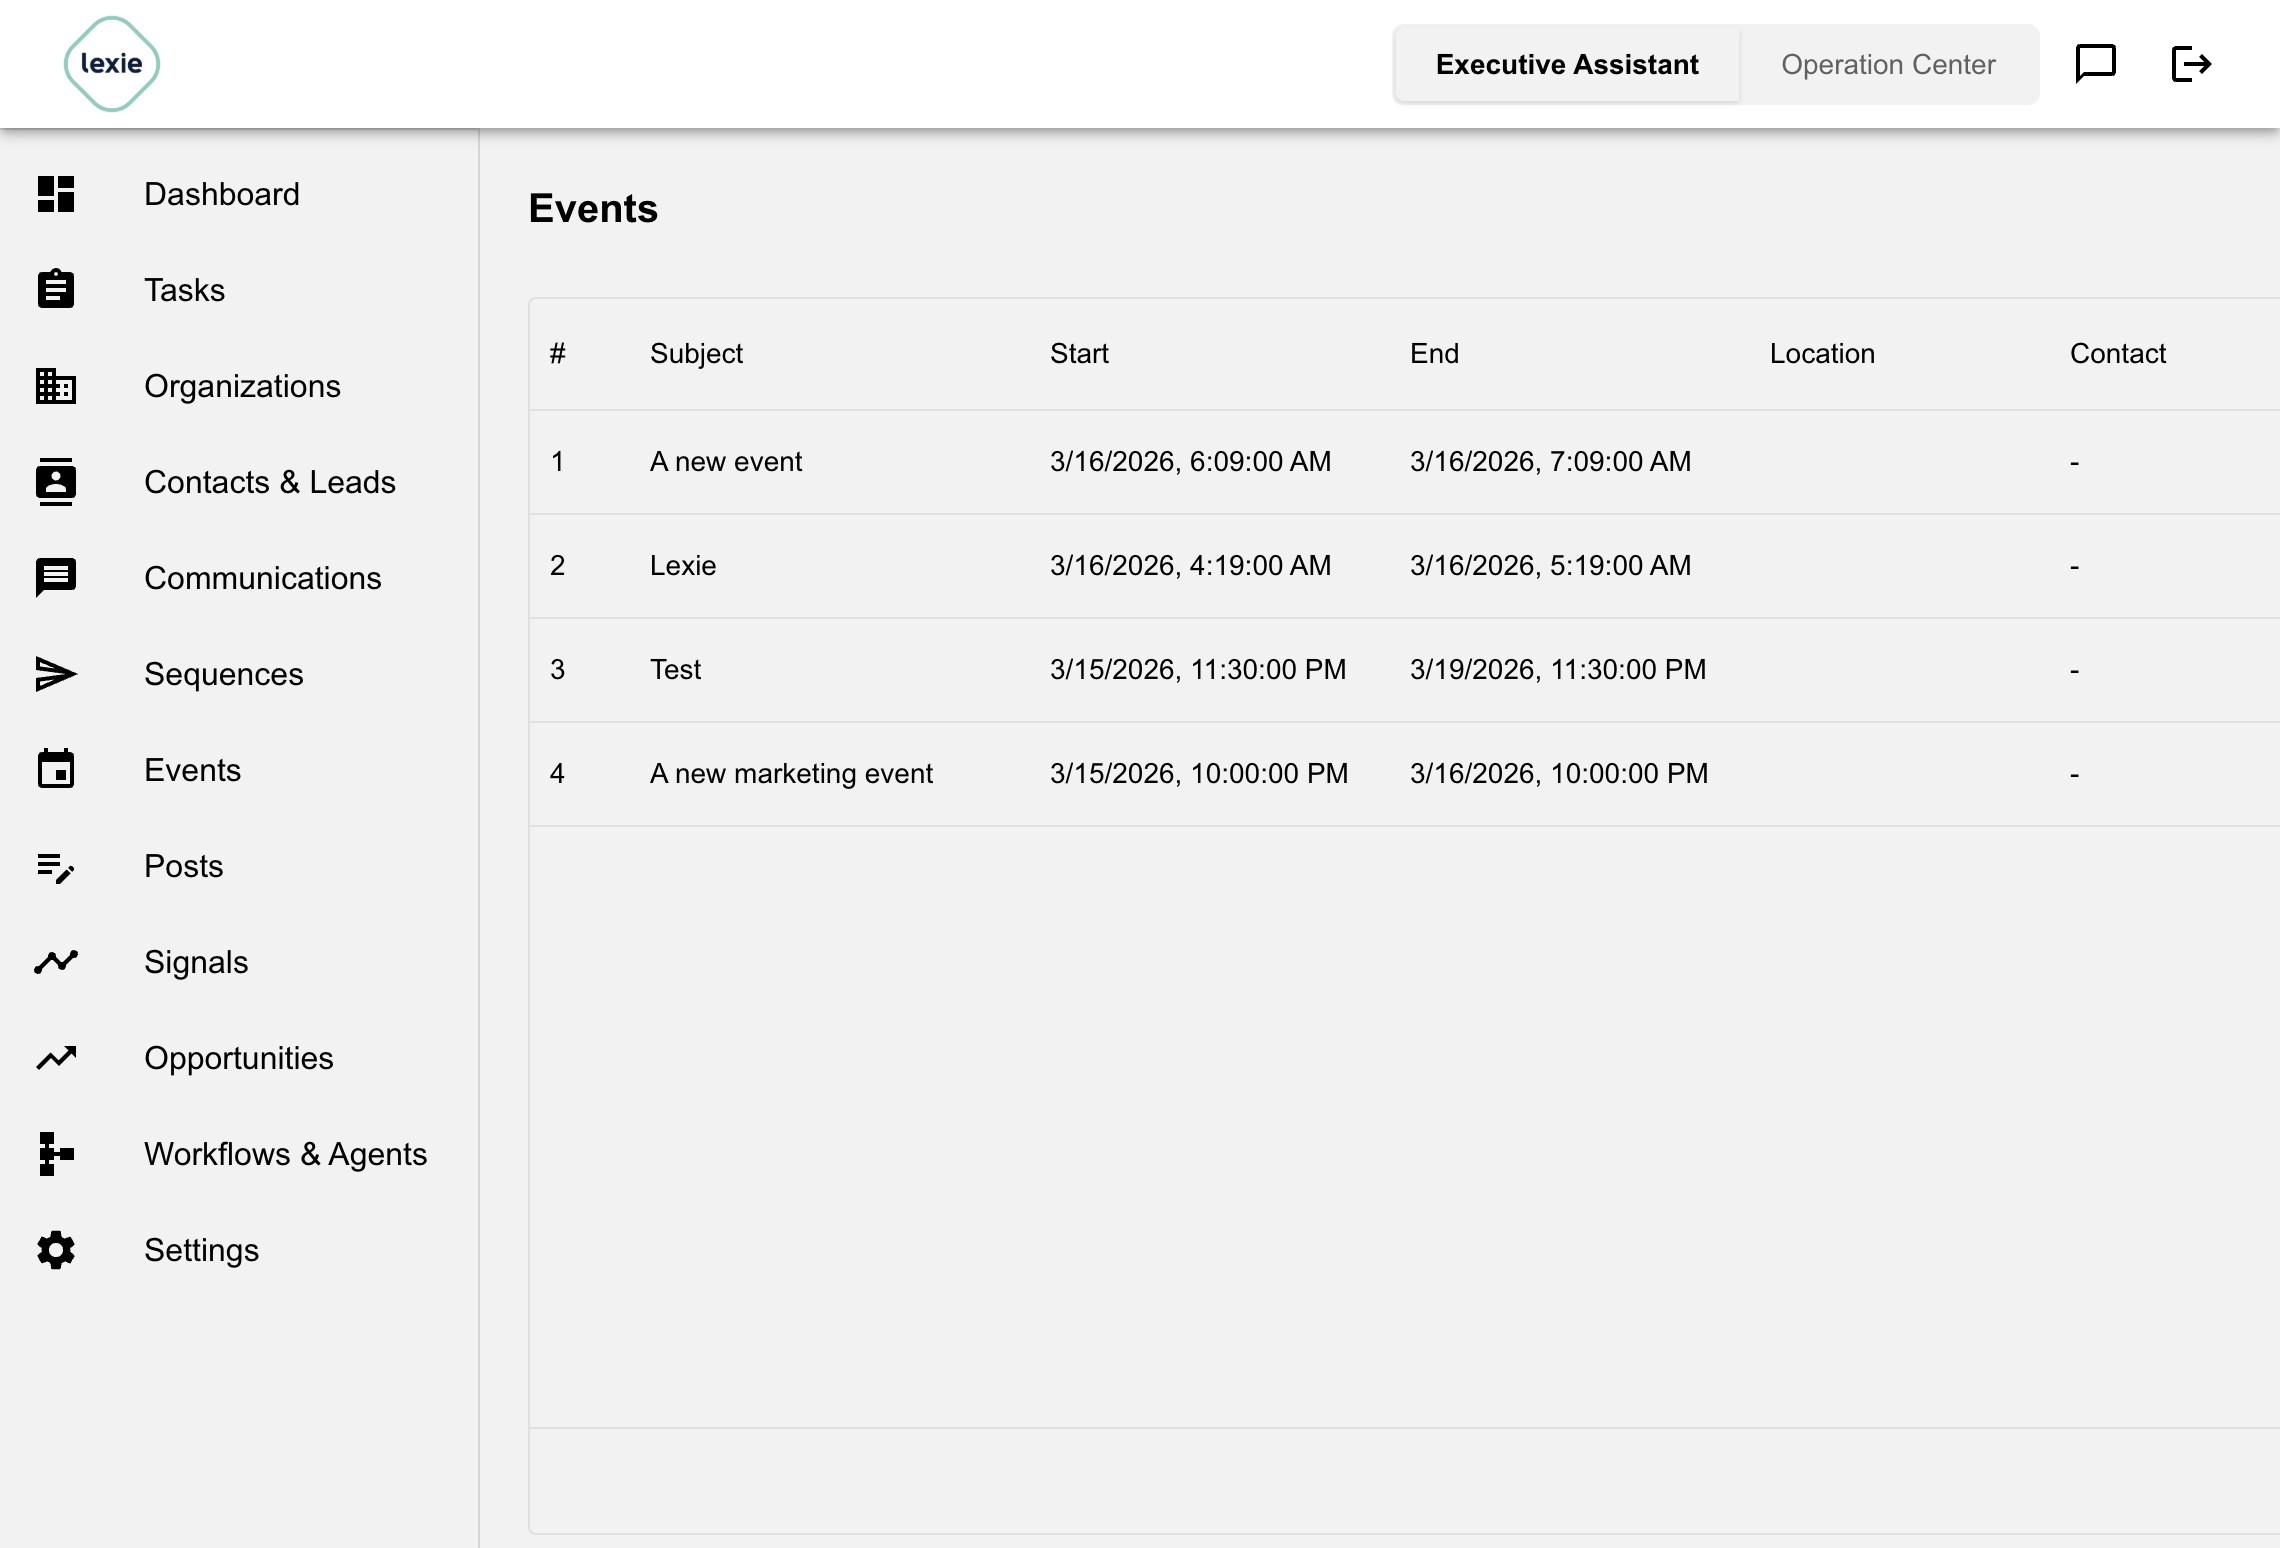
Events track calendar events and meetings synced from your CRM or created manually.
Event Properties
Each event includes:
- Subject: Event title
- Description: Event details
- Location: Meeting location
- Start/End Time: Event timing
- All Day: Flag for all-day events
- Associated Contact: Linked contact
- Associated Organization: Linked organization
Posts
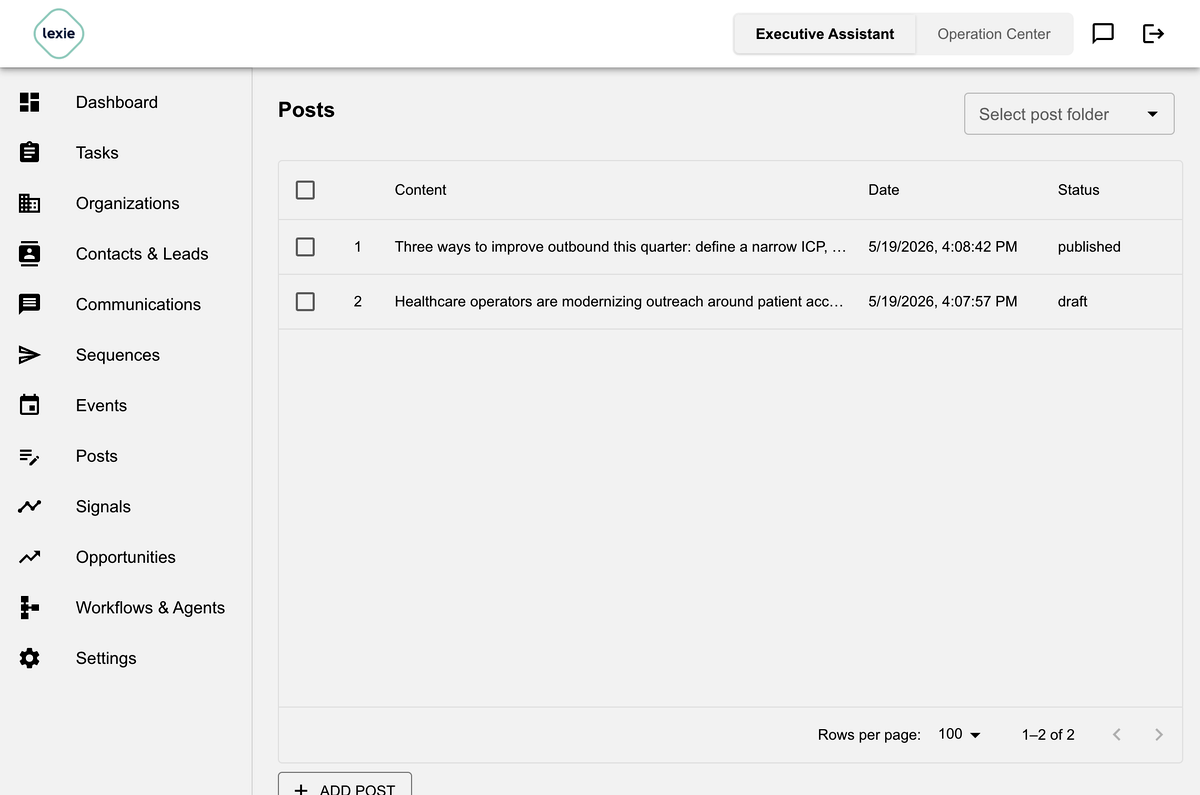
Posts allow you to create and manage social media content for platforms like LinkedIn and Twitter.
Folder Selection
Posts are organized into folders for better management. You can select the folder using the dropdown on the top right of the posts table.
To create a new post folder:
- Go to Settings > Post Folders
- Click New Folder
- Enter the folder name and description
- Save the folder
Post Listing
Posts are listed in a paginated table. Use this view to track draft and published post copy, review when each post was created, and quickly open or delete content from the action column.
Post Editing
Use the action in the rightmost column associated with the post to see the details and/or edit it.
Add Post
Use the Add Row button to add a post.
Signals
Signals provide real-time intelligence and news about companies, industries, and key individuals to help you stay informed and take timely action.
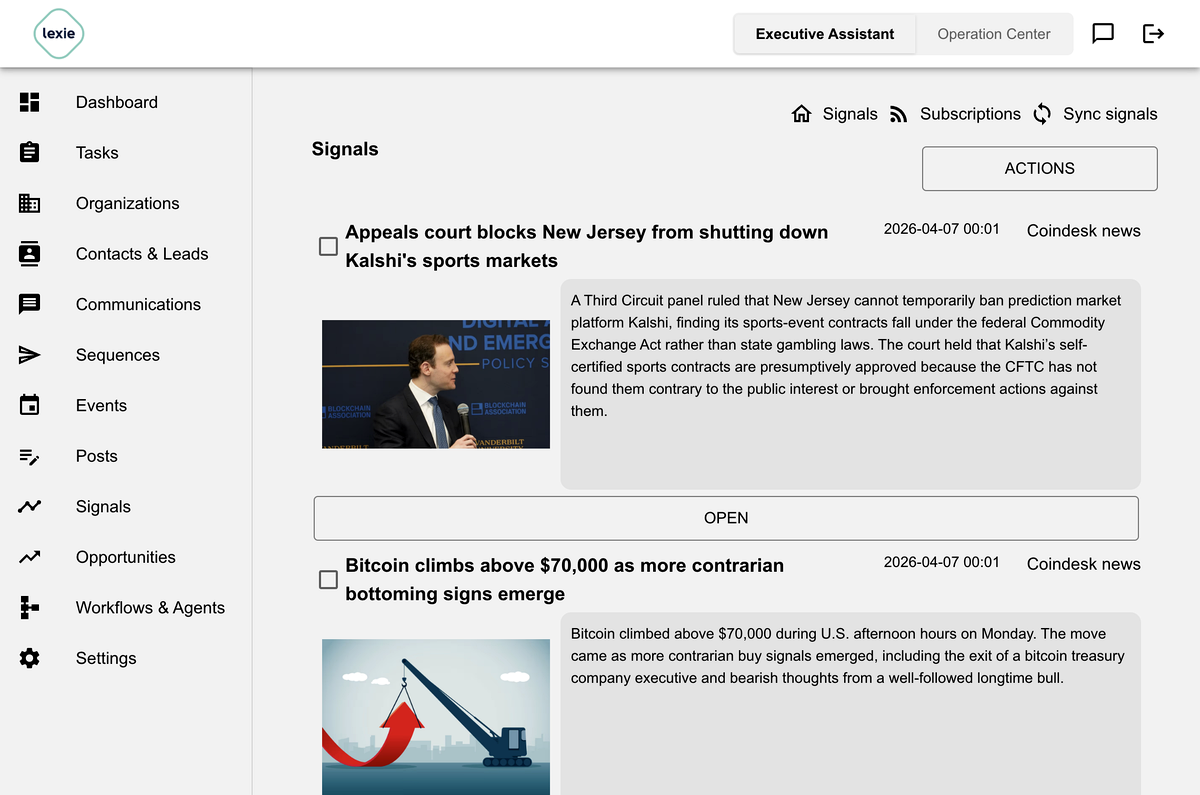
Key Features
View Signals
The main Signals view shows the actual feed of signal items generated from subscribed outlets. Each signal includes a title, source, timestamp, image, summary, and action controls so the team can review timely news and decide what to do next.
Signals are displayed in a feed format with detailed information including:
- Signal title and source
- Publication date and time
- Summary description
- Metadata info (i.e., related founders or key personnel)
- Action buttons for engagement
Manage Outlets and Subscriptions
The Subscriptions tab is where you manage channels and outlets. Use it to add new outlets or subscribe to existing public/private sources; those subscriptions determine which signal items appear in the feed.
Outlet Management
- Add new outlets with custom names and URLs
- Configure outlet types (public/private)
- Set up filters for specific content types
- Manage subscription status (active/inactive)
Subscription Types
- Public outlets: Pre-configured news sources like CoinDesk, Financial Times, TechCrunch
- Private outlets: Custom RSS feeds or news sources you add
- Filtered subscriptions: Content filtered by specific criteria
Actions for Signals
- Generate personalized messages for related people
- Create LinkedIn posts related to the signal
Opportunities
Opportunities track sales deals and potential revenue from your prospects.
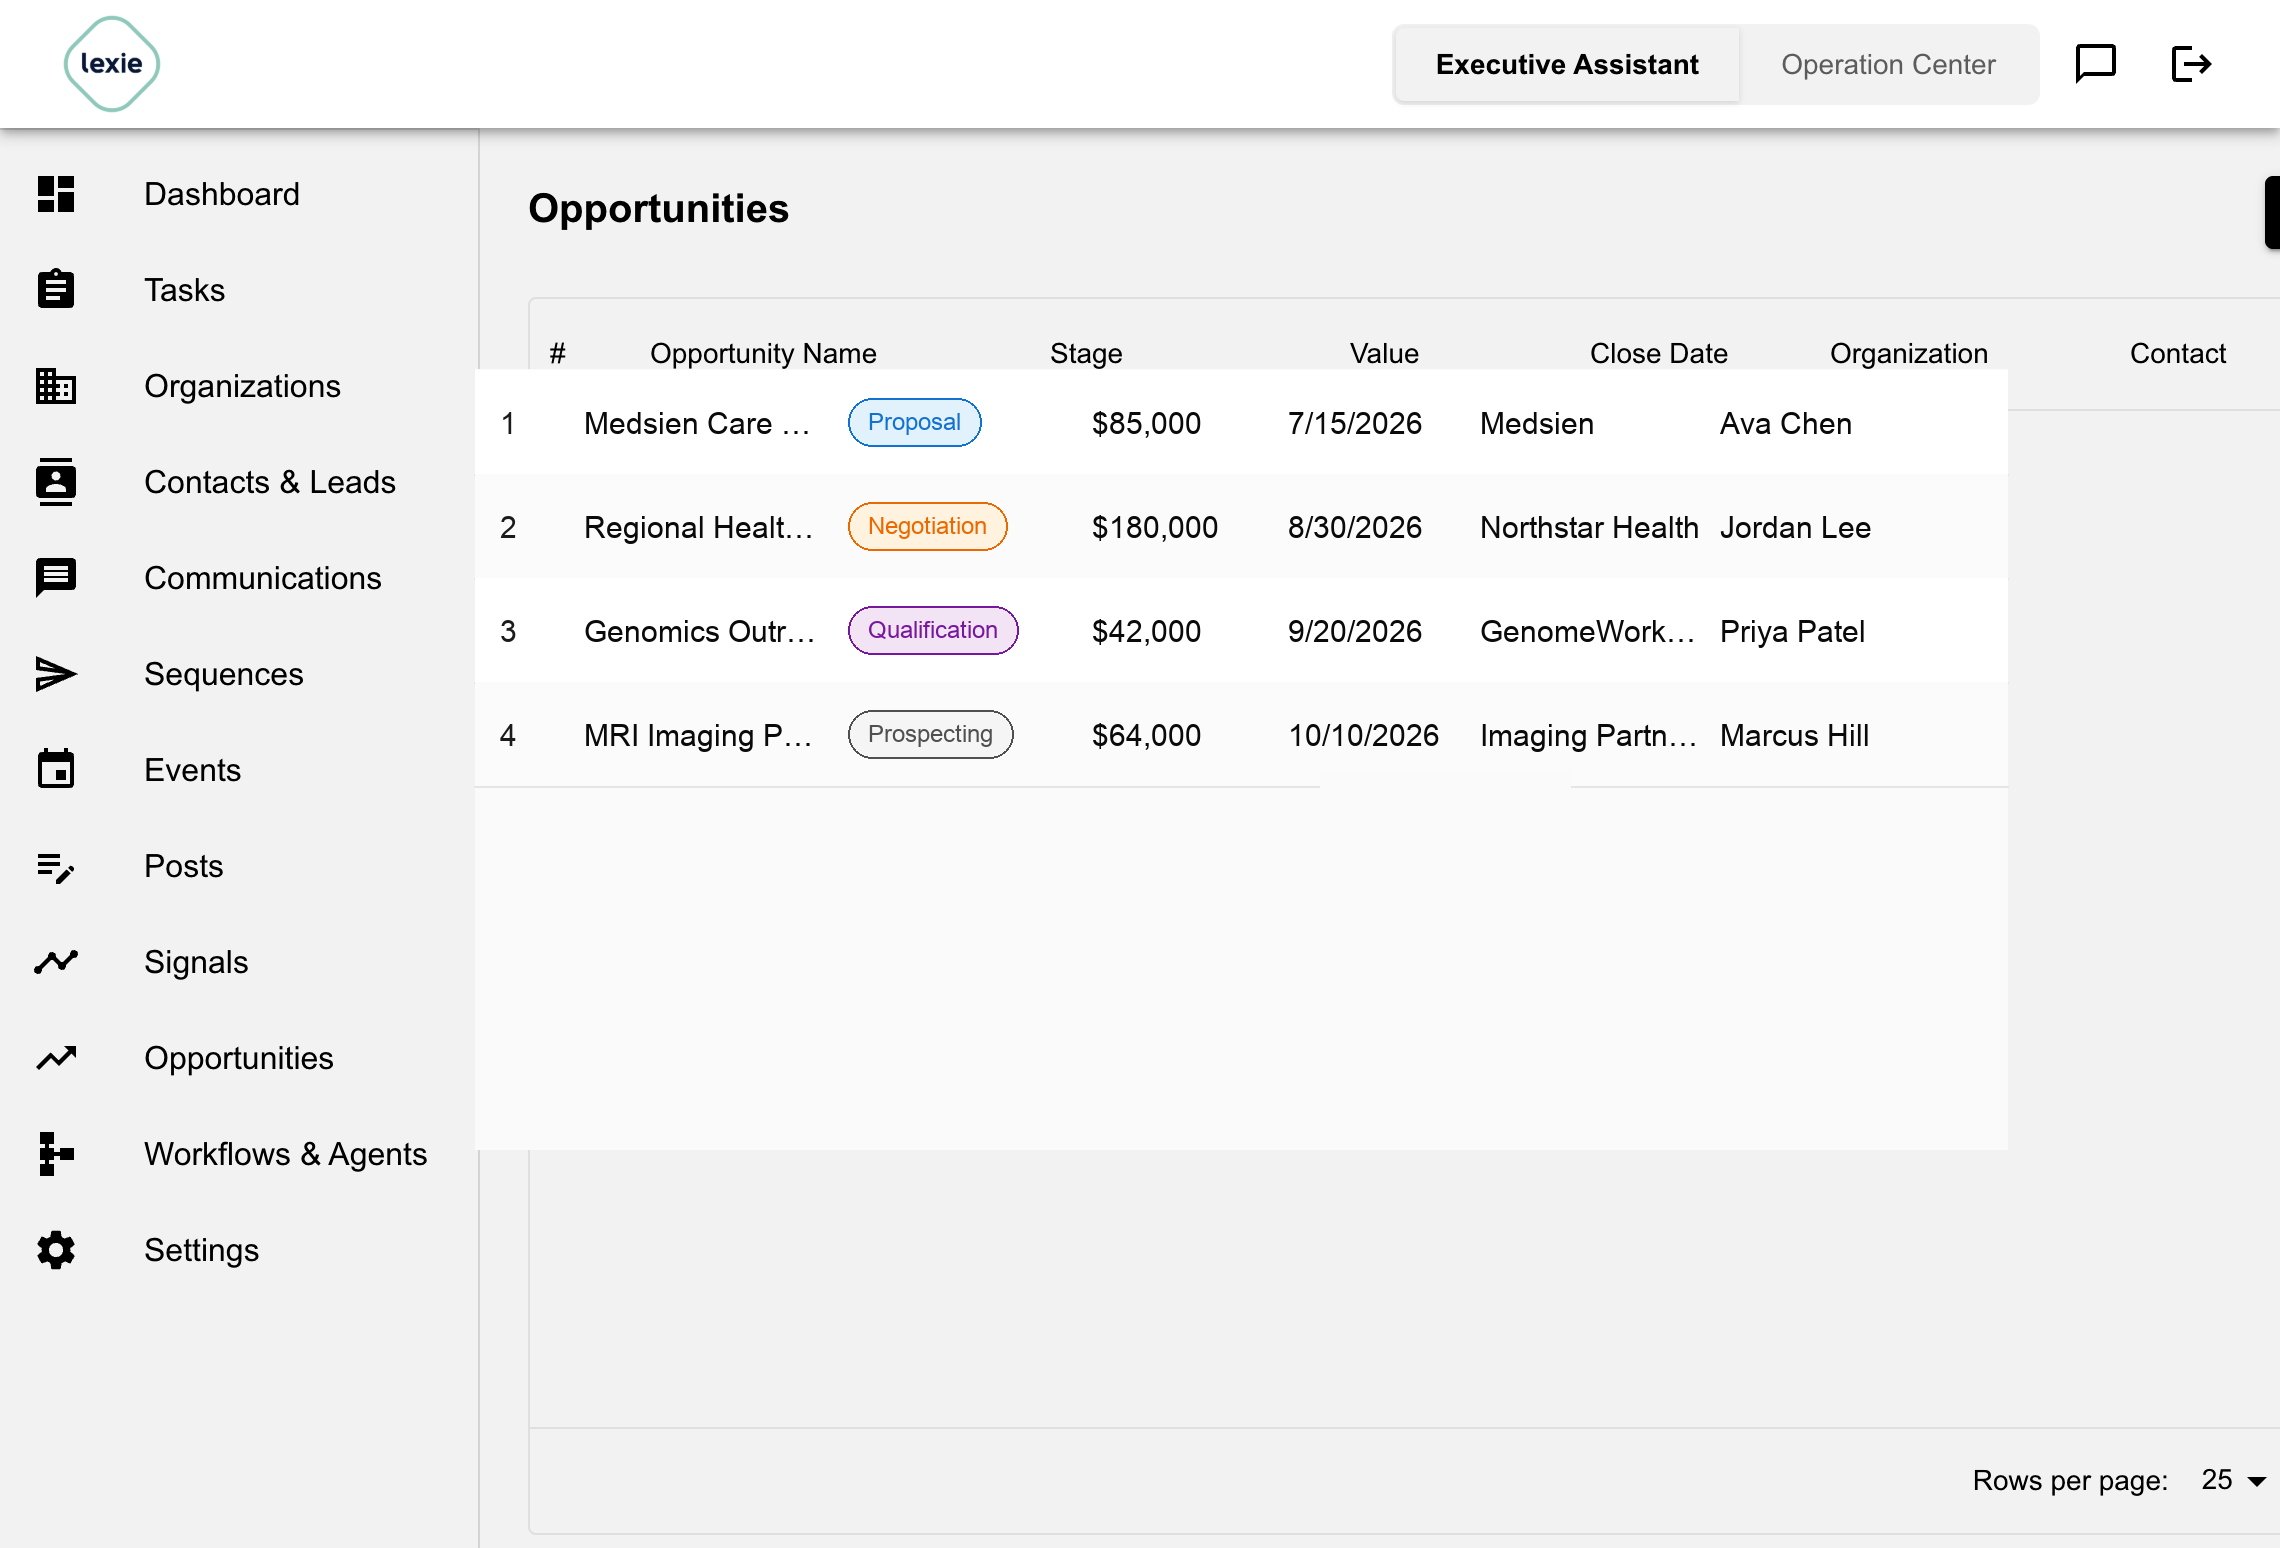
Opportunity Management
Track and manage your sales pipeline:
- Stage tracking: Monitor deal progression
- Value tracking: Track potential revenue
- Contact/Organization linking: Associate opportunities with contacts and companies
Typical opportunity stages include Prospecting, Qualification, Needs Analysis, Proposal, Negotiation, Closed Won, and Closed Lost. Use this view to quickly see which deals are moving forward, their expected value, target close date, and the related account or contact.
Workflows & Agents
Workflows & Agents is the centralized hub for all automation and AI-powered features in Sales Assistant. Access via the "Workflows & Agents" menu item in the left sidebar.
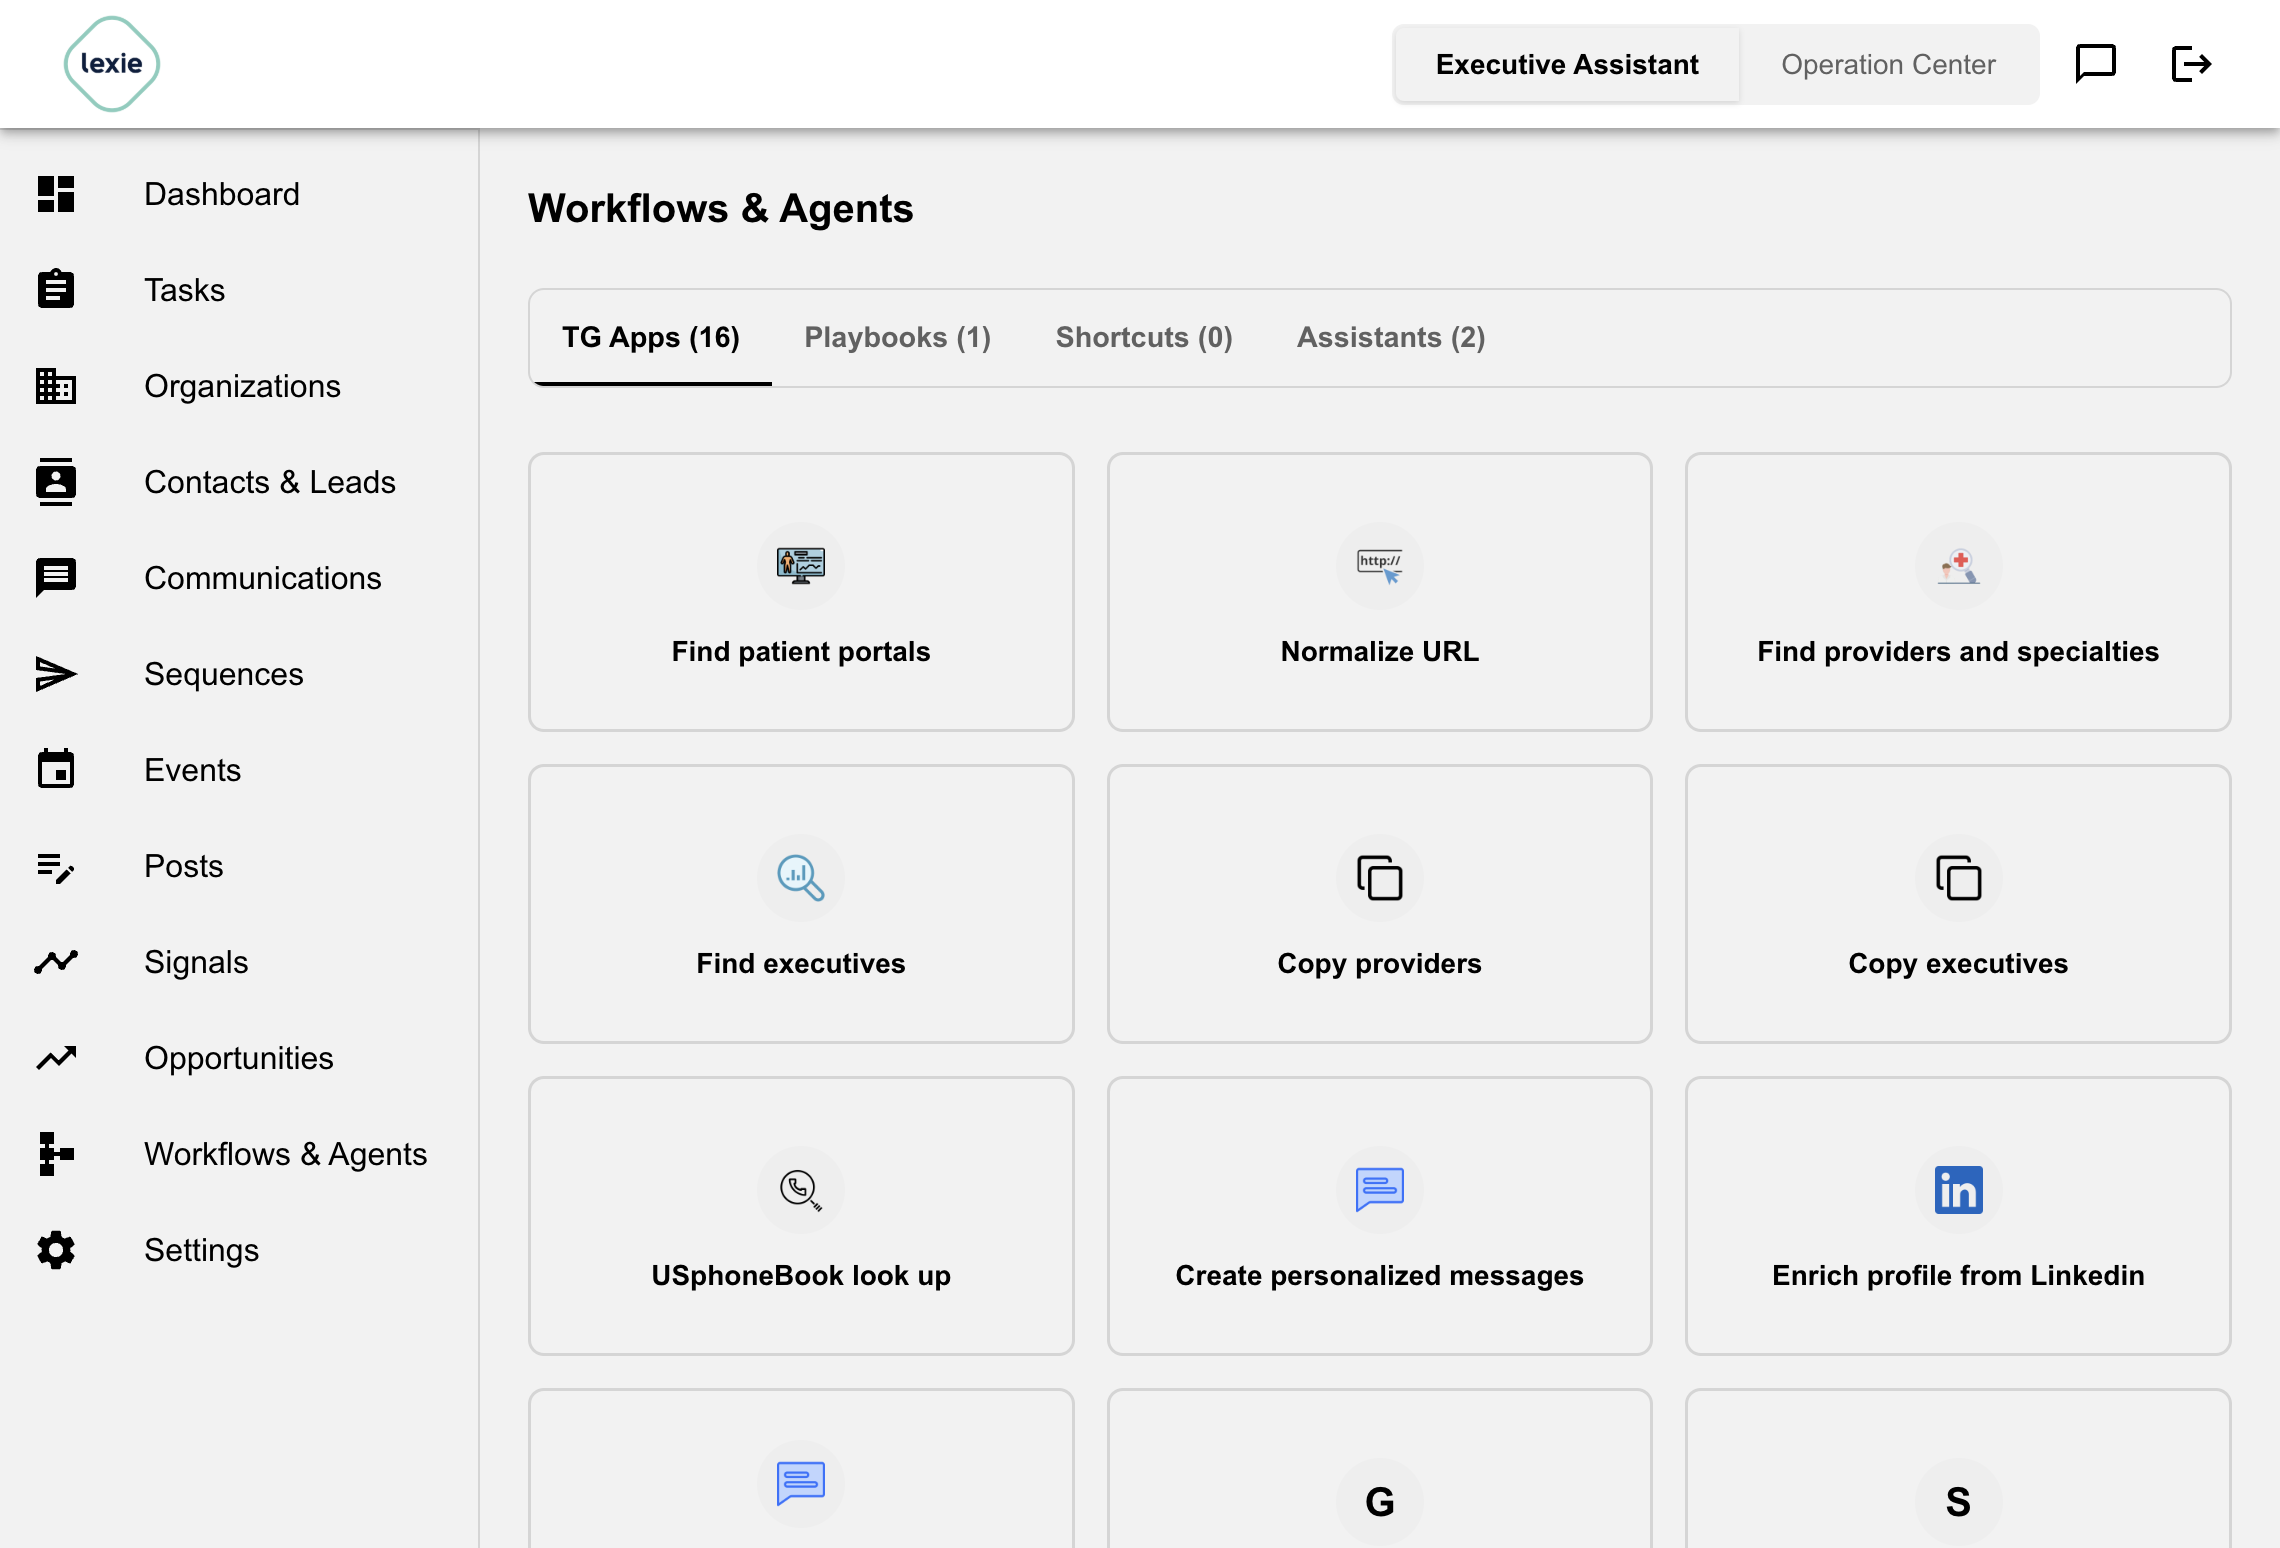
Workflow Tabs
The Workflows & Agents page is organized into five tabs:
Tab 1: TG Apps
TG Apps are pre-built automation workflows powered by Thought Graph:
- View available TG Apps
- Execute workflows
- Track progress and results
Tab 2: Playbooks
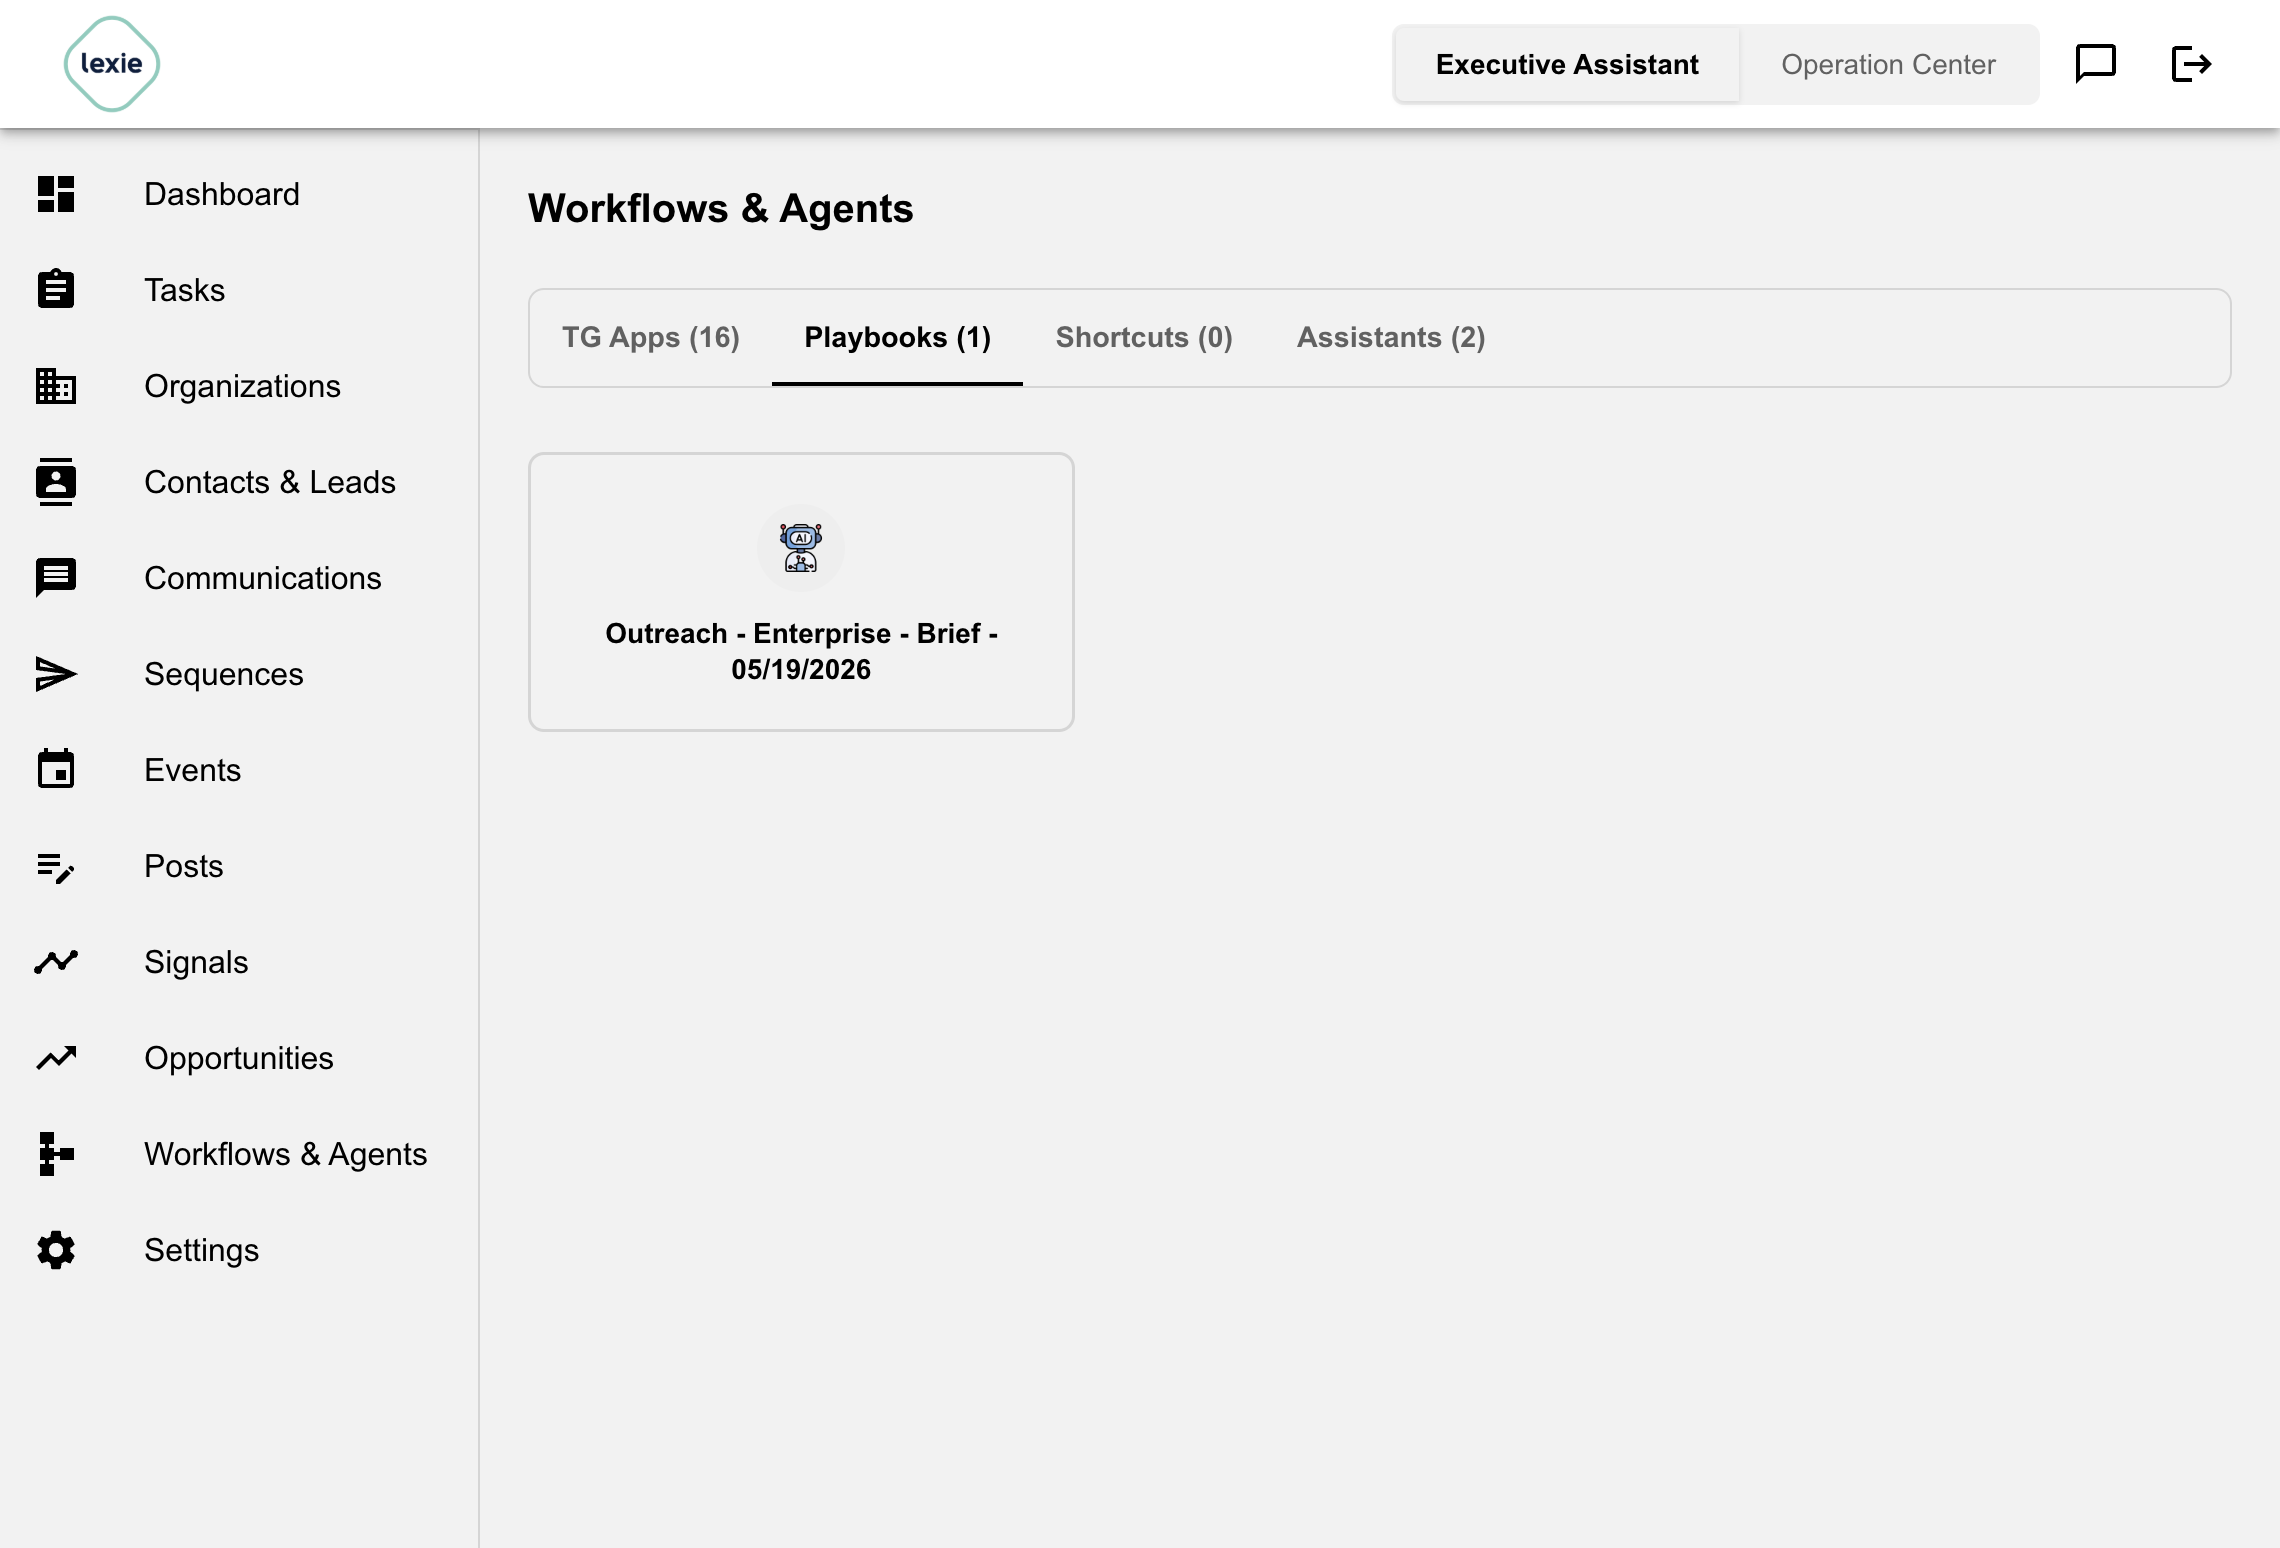
Playbooks are documented strategies and step-by-step processes:
- View all playbooks
- Execute playbook workflows
- Monitor playbook execution
Playbooks are structured sales and marketing strategies that document repeatable processes and best practices. A playbook can include the target audience, key steps, templates, success metrics, and the automation plan used to execute the motion.
Auto-onboarding can generate a playbook automatically after it researches the company, creates an offering, and defines an ICP. This generated playbook is usually the bridge between setup and execution: users review it, run it, and then use its results to prepare contacts, sequences, and outreach.
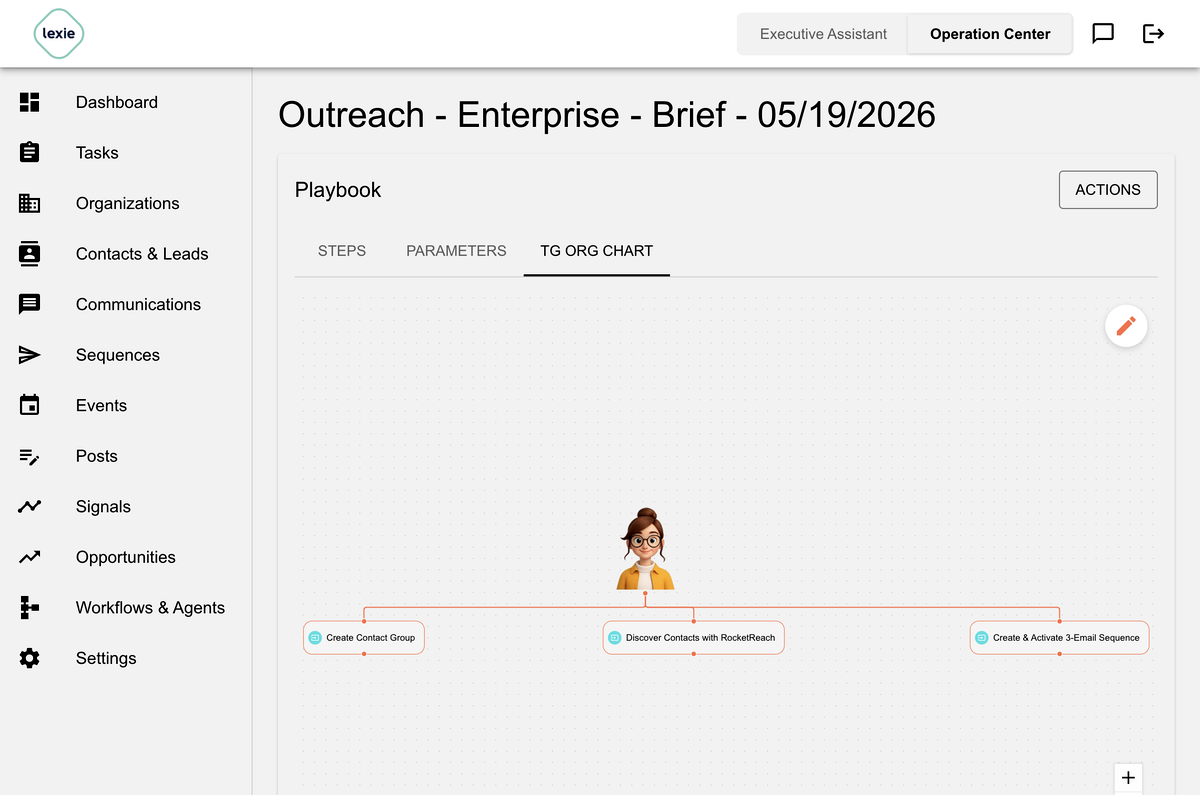
When a playbook is opened from Workflows & Agents > Playbooks, the TG Org Chart tab shows the underlying ThoughtGraph structure. The root playbook node branches into executable workflow steps, such as creating a contact group, discovering contacts with RocketReach, and creating or activating a sequence. This view helps users understand the full automation plan before running or editing the playbook.
Playbook categories include:
- Outbound Sequences: Multi-step outbound email campaigns and calling strategies.
- Inbound: Processes for handling and nurturing inbound leads.
- Social Marketing: Strategies for LinkedIn, Twitter, and other social platforms.
- Email Marketing: Email campaign strategies and templates.
- Events: Processes for event marketing, trade shows, and webinars.
Before running auto-onboarding for a demo or a clean setup, delete stale generated playbooks that are no longer needed. This makes it clear which playbook was created by the latest onboarding run.
Tab 3: Shortcuts
Shortcuts are quick-access workflows for common operations:
- GenAI Shortcuts: Pre-configured AI generation workflows
- Formula Shortcuts: Pre-configured formula-based workflows
- Click to execute with saved parameters
Tab 4: Custom Assistants (Conversational Assistants)
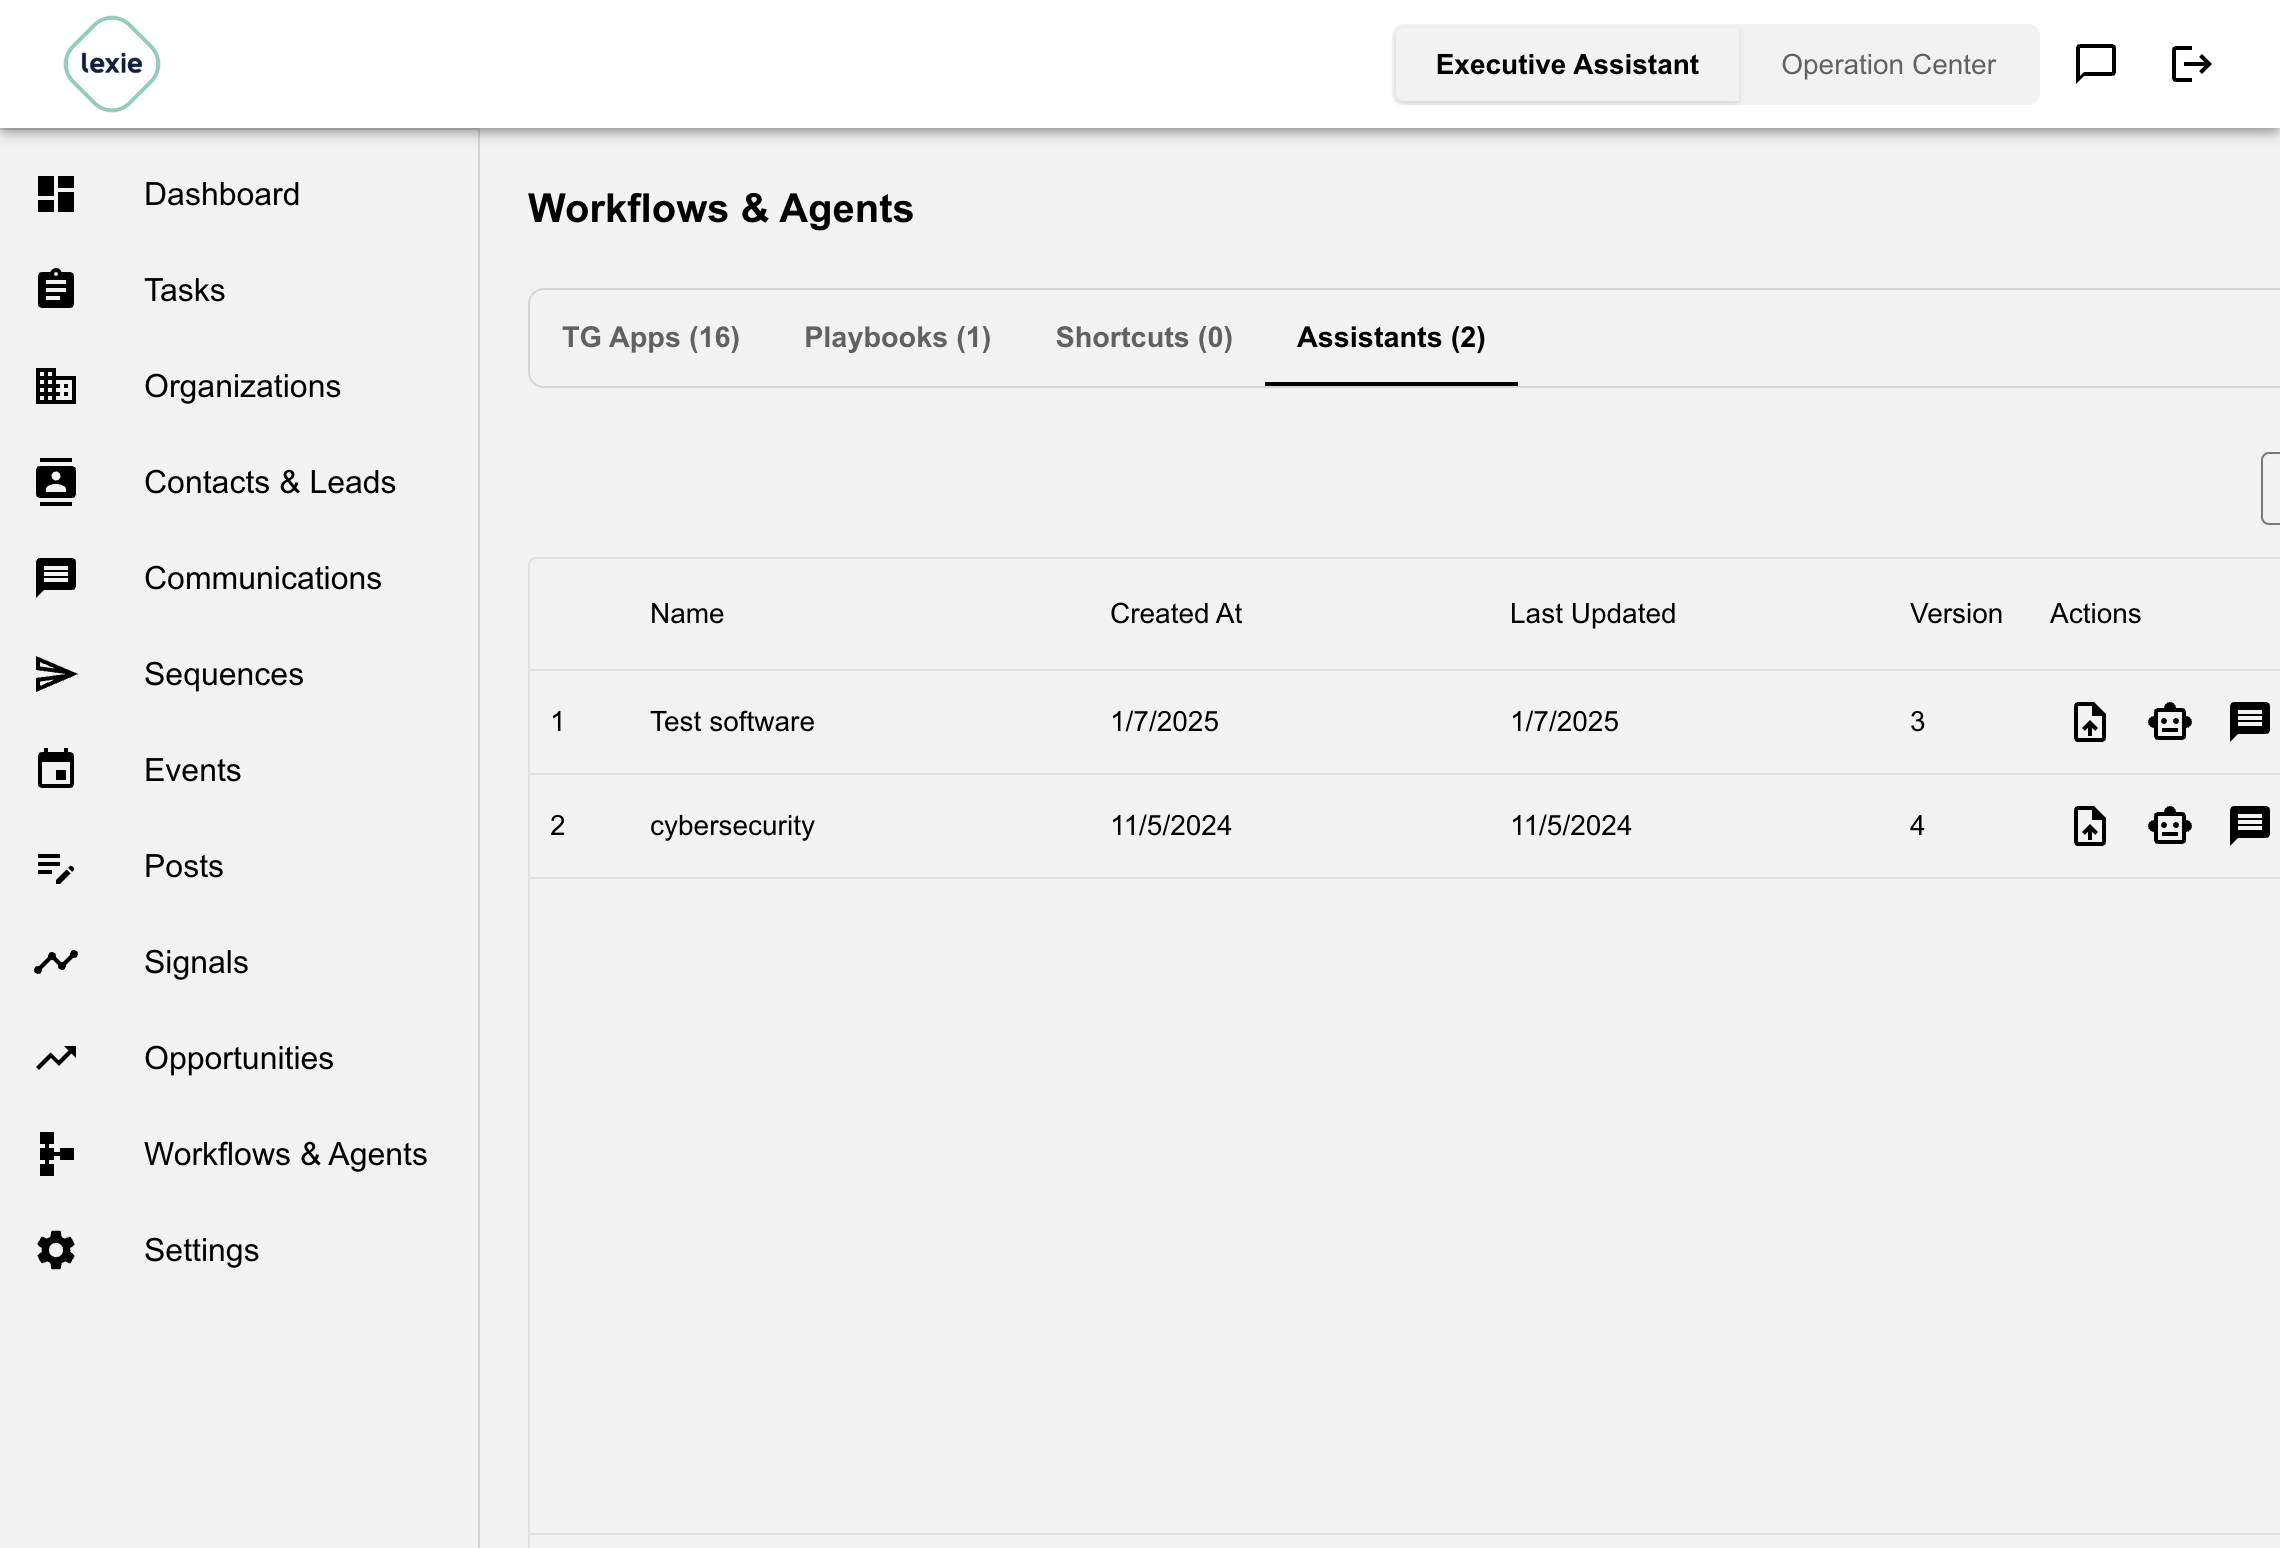
Custom Assistants are user-created AI chatbots that are separate from the built-in Lexie assistant. Use this tab to create assistants for a specific audience, knowledge base, workflow, or internal use case.
View Created Assistants:
- Name, Created At, Last Updated, Version
Actions on Assistants:
- Ingest Assets: Upload documents to enhance knowledge
- System Prompts: Define assistant behavior
- Chat: Start conversations
- View Users: Manage user access
- Edit: Modify configuration
- Delete: Remove assistant
Adding New Assistants:
- Click Add Assistant
- Define name and use case
- Configure system prompts and resources
The custom Assistants tab is not the same thing as the built-in Lexie assistant used in Executive Assistant mode or the Operation Center copilot panel. Lexie is the product assistant for navigating Sales Assistant, running workflows, and guiding onboarding; custom Assistants are configurable bots that users create and manage.
Tab 5: Sequences
Sequences are also accessible as a standalone page from the left sidebar. See Sequences for full details on creating and managing multi-step email campaigns.
Organization Workflows
Access organization workflows via Actions > Workflow in the Organizations section:
- Create Contacts from Property: Convert a list property into individual contacts
- Custom Workflows: User-defined automation workflows
Contact Workflows
Access contact workflows via Actions > Workflow in the Contacts section:
- Custom Workflows: User-defined automation workflows for contact processing
Workflow Execution Tracking
When running workflows:
- Progress Bar: Visual indication of completion percentage
- Real-time Updates: See results as they're generated
- Stop Capability: Cancel workflow execution at any time
- Results Preview: View generated values before saving
Auto-Onboarding Workflow
Auto-onboarding is the guided workflow that helps a new workspace generate its first sales strategy assets. A user can start it from the assistant suggestion, by asking Lexie to "start onboarding," or by asking to get to know the business.
The onboarding flow researches the user's company and target market, then creates three core assets:
- Offering: the product or service the company sells.
- Ideal Customer Profile (ICP): the type of customer or account the offering is designed for.
- Playbook: a sales or marketing process that can be used to run outreach and prepare contacts.
After onboarding completes, users should verify the created assets:
- Go to Settings > Offerings and confirm the new offering is accurate.
- Go to Settings > Ideal Customer Profiles and confirm the ICP matches the target customer.
- Go to Workflows & Agents > Playbooks and confirm the generated playbook is ready to run.
- Run the playbook when ready. The playbook can import contacts into a contact group, which can then feed sequences and outreach workflows.
Preparing for a Clean Auto-Onboarding Run
For demos, testing, or a new customer setup, clean up old auto-generated assets first. Duplicate or stale Offerings, ICPs, and Playbooks can make the onboarding results confusing because the new playbook may appear alongside older generated content.
Before starting auto-onboarding, review and remove stale test assets from:
- Settings > Offerings
- Settings > Ideal Customer Profiles
- Workflows & Agents > Playbooks
Keep only assets that the user wants to preserve. Then run onboarding so the new Offering, ICP, and Playbook are easy to identify and validate.
Projects & Team Collaboration
Projects enable team collaboration and workspace management within Sales Assistant. Multiple users can work together within shared project environments.
Understanding Projects
Projects provide:
- Workspace Isolation: Each project has its own segments, contact groups, and data
- Team Collaboration: Invite team members to work together
- Access Control: Manage who can access what within the project
- Data Organization: Keep different initiatives or clients separate
Creating a New Project
- Go to Settings > Projects
- Click Create New Project
- Enter the project name
- Save the project
Selecting a Project
- Go to Settings > Projects
- Use the dropdown to select your active project
- All segments, contact groups, and data will switch to that project context
Important: When you switch projects:
- The active segment will be cleared
- The active contact group will be cleared
- You'll see only data associated with that project
Managing Project Access
Invite team members to collaborate on your project:
- Go to Settings > Projects
- Select your project from the dropdown
- In the Project Access section, enter the email address of the person you want to invite
- Click Invite
- The invited user will receive access to the project
Removing Project Access
- Go to Settings > Projects
- Select your project
- Find the user in the access list
- Click Remove next to their email
- Their access will be revoked immediately
Deleting a Project
Warning: This action is permanent and will delete all associated data.
- Go to Settings > Projects
- Select the project you want to delete
- Click Remove project
- Confirm the deletion
Note: Deleted projects cannot be recovered. All segments, contacts, organizations, and workflows within that project will be permanently deleted.
Settings
The Settings section provides comprehensive configuration options for your Sales Assistant environment.
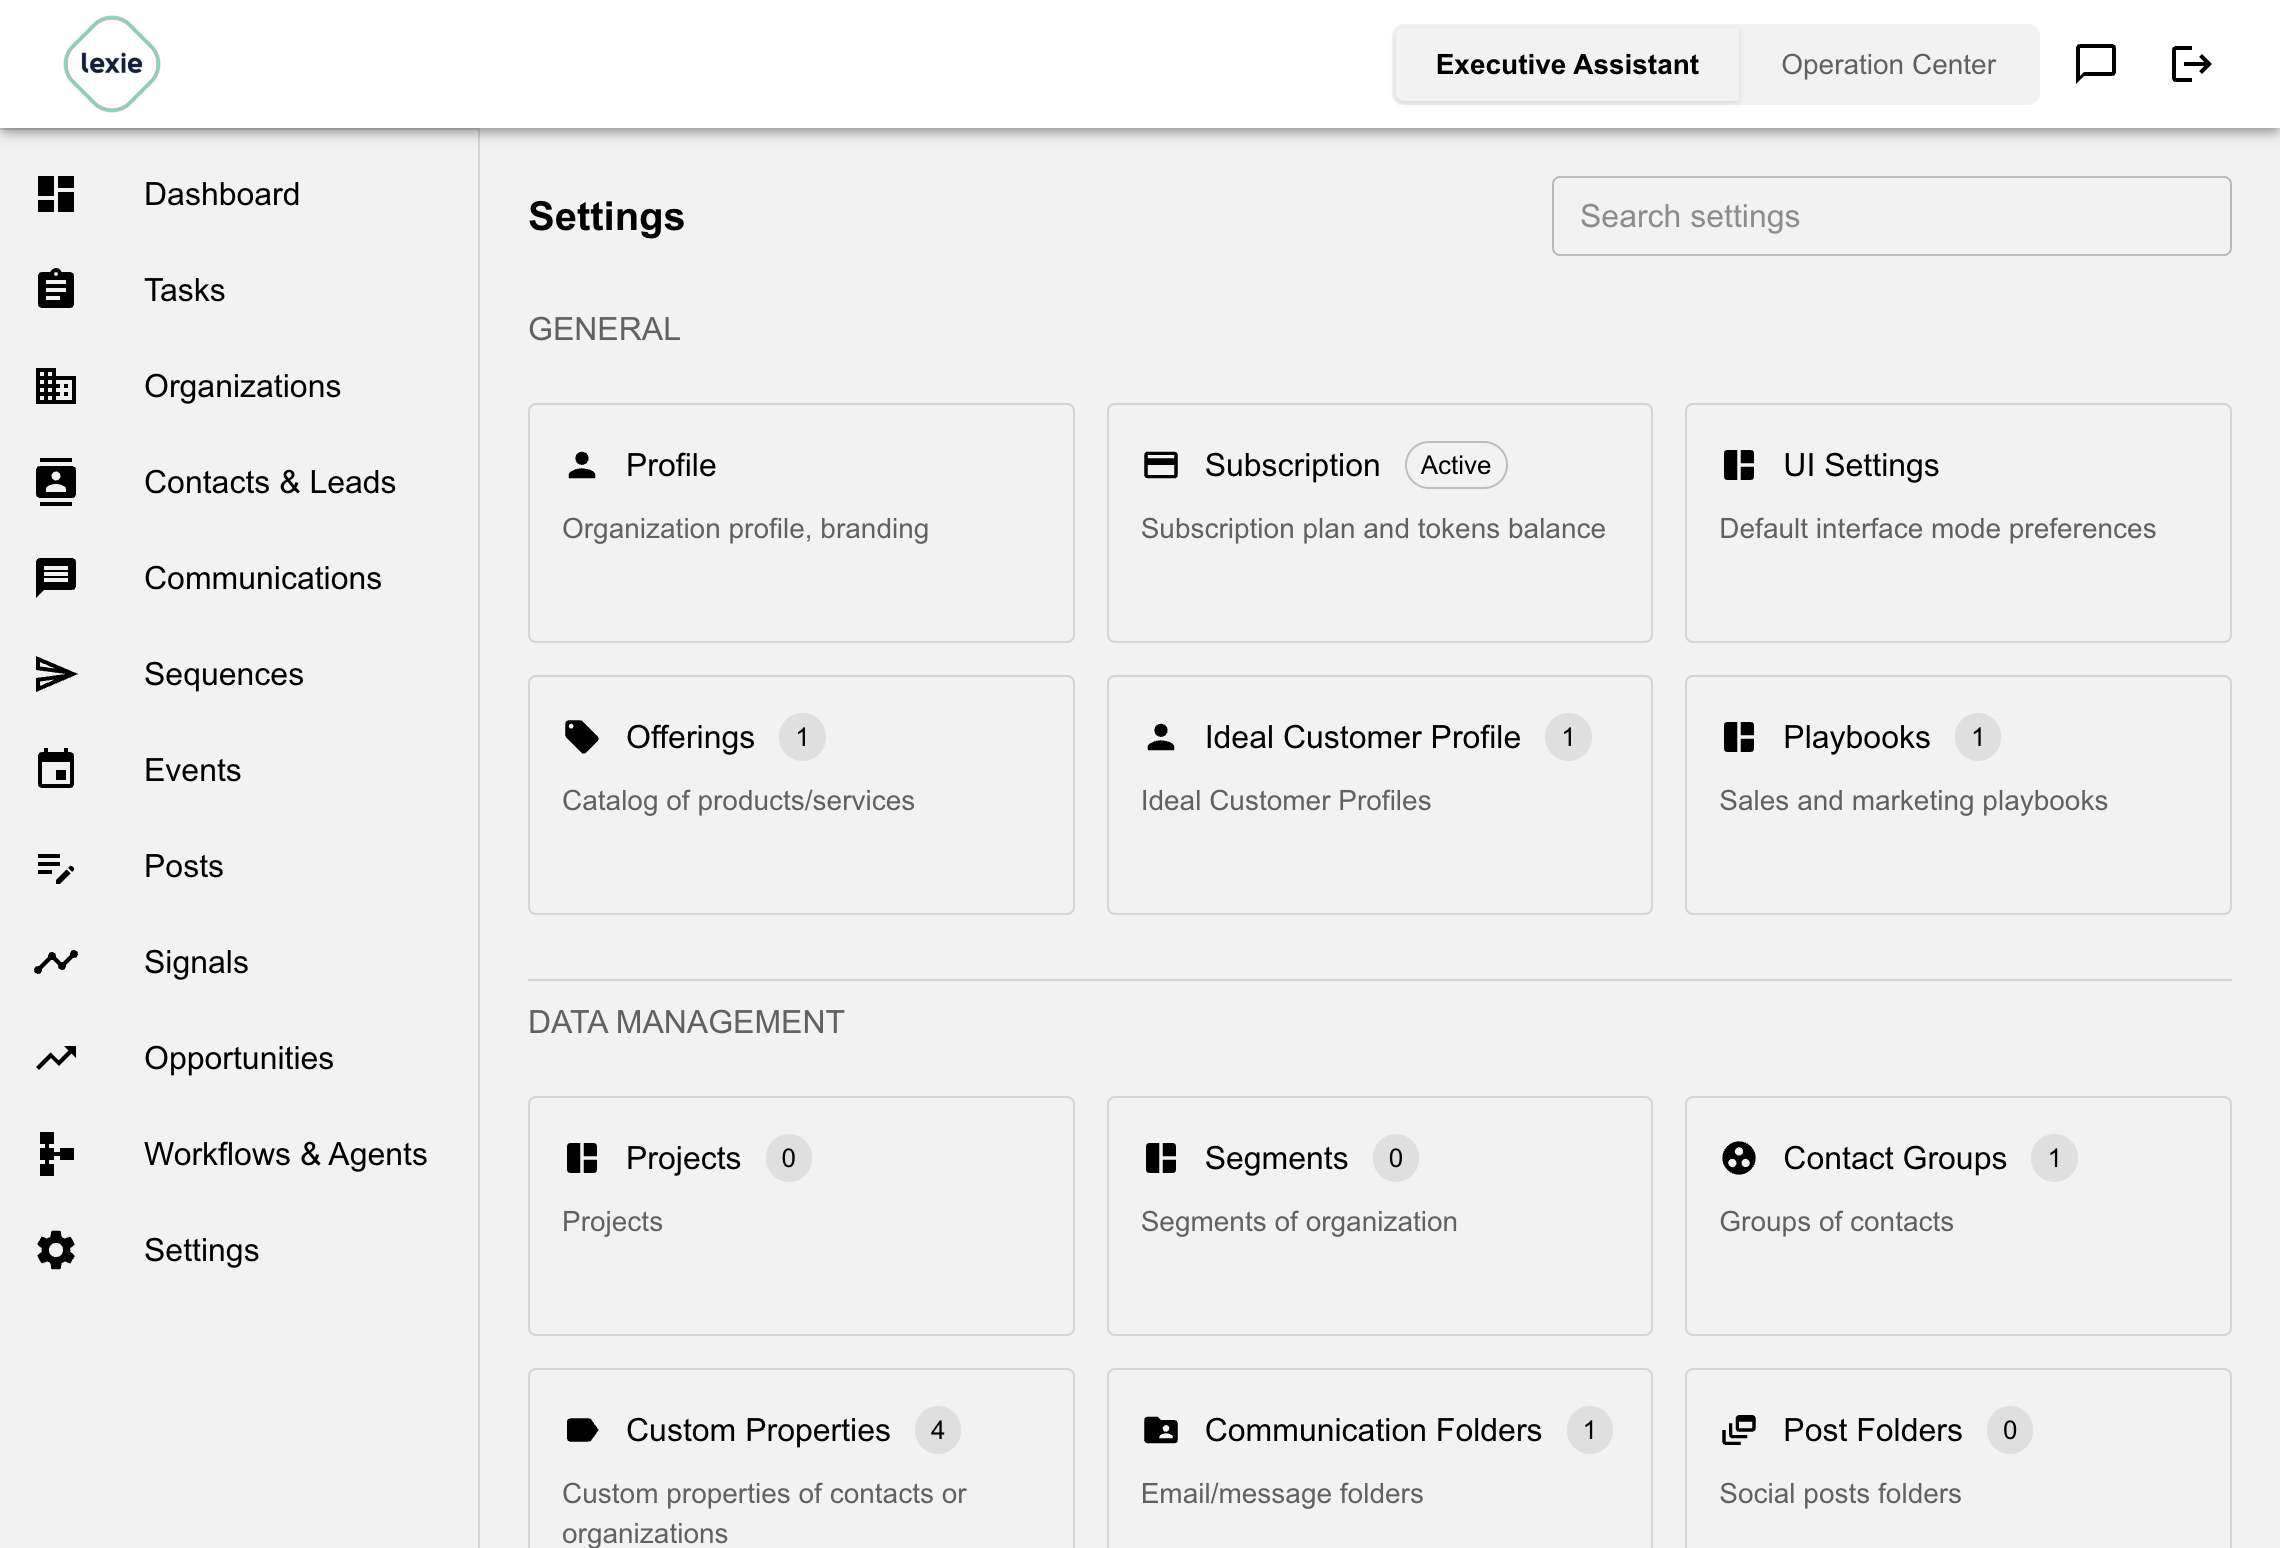
The Settings page is organized into the following groups:
GENERAL
Profile
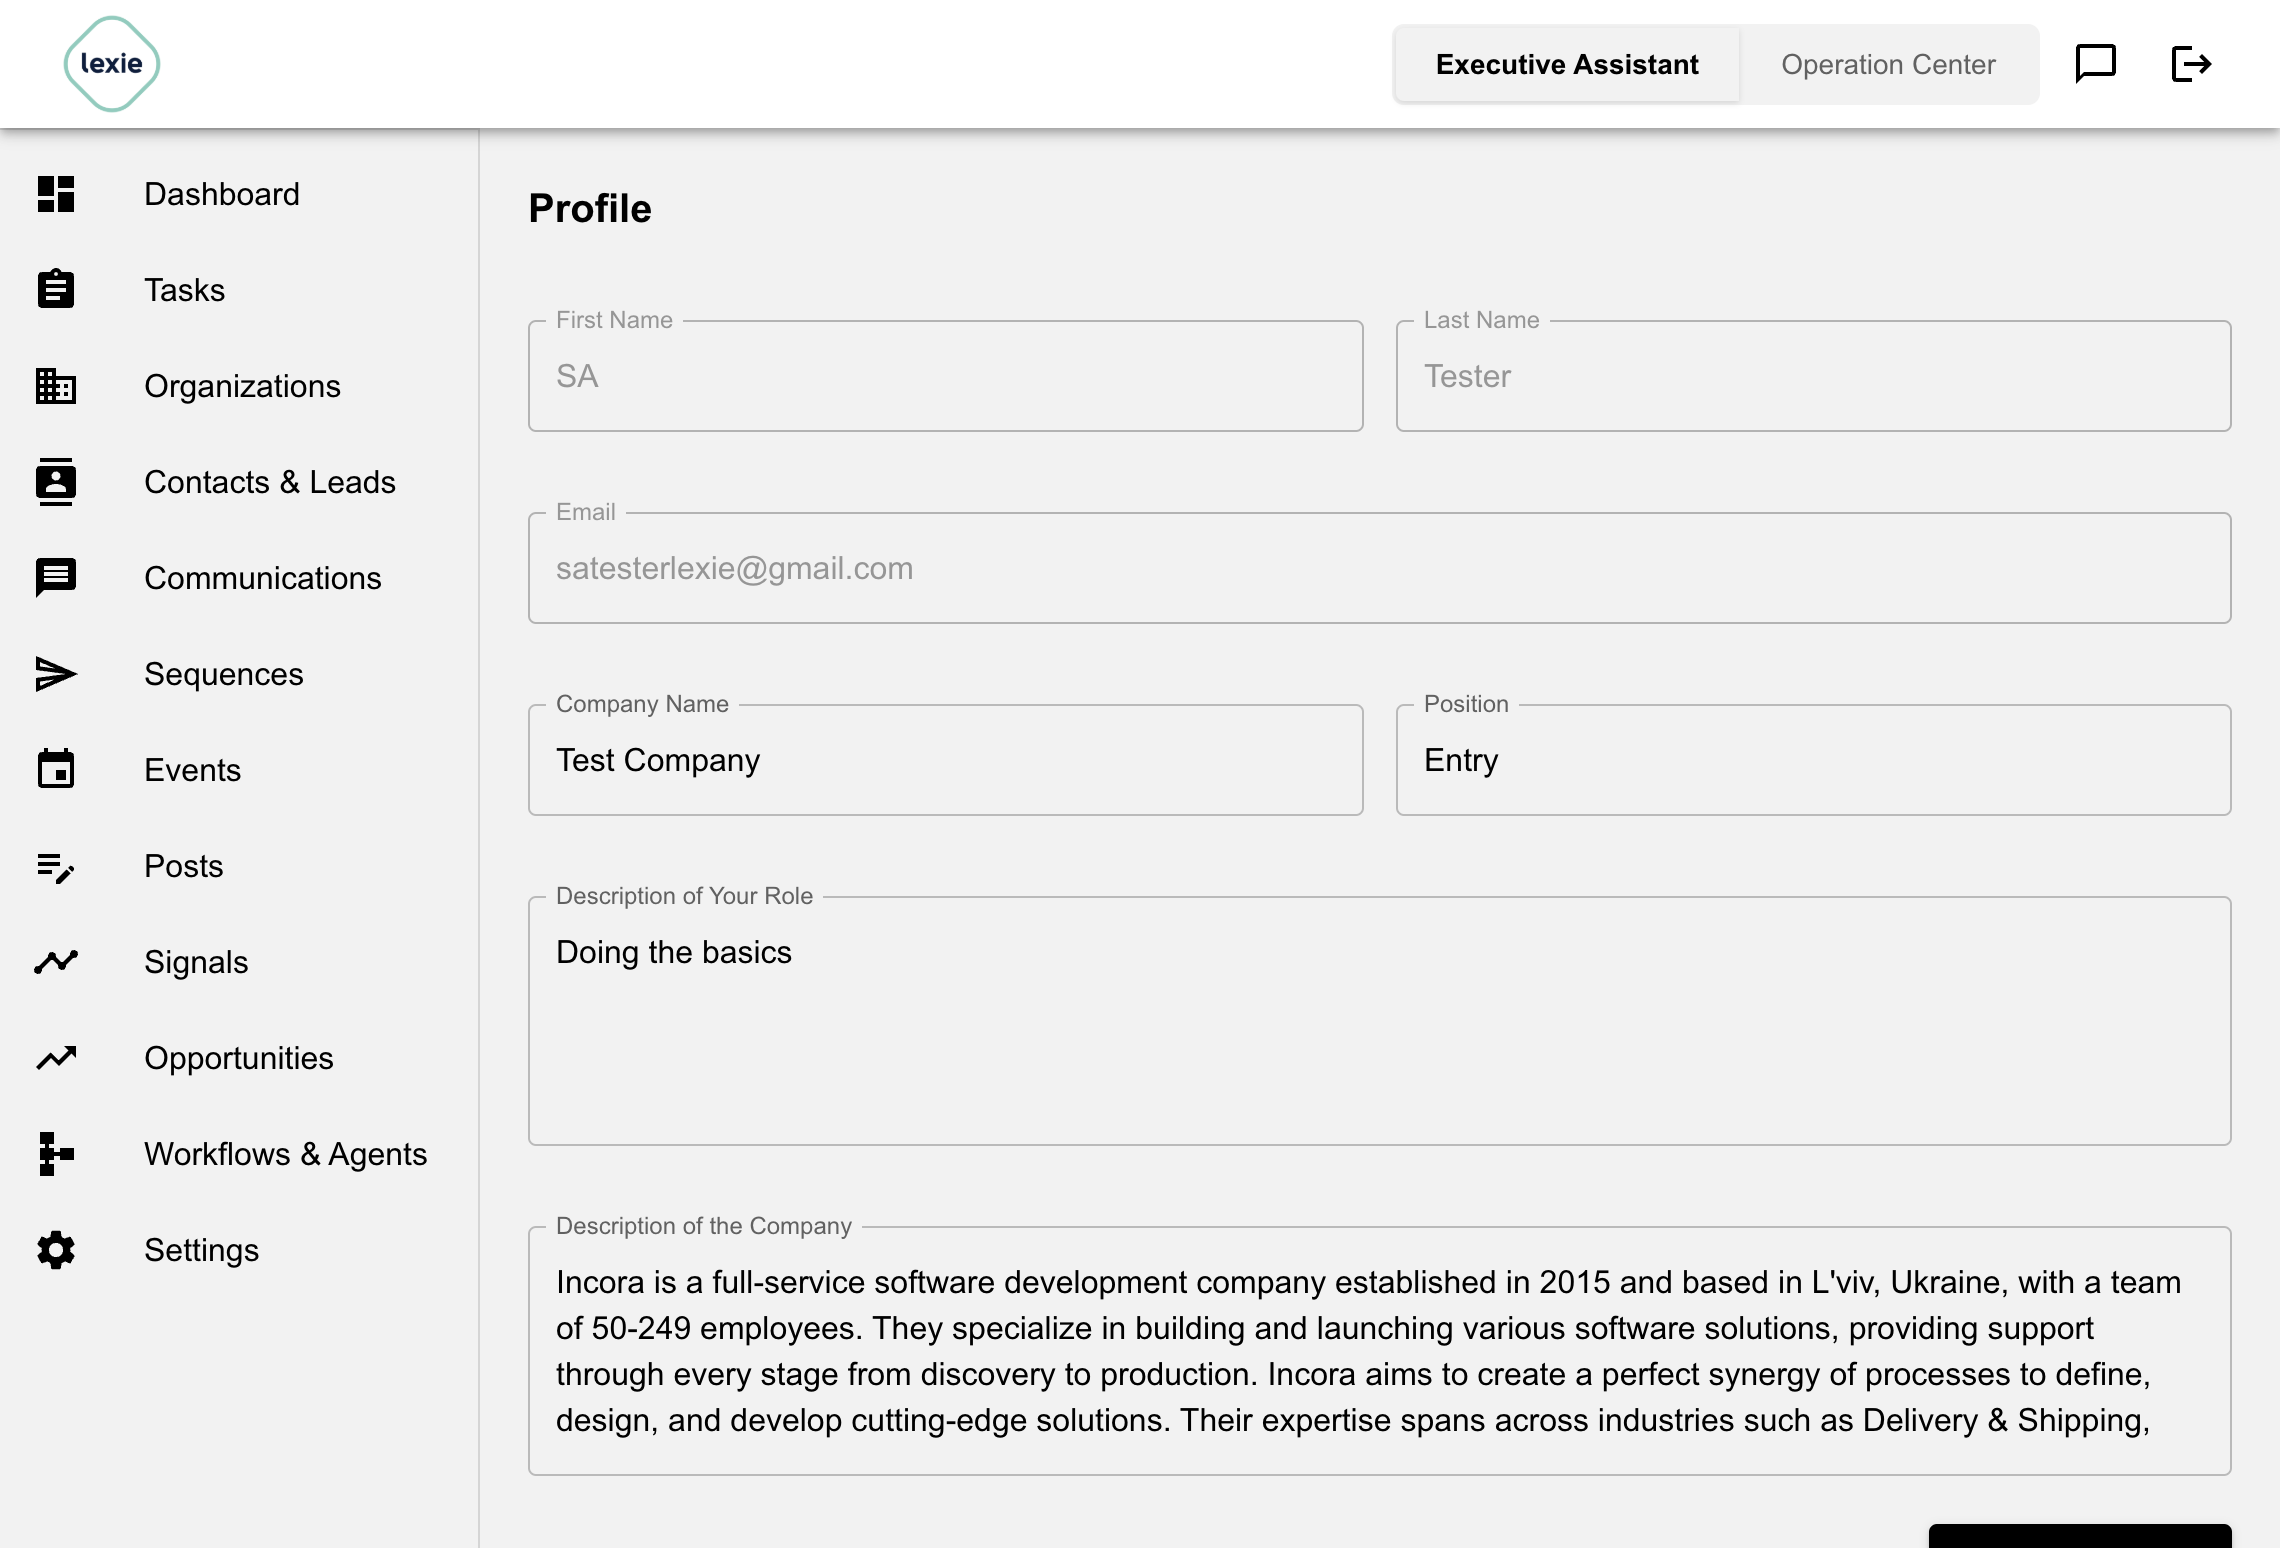
Update your personal and company profile information:
- Name and contact details
- Company information and branding
- Profile picture
- Timezone preferences
- Notification settings
Subscription
View and manage your subscription plan:
- Current Plan: See your active subscription tier
- Tokens Balance: Monitor your available AI tokens for workflows and assistants
- Usage: Track token consumption
Offerings
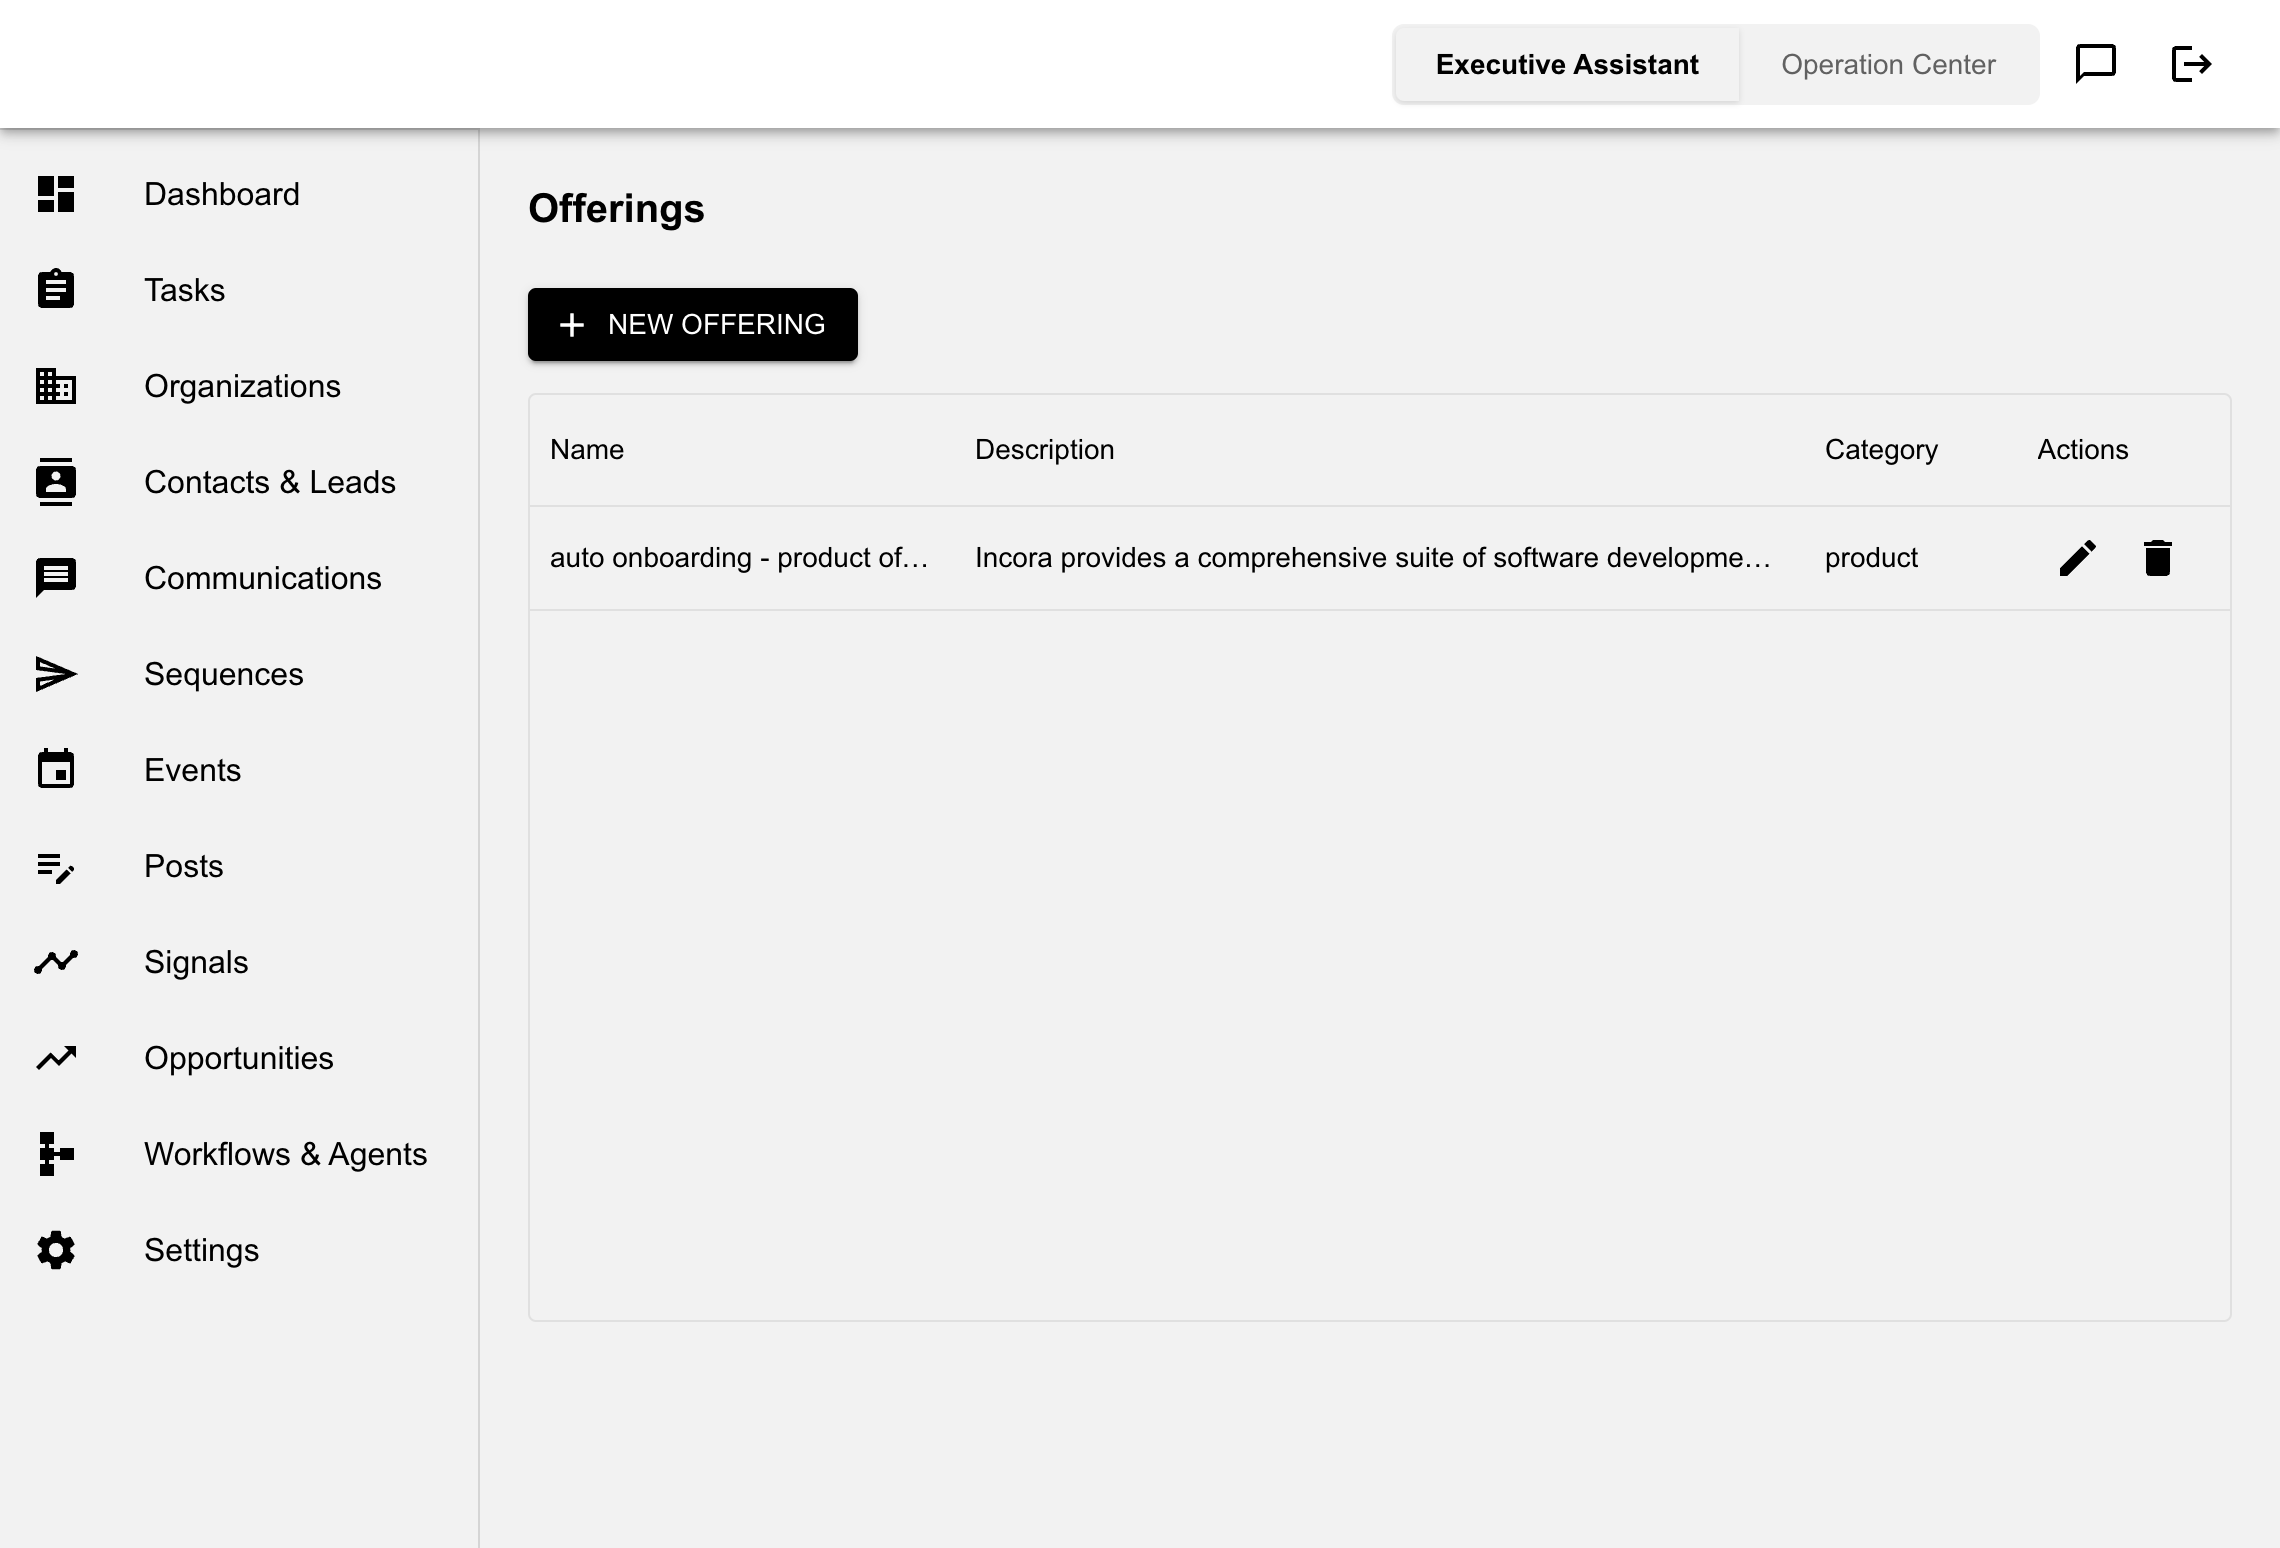
Define and categorize the offerings your organization provides:
- Click New Offering
- Enter offering name and description
- Define key features and benefits
- Save the offering
- Associate ICPs with your offerings
Offerings are also created by auto-onboarding. After the onboarding workflow runs, review the generated offering and edit the name, description, and positioning if needed. If there are old test offerings, remove them before running onboarding again so the new generated offering is easy to identify.
Ideal Customer Profiles
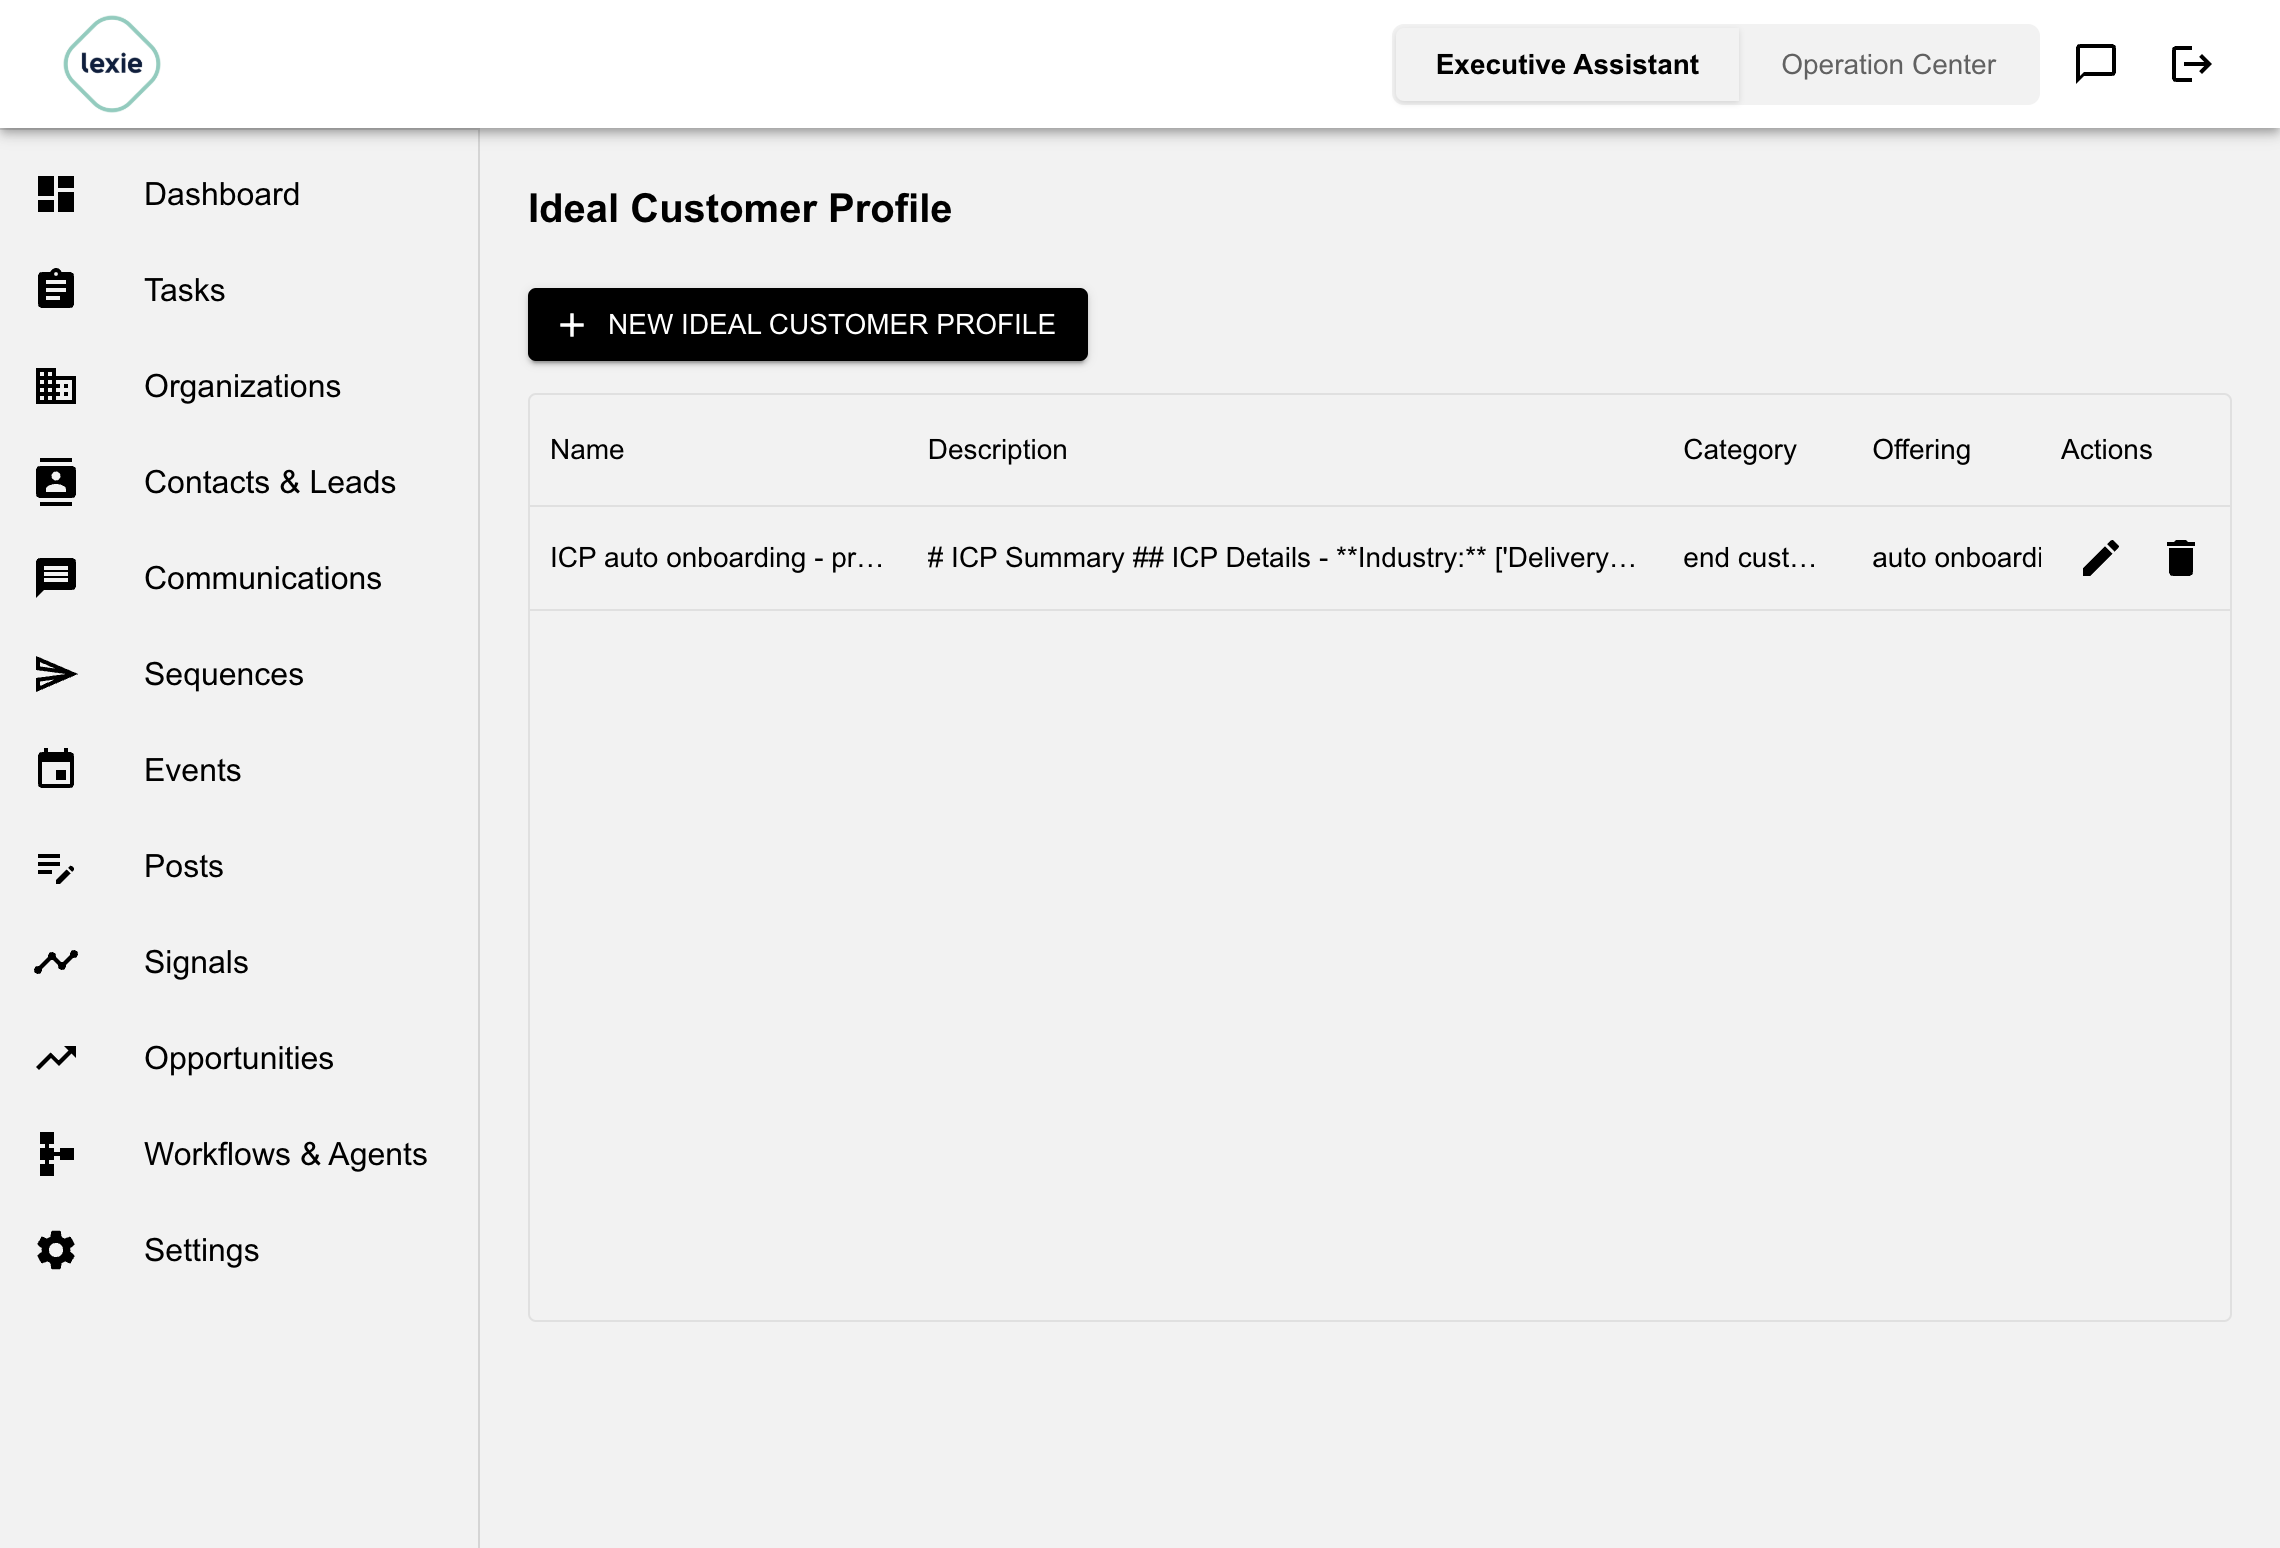
Define your ideal customer profiles. An Ideal Customer Profile describes the type of customer or account you want to target for a specific offering.
Auto-onboarding creates an ICP for the generated offering. Review it after onboarding to make sure the target segment, category, and description match the actual sales motion. Clean up stale test ICPs before demos or re-runs to avoid confusing the new ICP with older generated profiles.
UI Settings
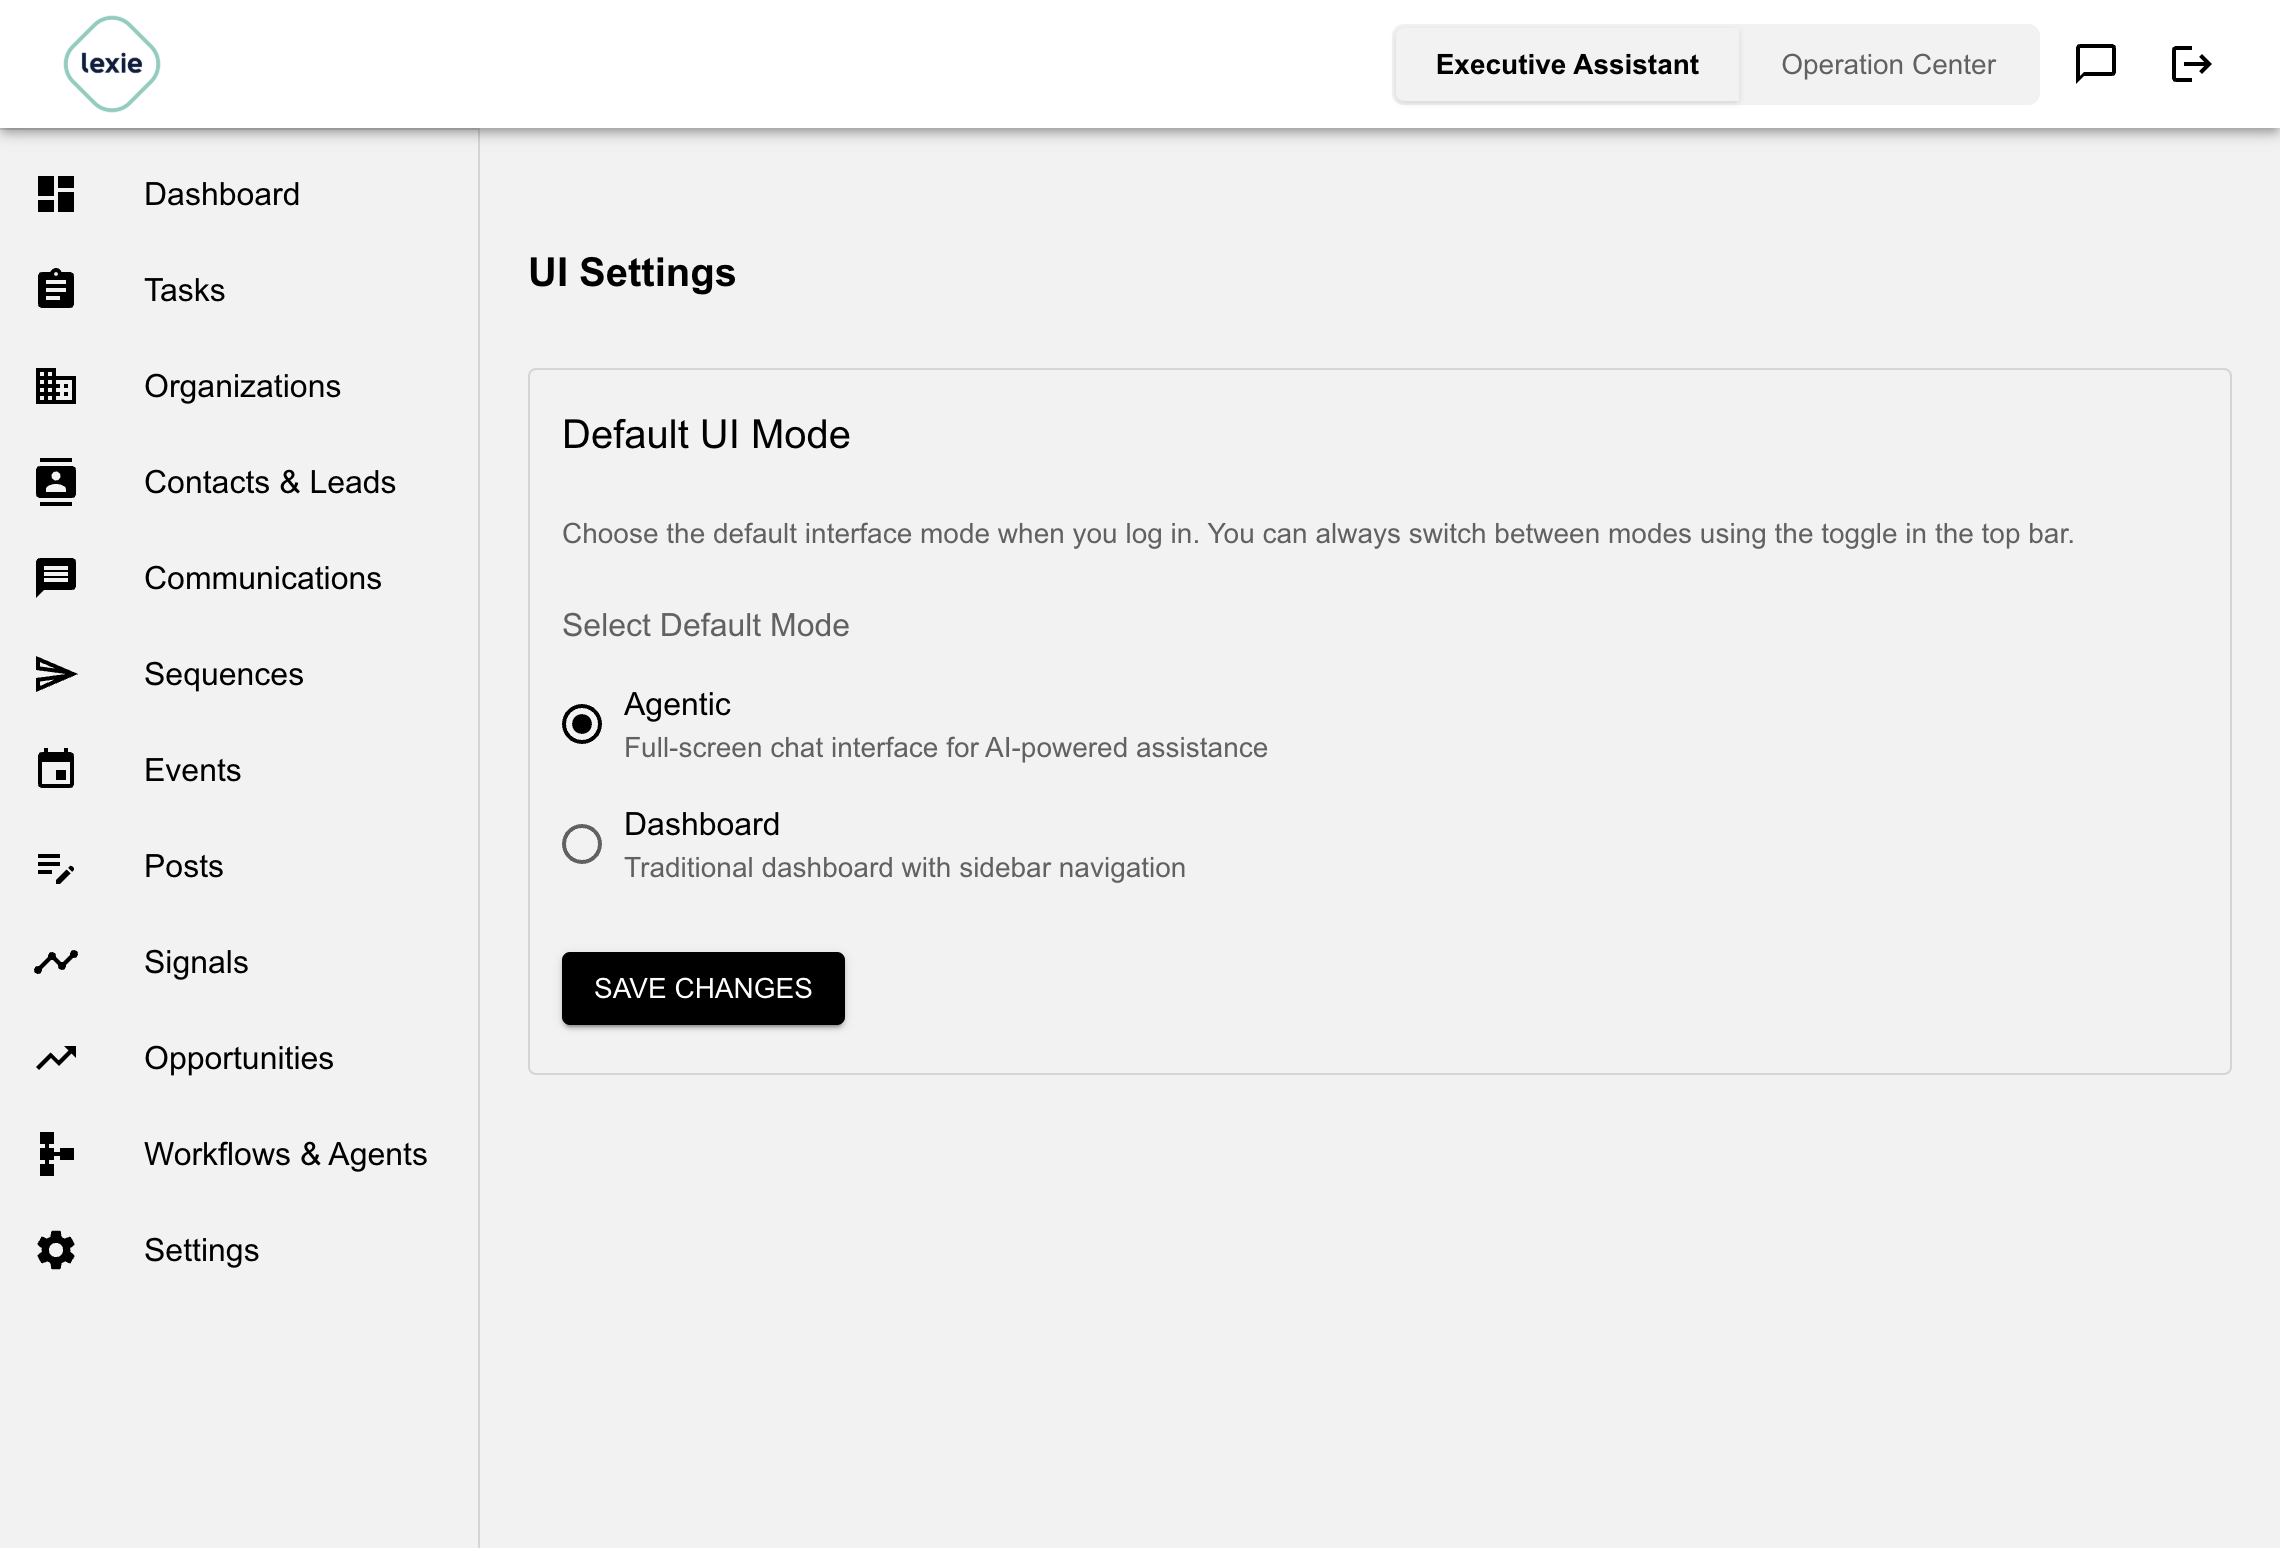
Configure your default interface mode preferences:
- Default Mode: Choose whether to start in Executive Assistant mode or Operation Center mode when you log in
- This setting controls the initial view after login
DATA MANAGEMENT
Projects
Manage team collaboration and workspace isolation (see Projects & Team Collaboration for details).
Segments
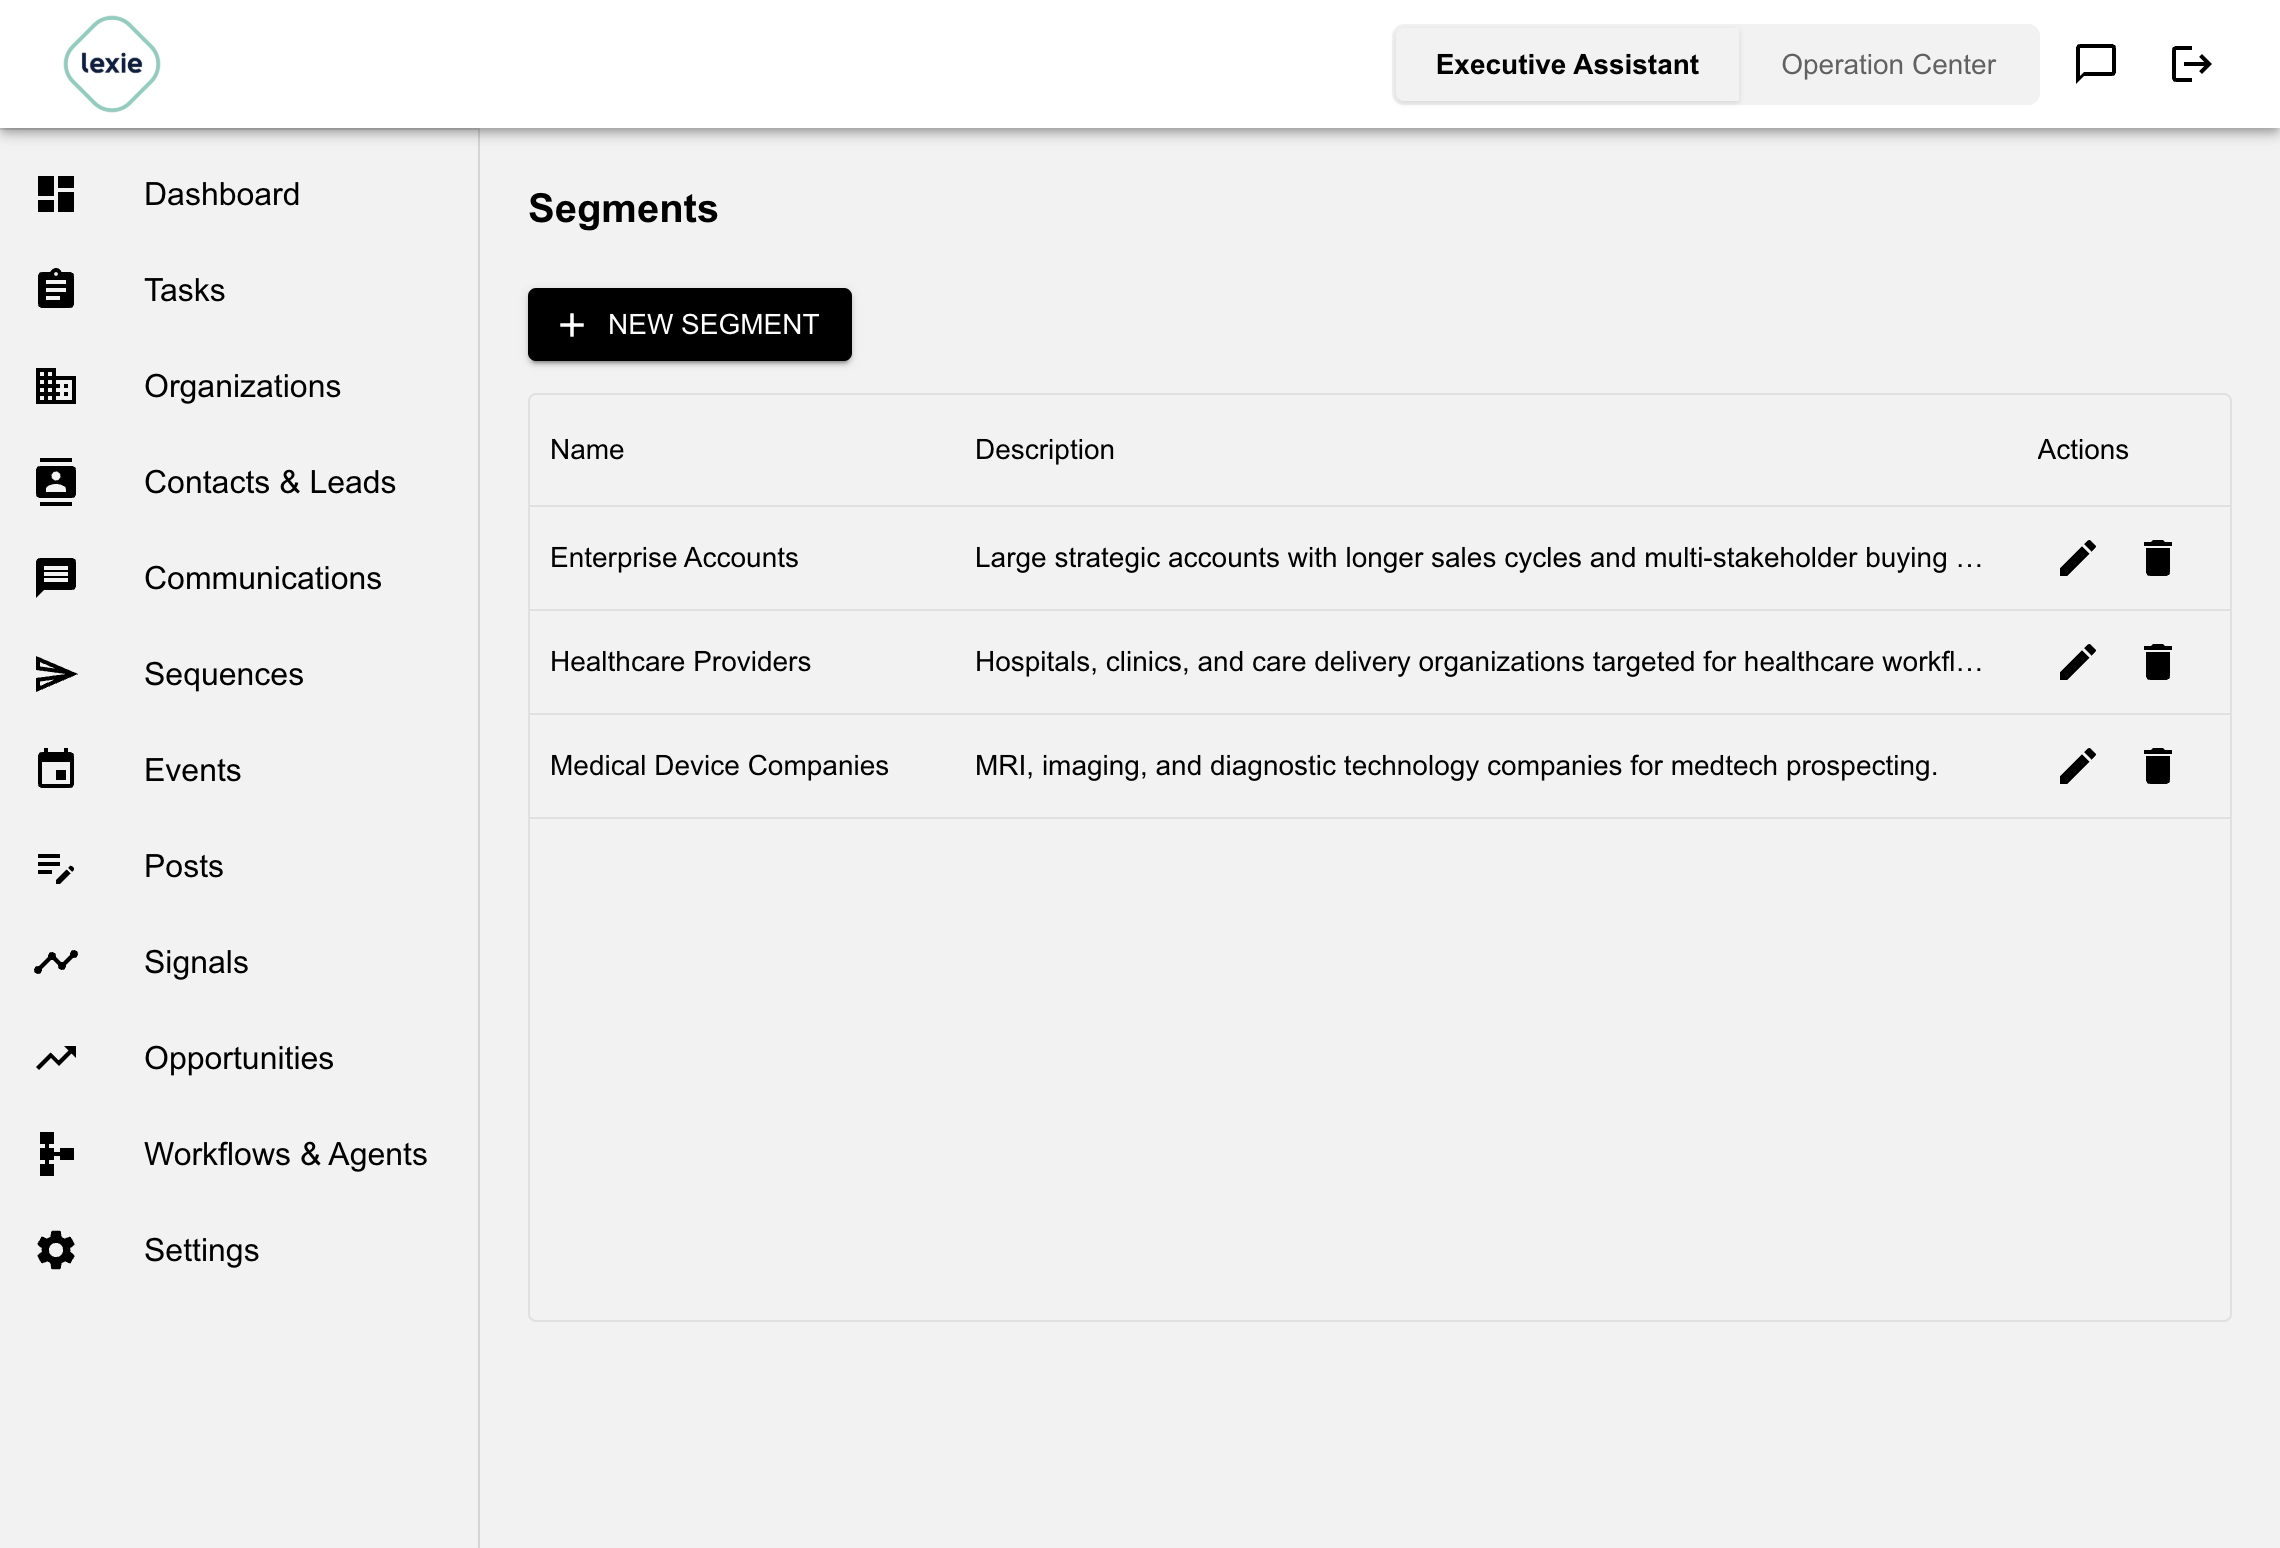
Group organizations into segments for targeted workflows:
- Click New Segment
- Enter segment name and description
- Save the segment
- Assign organizations to segments from the Organizations page
Contact Groups
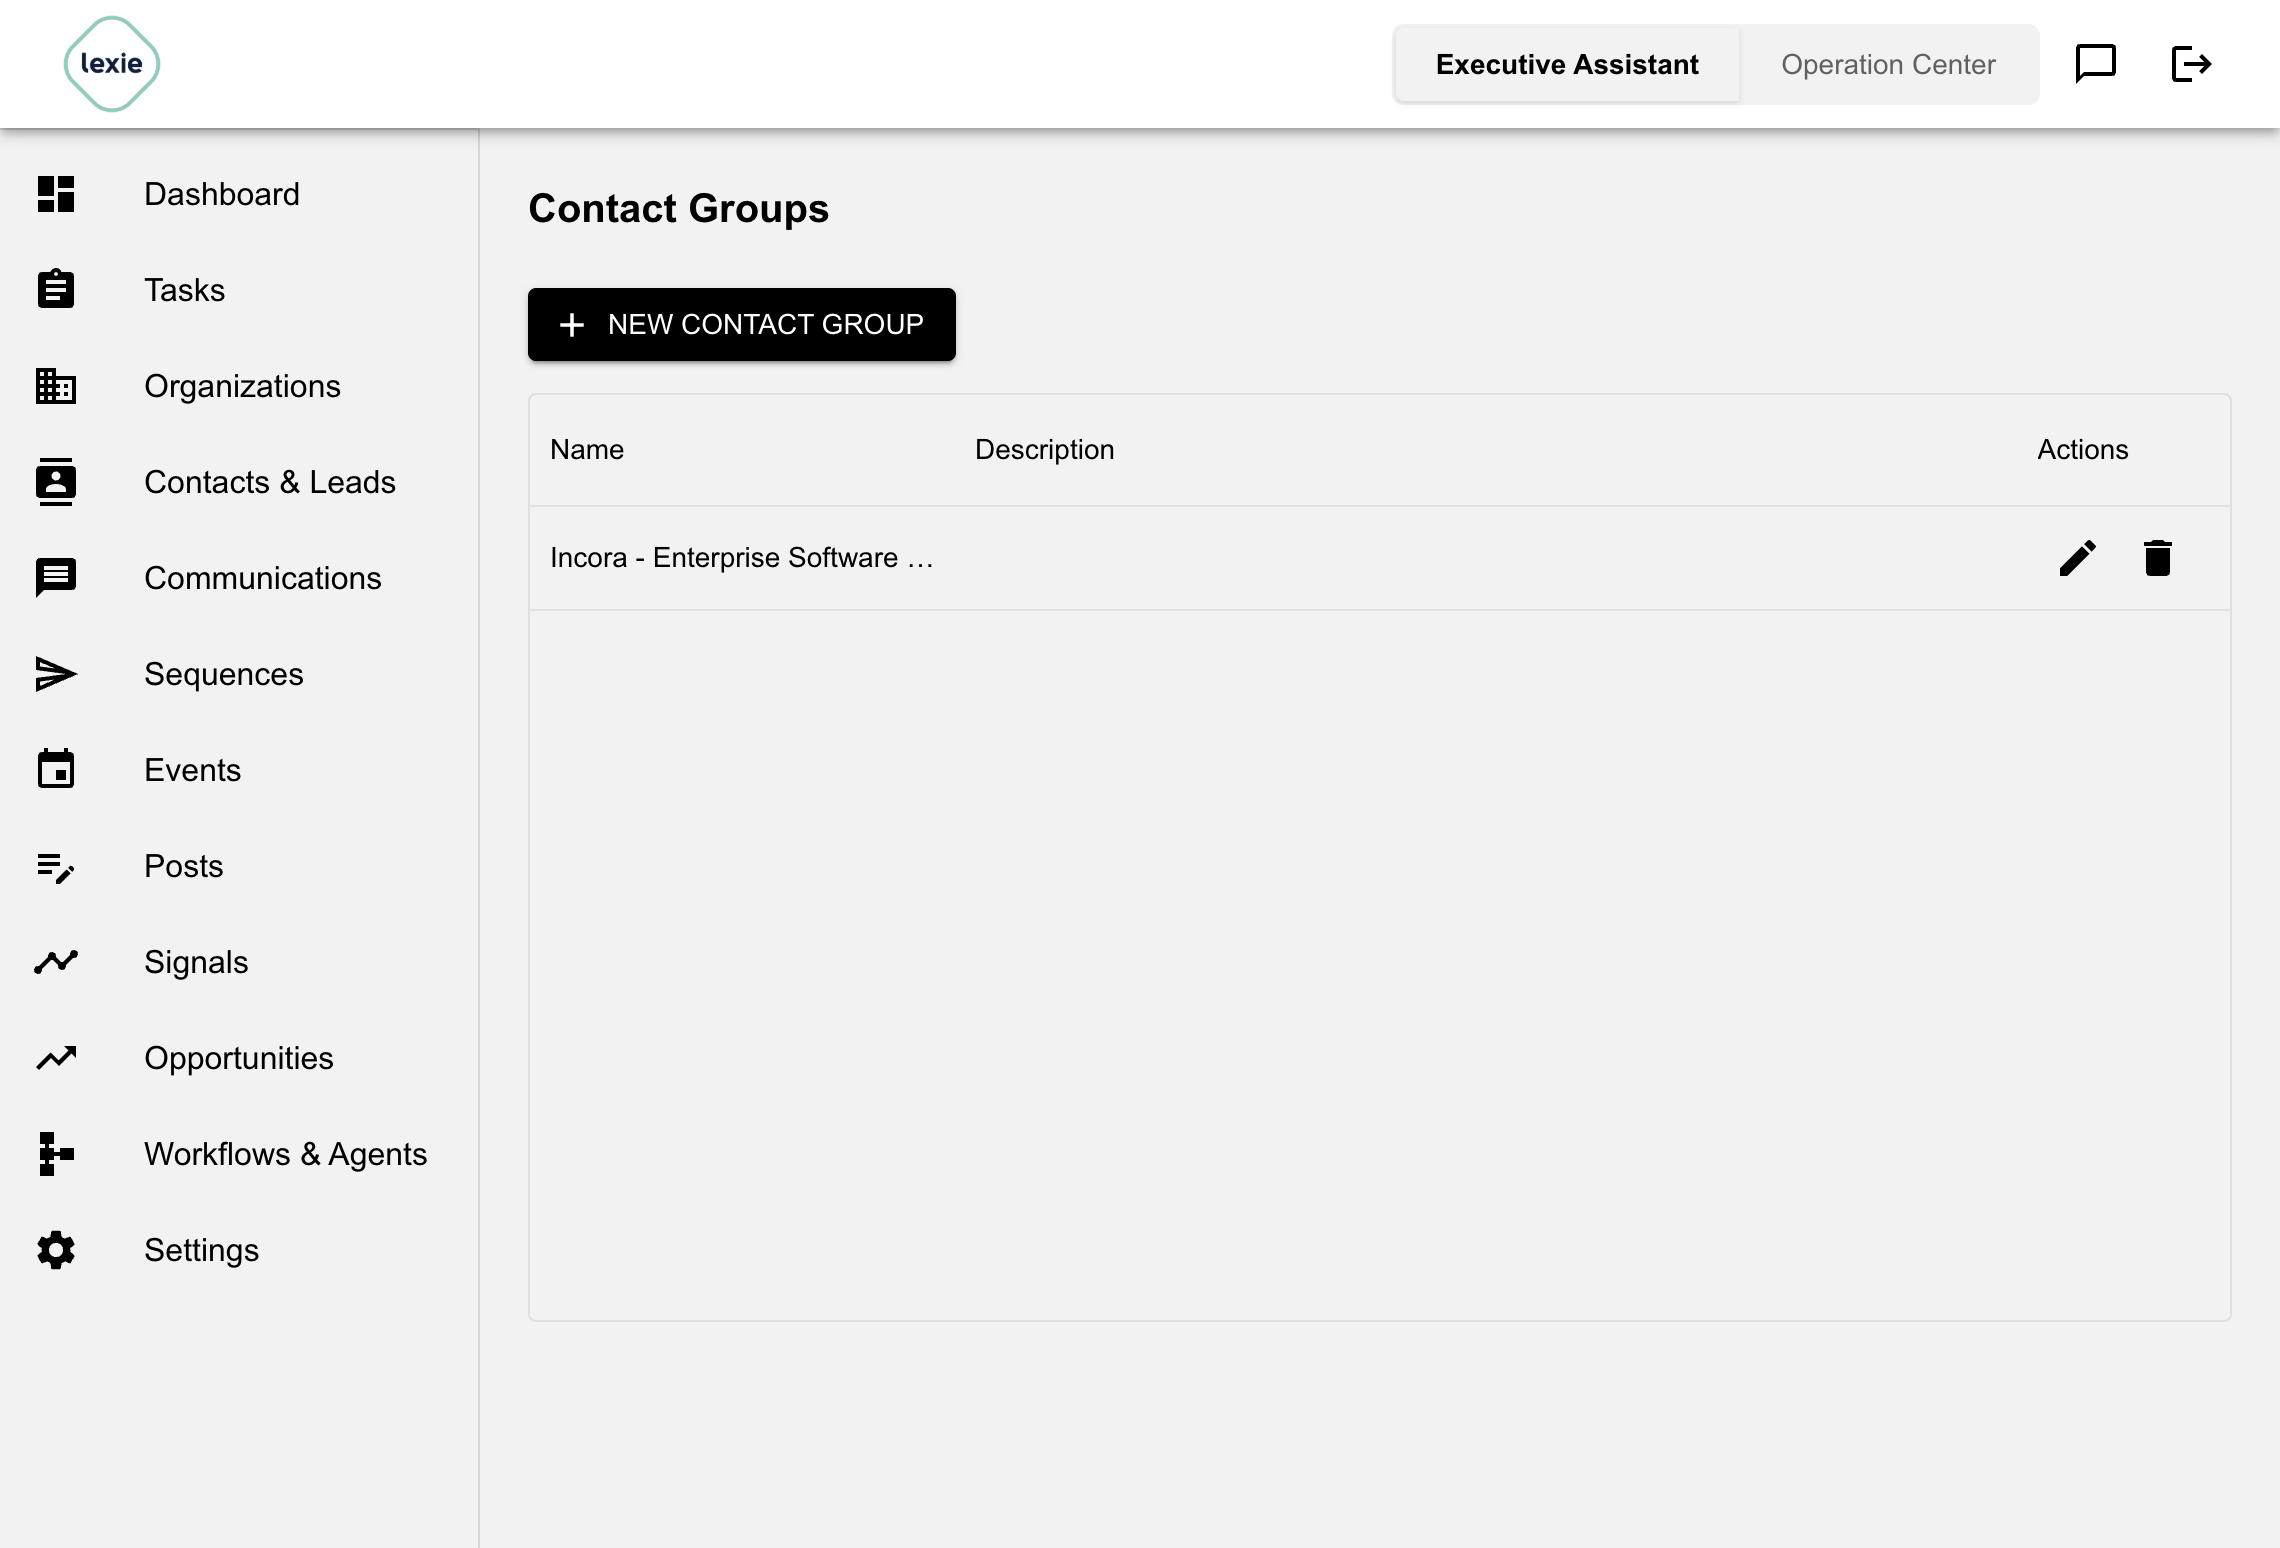
Manage groups of contacts for streamlined communication:
- Click New Contact Group
- Enter group name and description
- Save the contact group
- Assign contacts to groups from the Contacts page
Custom Properties
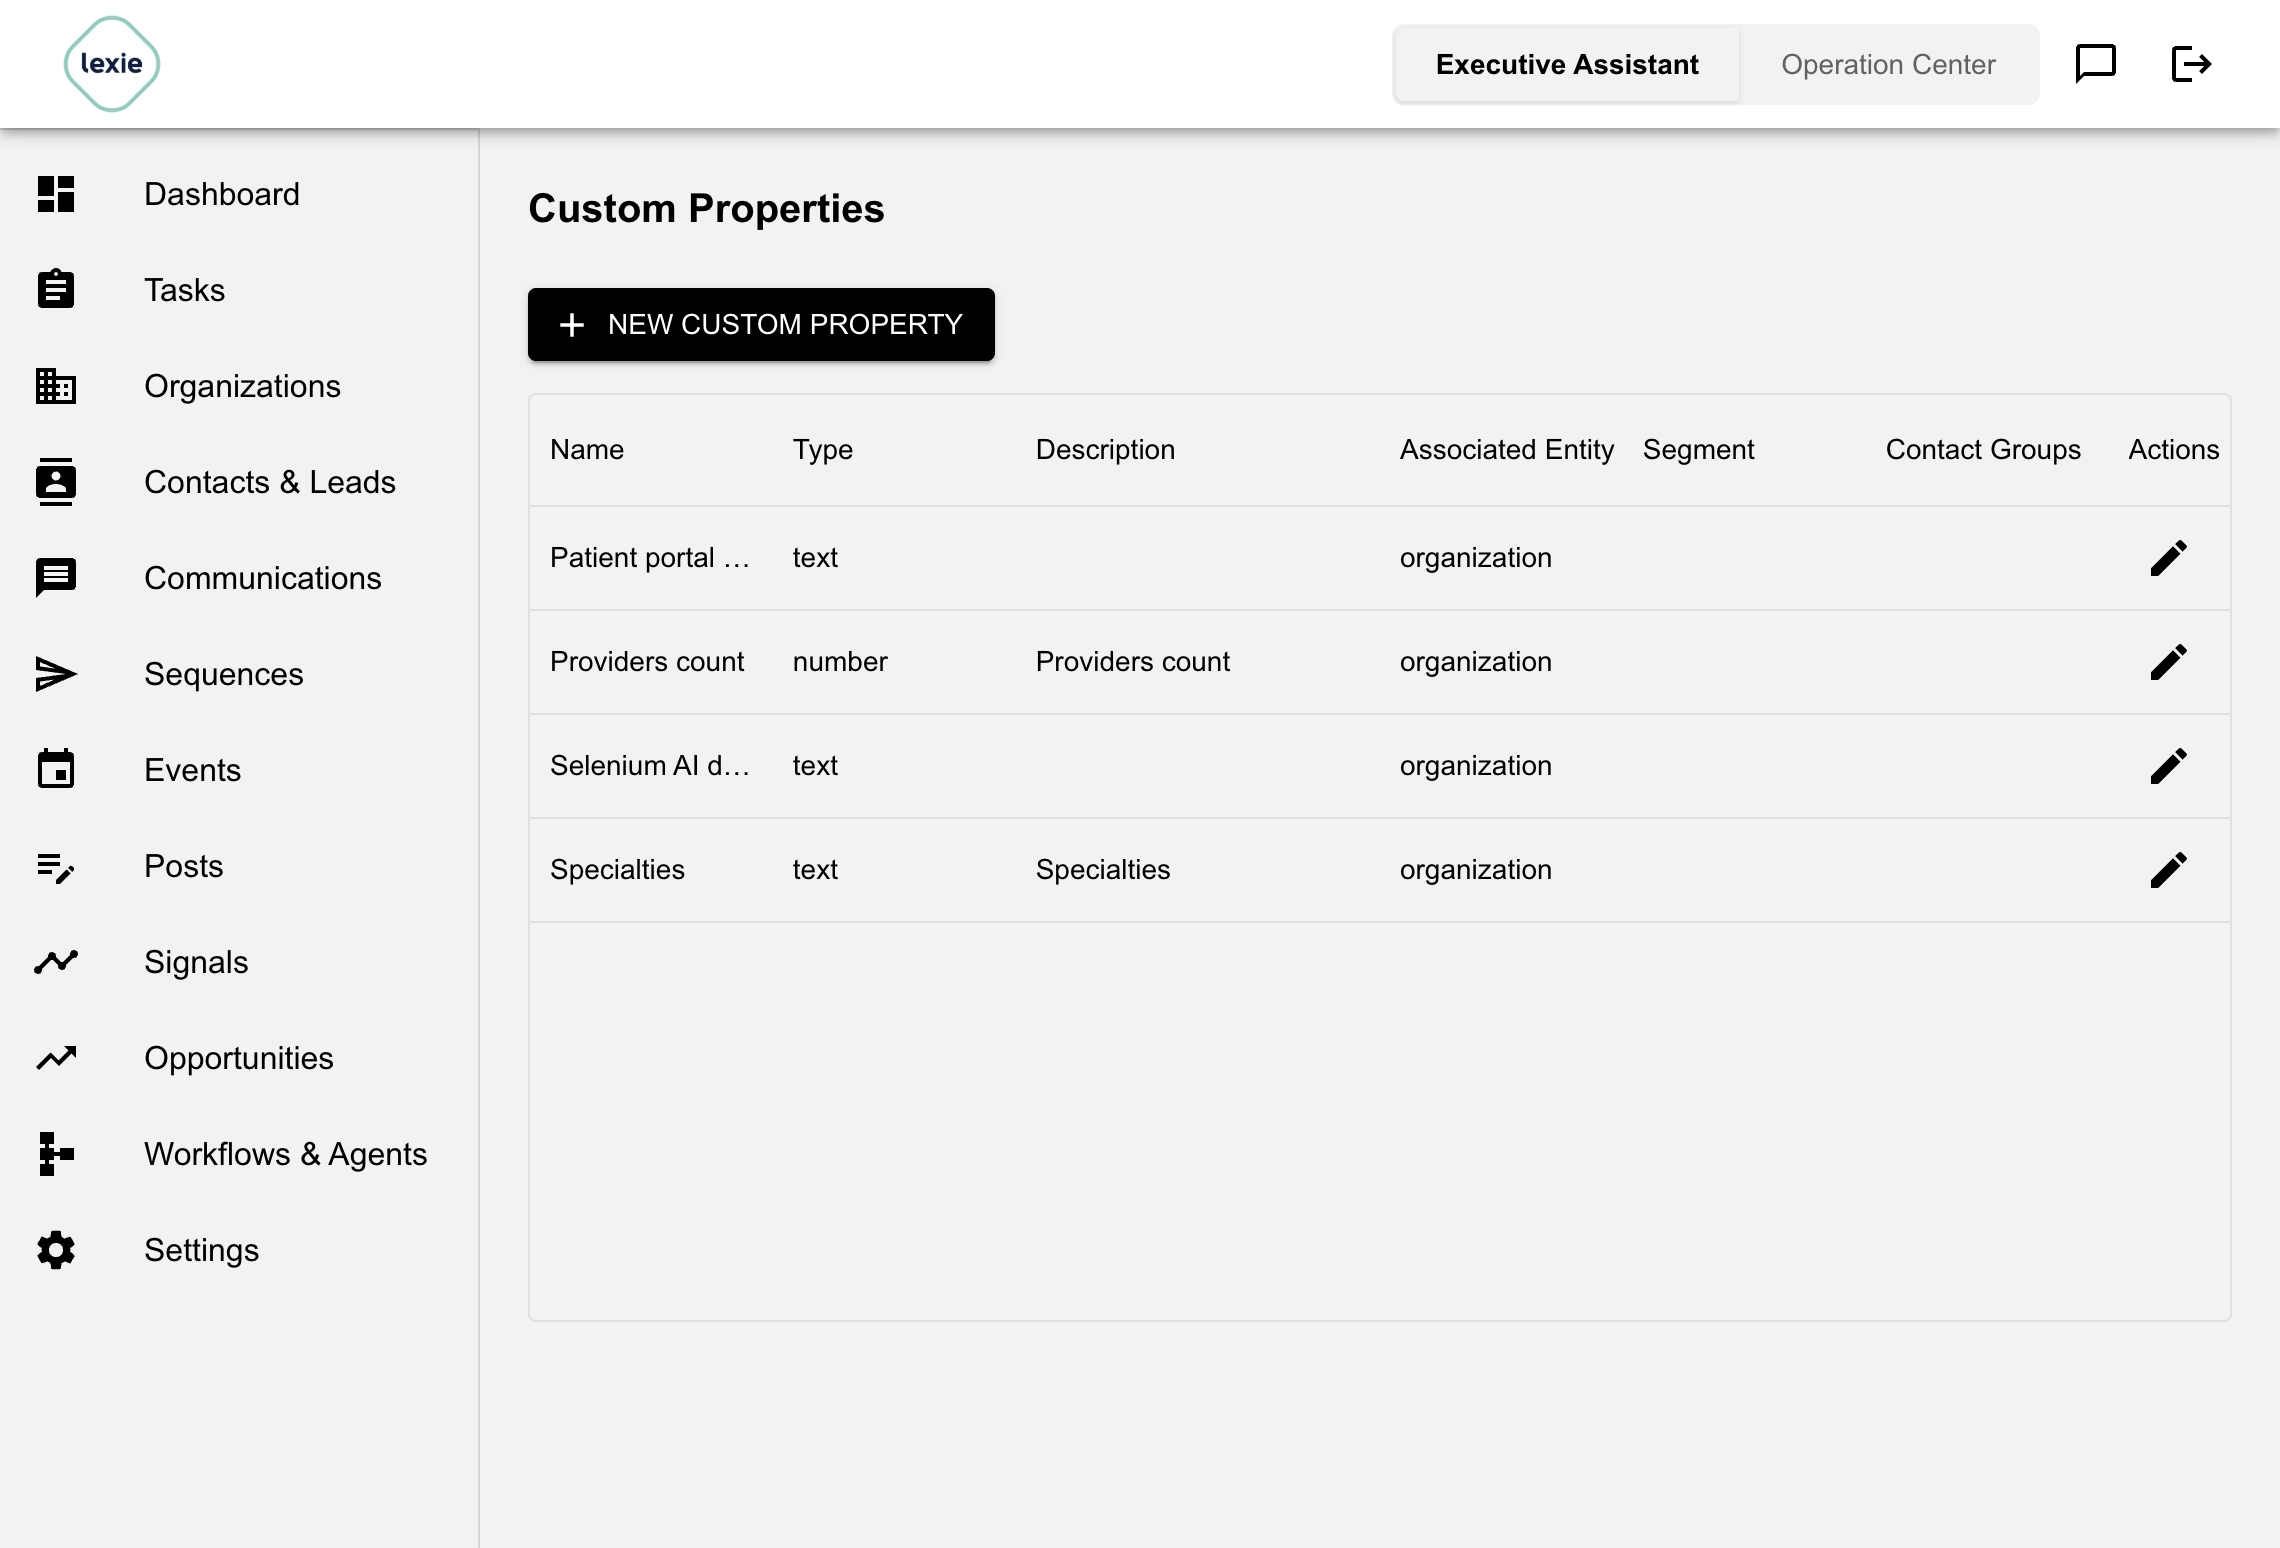
Define and manage custom properties to capture specific data points.
Creating a Custom Property:
- Go to Settings > Custom Properties
- Click New Custom Property
- Configure:
- Name: Property name (must be unique)
- Type: Select from Text, Number, Date, Collection, Dictionary, Tag, Boolean, Markdown Text
- Description: Explain what this property captures
- Associated Entity: Choose Organizations or Contacts
- Segments/Contact Groups: Select which segments or groups will use this property
- Click Save
Important:
- A custom property is either associated with organizations or contact groups
- You cannot create duplicated custom properties or ones with the same name as native or indirect properties
- Custom properties appear as columns in your tables
- You can filter and sort by custom properties
Communication Folders
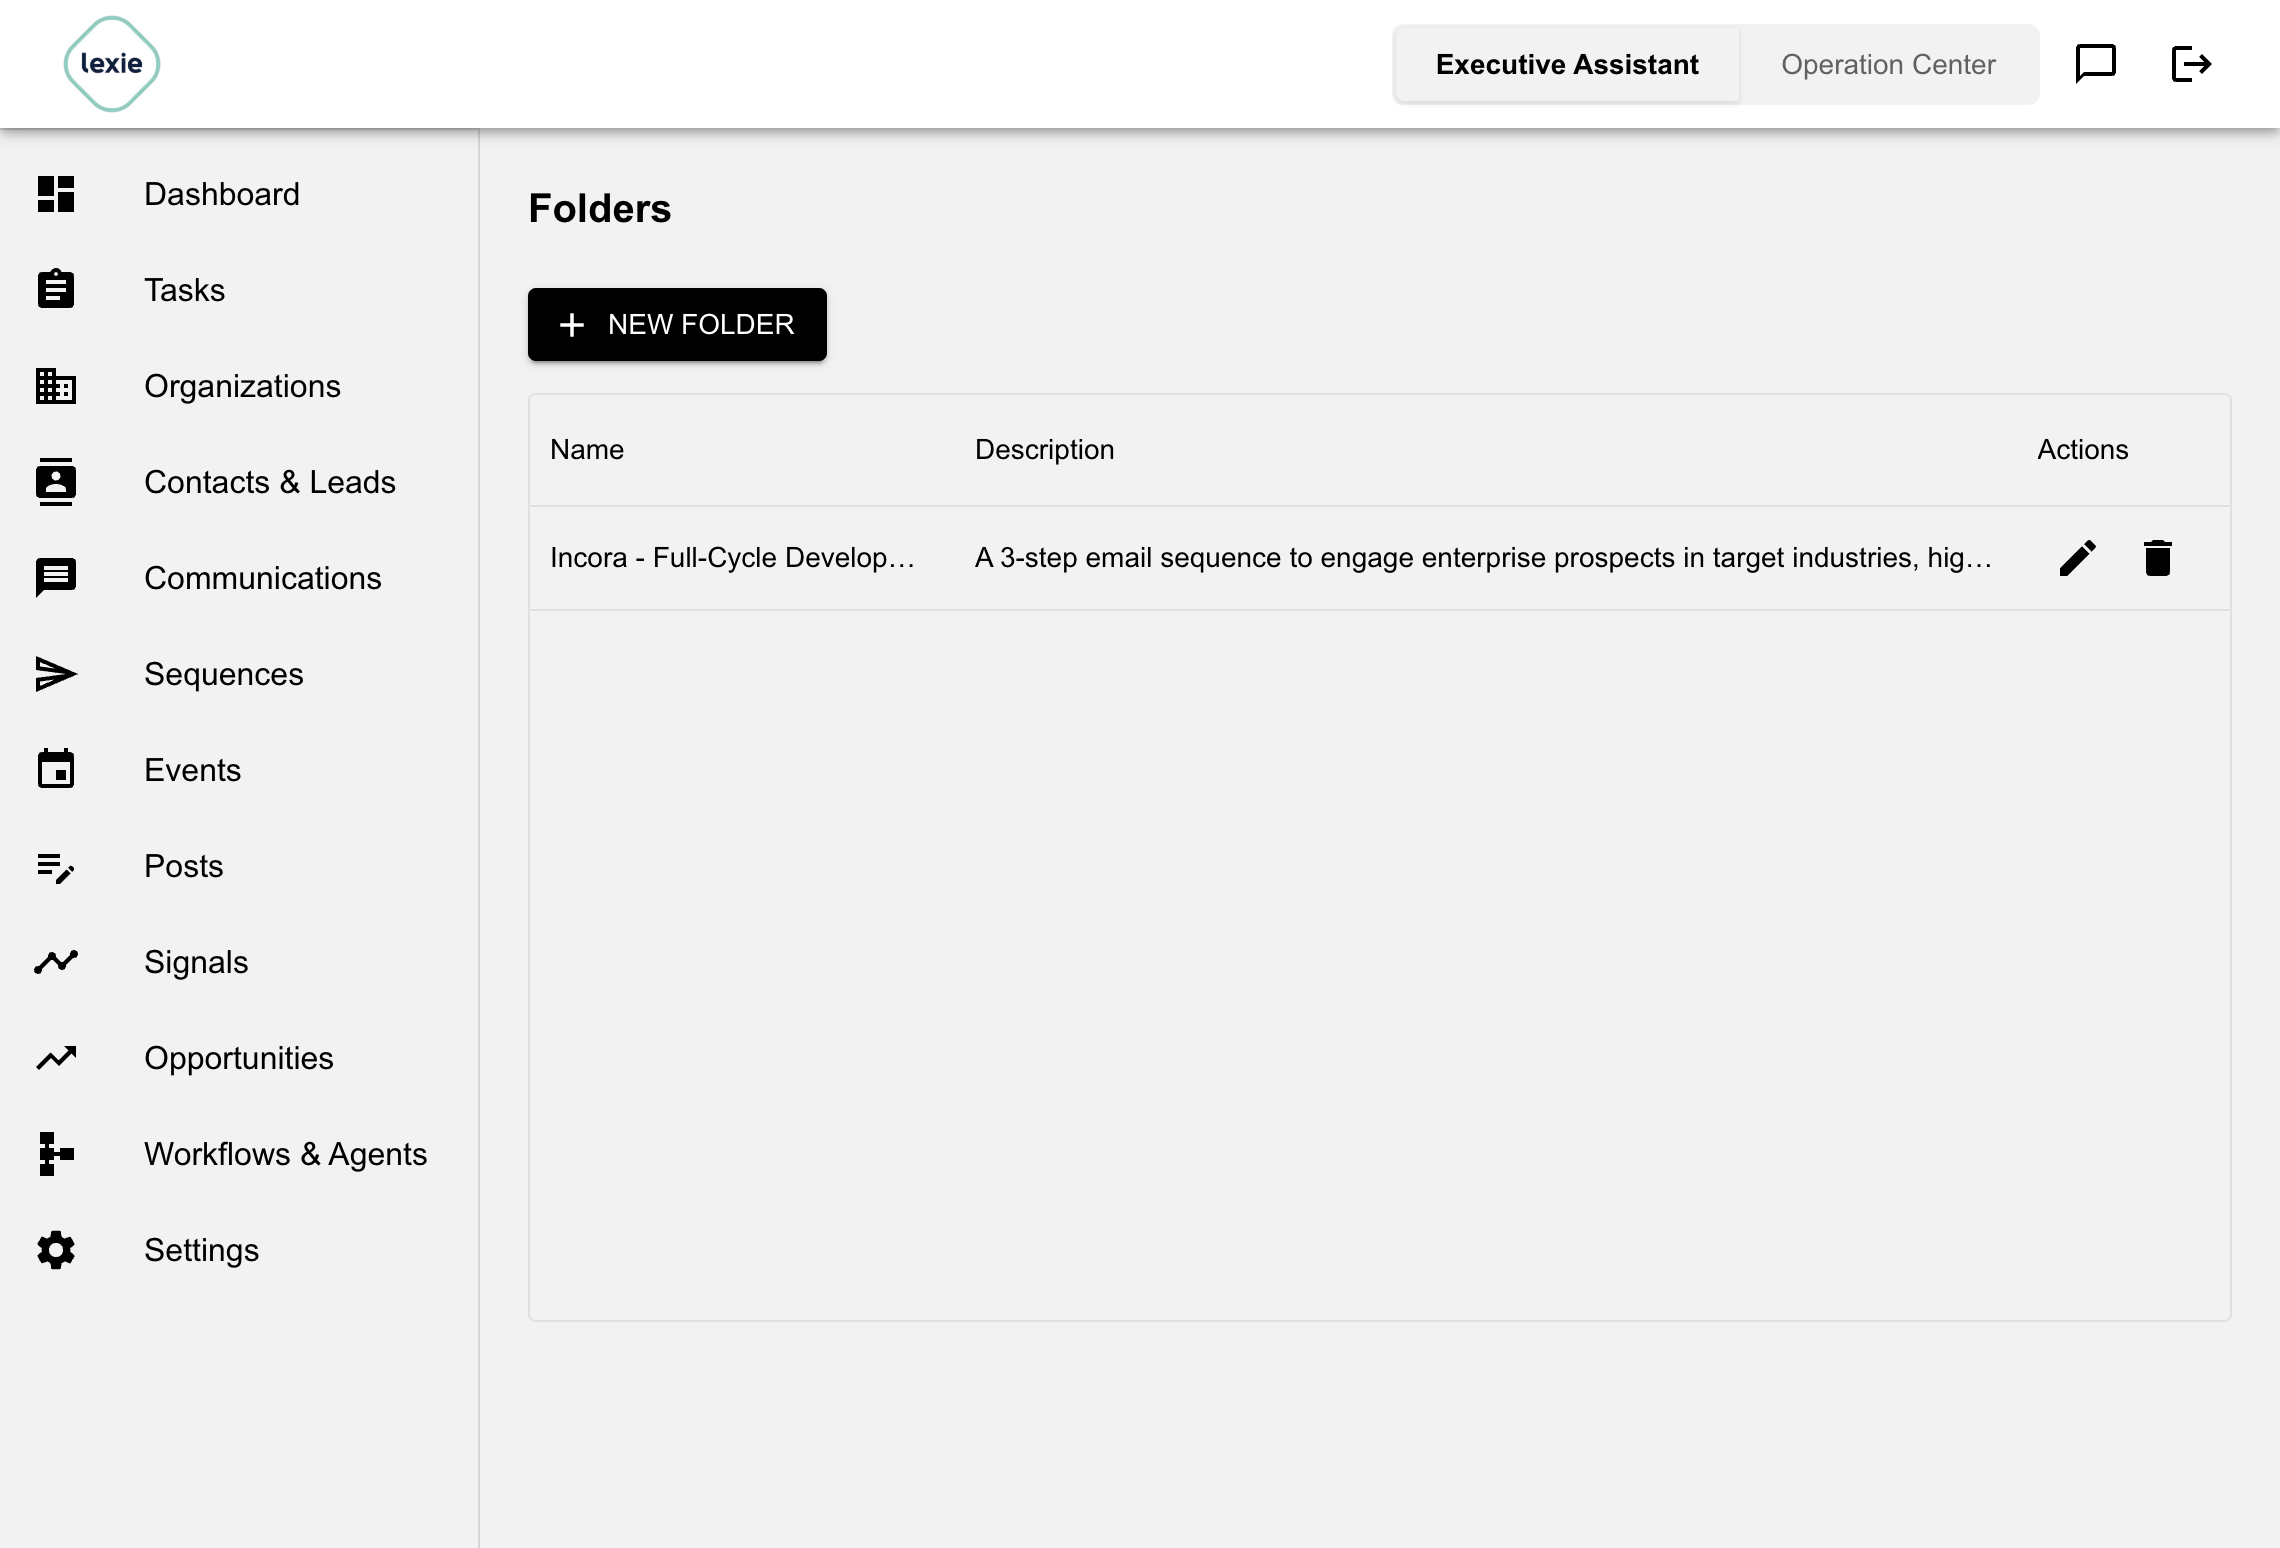
Organize your communication threads for efficient tracking and follow-ups:
- Click New Folder
- Enter folder name
- Organize your communications by moving them into appropriate folders
Post Folders
Store and manage your drafts, published, and scheduled posts:
- Click New Folder
- Enter folder name
- Organize your social media posts into folders
INTEGRATIONS
External Credentials
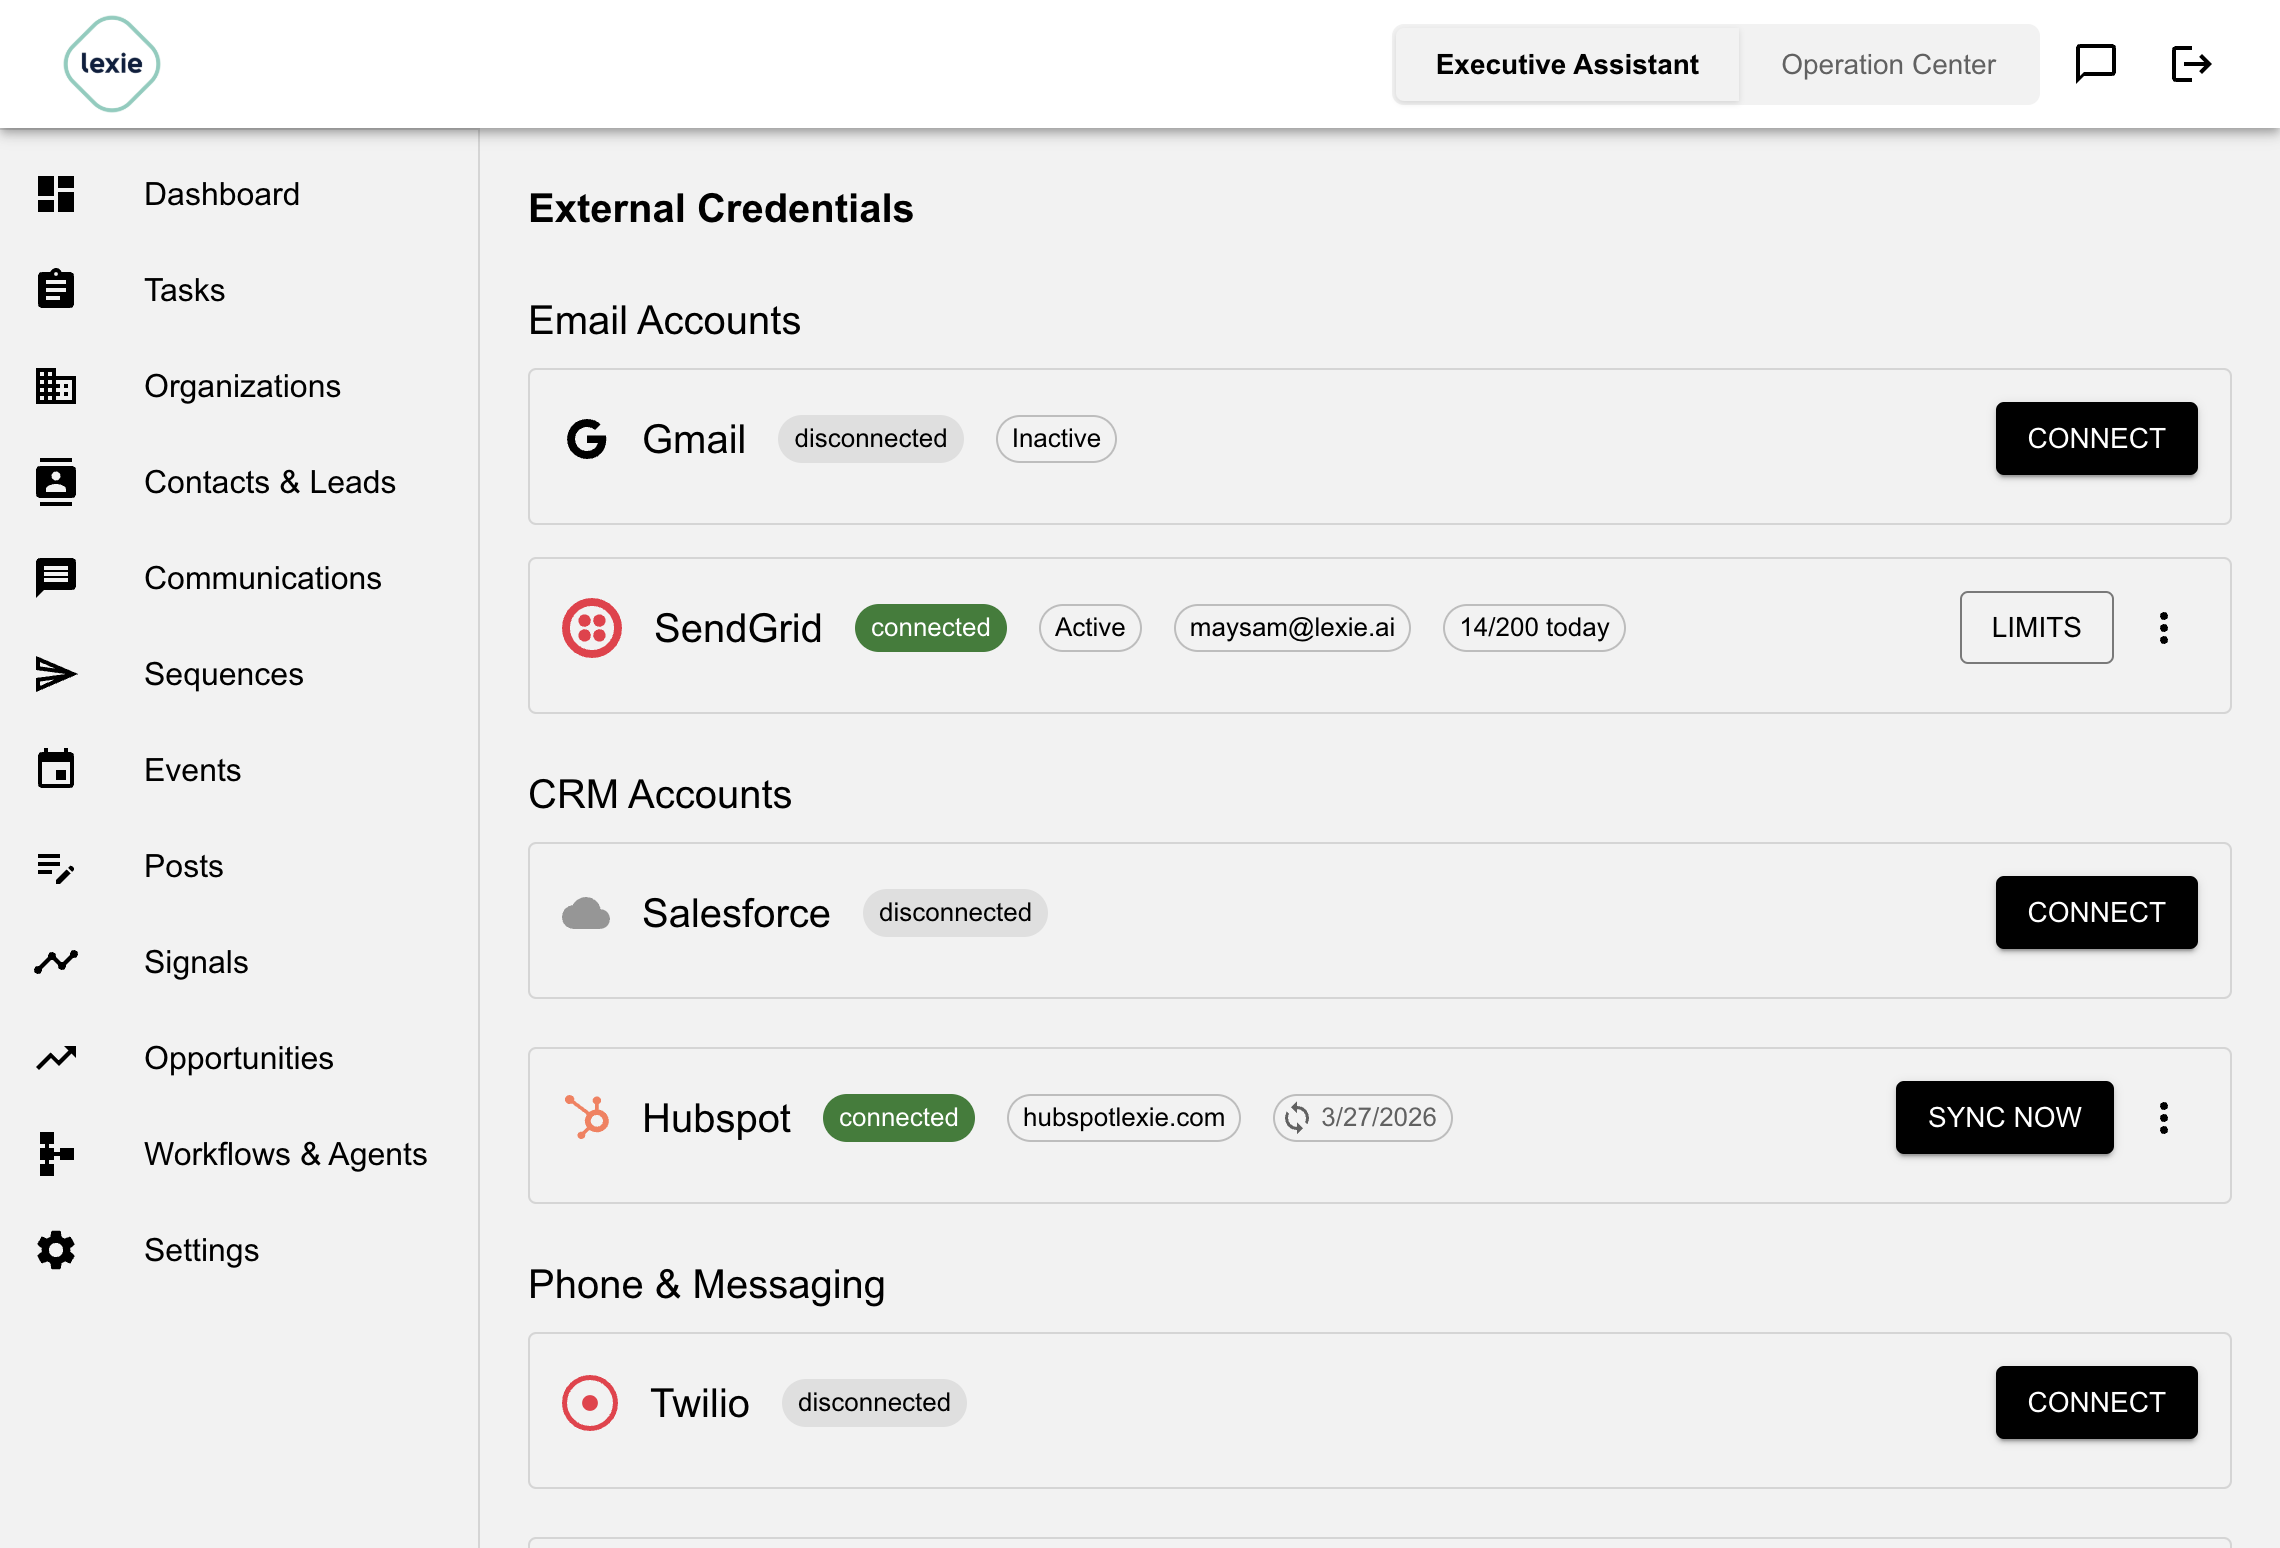
Manage integrations with external services for email sending and CRM sync.
Email Accounts
Gmail Integration
Connect your Gmail account to send emails through Sales Assistant:
Setup:
- Go to Settings > External Credentials
- Under Email Accounts, click Connect for Gmail
- Authenticate with your Google account
- Grant necessary permissions
Configuration:
- Status: Shows connected, disconnected, or expired
- Email Address: Your connected Gmail address
- Max per Day: Maximum emails to send per day (default: 100, max: 100)
- Max per Hour: Maximum emails to send per hour (default: 10, max: 10)
- Active/Inactive: Set this account as your active email sender
Managing Gmail:
- Schedule: Configure sending schedule
- Set as Active: Make this your primary sending account
- Disconnect: Remove the Gmail connection
SendGrid Integration
Connect SendGrid for higher volume email sending:
Setup:
- Go to Settings > External Credentials
- Under Email Accounts, click Connect for SendGrid
- Enter your SendGrid API key
- Configure your sender email address
Configuration:
- Status: Shows connected, disconnected, or expired
- Email Address: Your SendGrid sender address
- Max per Day: Maximum emails to send per day (default: 200, max: 200)
- Max per Hour: Maximum emails to send per hour (default: 20, max: 20)
- Active/Inactive: Set this account as your active email sender
Managing SendGrid:
- Schedule: Configure sending schedule
- Set as Active: Make this your primary sending account
- Disconnect: Remove the SendGrid connection
Choosing Between Gmail and SendGrid:
- Gmail: Best for personal, lower volume outreach (up to 100/day)
- SendGrid: Best for higher volume campaigns (up to 200/day and beyond)
- Only one can be active at a time
- Switch between them as needed for different campaigns
CRM Accounts
Salesforce Integration
Connect Salesforce when your team already uses Salesforce as the CRM system of record, but wants to use Sales Assistant for AI-assisted account planning, enrichment, outreach, and workflow execution.
Setup:
- Go to Settings > External Credentials
- Under CRM Accounts, click Connect or Connect Sandbox for Salesforce
- Authenticate with your Salesforce account
- Grant necessary permissions
Initial Setup: After connecting, click Setup Integration to:
- Create custom Lexie ID fields in Salesforce (for bidirectional linking)
- Enable write-back of Lexie record IDs to Salesforce
After the integration is set up, open View Details from the Salesforce account menu to review the sync controls. This is where admins configure per-object create/update direction, import routing, manual sync mode, deletion behavior, real-time Salesforce CDC, and scheduled sync.
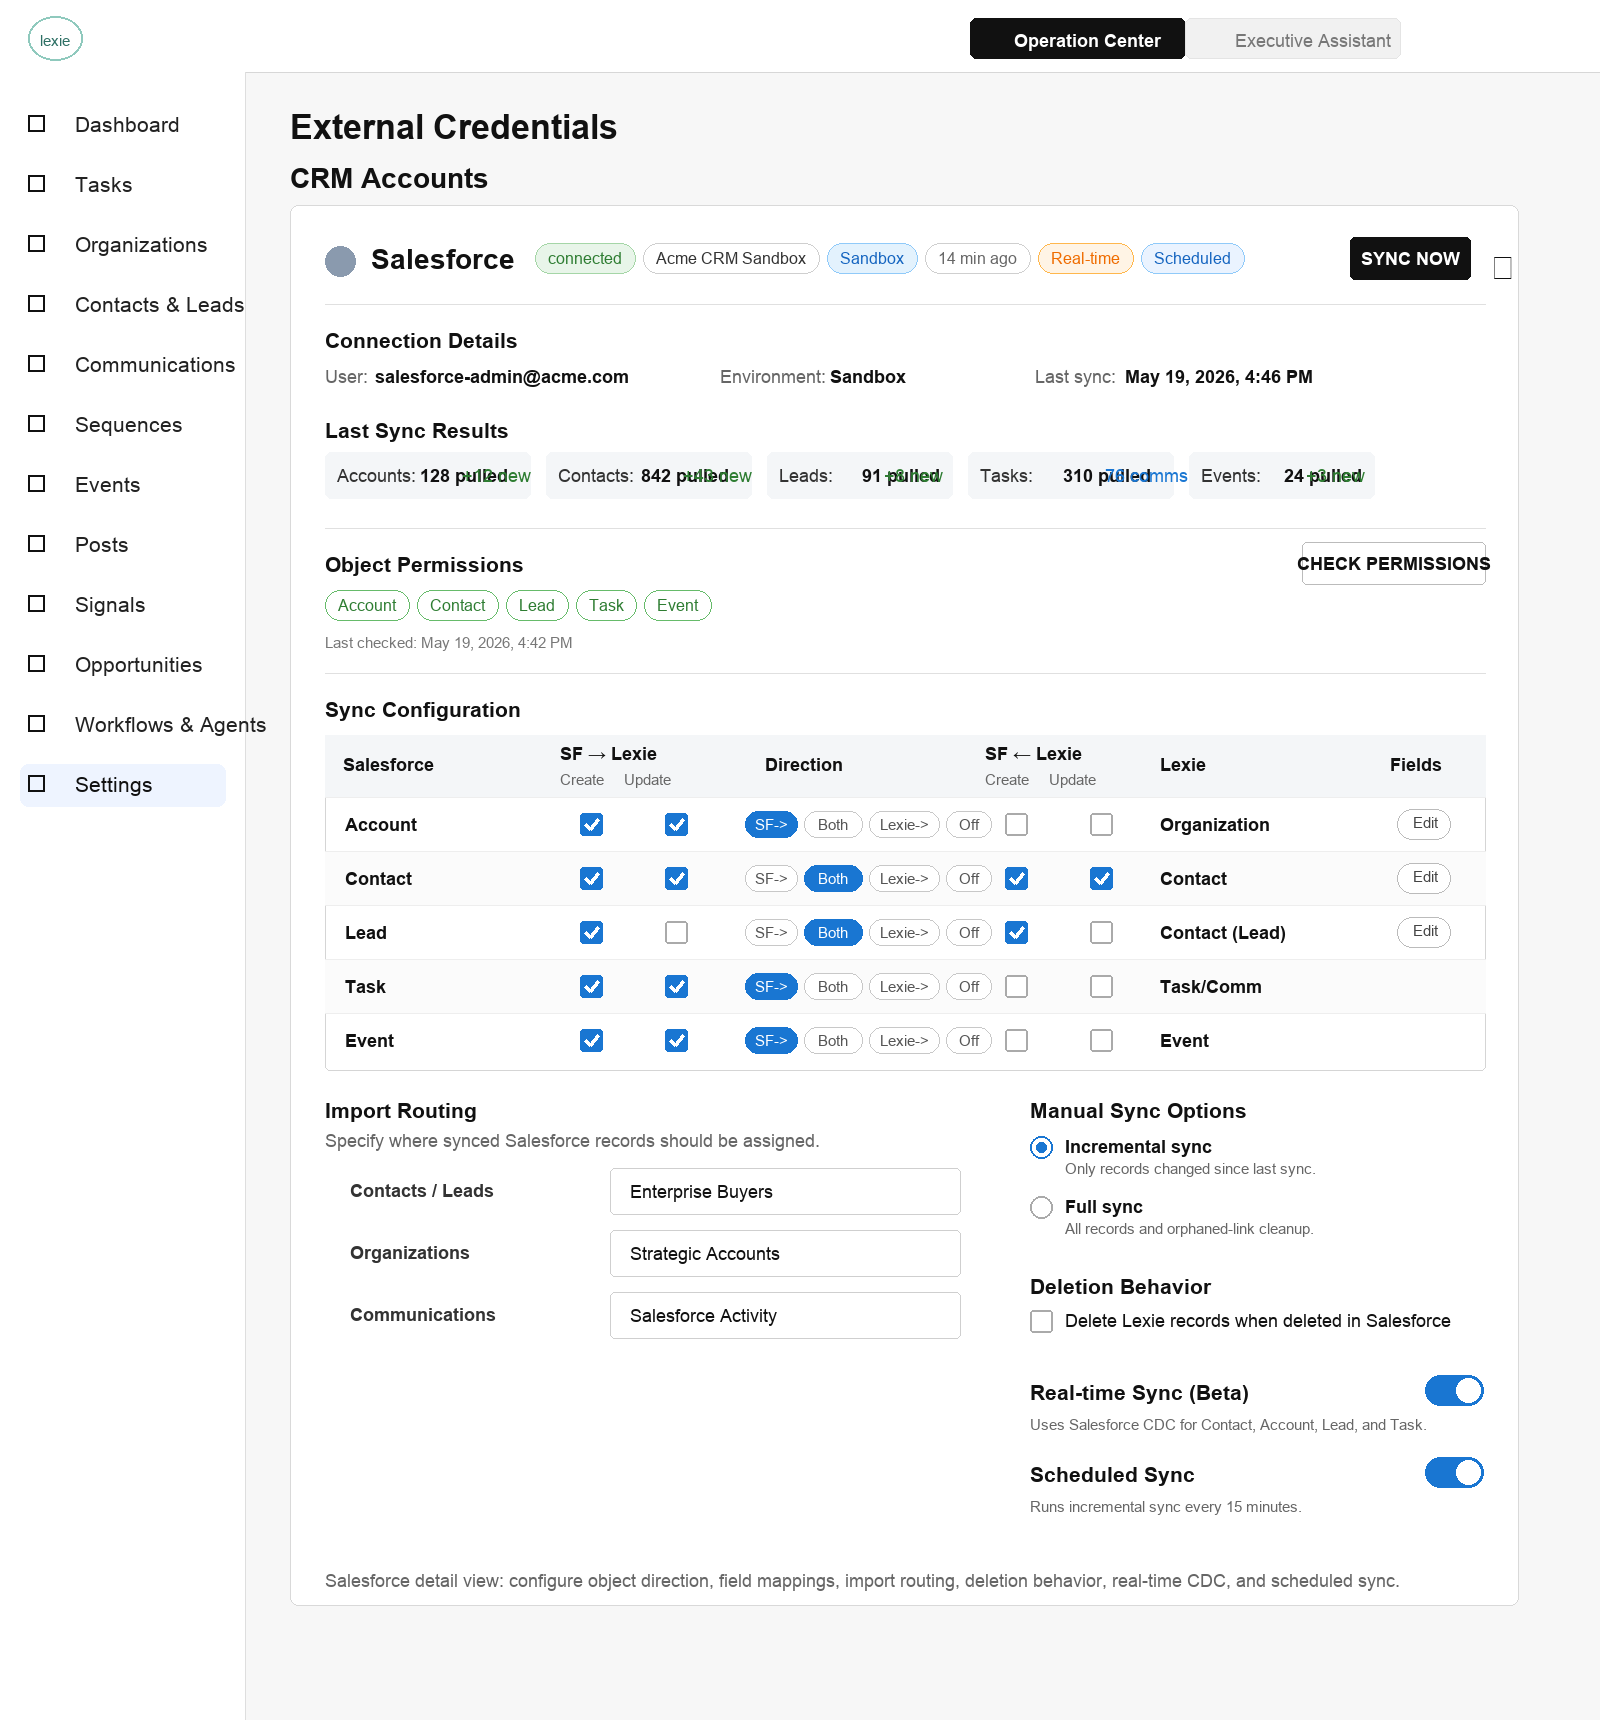
Objects Synced:
- Salesforce Accounts → Sales Assistant Organizations
- Salesforce Contacts → Sales Assistant Contacts
- Salesforce Leads → Sales Assistant Contacts with lead-type context
- Salesforce Tasks → Sales Assistant Tasks, and completed call/email/meeting/sms tasks can also become Communications
- Salesforce Events → Sales Assistant Events
Sync Configuration:
Salesforce sync is configurable per object. For each object type, choose whether Sales Assistant should:
- Create new records from Salesforce into Lexie
- Update existing Lexie records from Salesforce
- Create new Salesforce records from Lexie
- Update existing Salesforce records from Lexie
The quick direction presets are:
- SF → Lexie: Salesforce is the source for that object.
- Bidirectional: both systems can create and update records.
- Lexie → SF: Sales Assistant pushes records back to Salesforce.
- Disabled: that object is not synced.
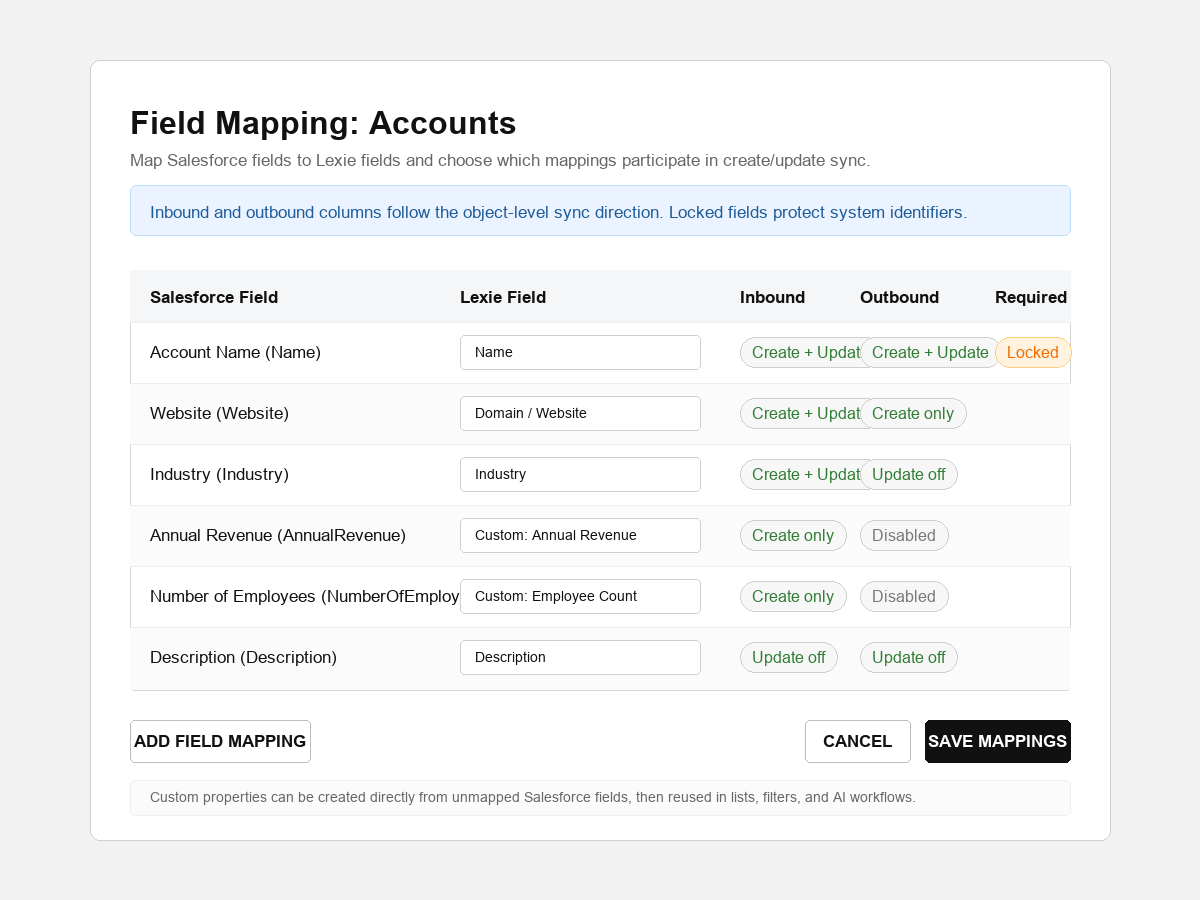
Use field mapping to control which CRM fields map to which Sales Assistant fields. For example, Salesforce Account.Name maps to Organization name, Account.Website maps to the organization website/domain, and Contact.Email maps to contact email. Field mappings also have create/update controls, so a field can be pulled during record creation but protected from later updates.
Important Sync Nuances:
- Sales Assistant stores CRM IDs and writes a Lexie ID back to Salesforce. This link is what prevents duplicate records on later syncs.
- Only records accessible to the connected Salesforce user are synced. In most Salesforce setups this means the sync follows that user's ownership and permission model.
- Synced records are placed in the user's selected Sales Assistant project. Use Import Routing to automatically assign incoming organizations to a segment, contacts/leads to a contact group, and communications to a folder.
- If Salesforce should remain the source of truth for deletions, enable Delete Lexie records when deleted in Salesforce. Otherwise, a full sync can clear orphaned CRM links without deleting the Lexie record.
- Incremental sync only processes records changed since the last sync and is faster for normal use.
- Full sync reads all selected records, catches up after configuration changes, and can detect records that were deleted or are no longer visible in Salesforce.
- Scheduled Sync runs automatically every 15 minutes using incremental sync.
- Real-time Sync (Beta) uses Salesforce Change Data Capture (CDC). It requires Salesforce CDC to be enabled for Contact, Account, Lead, and Task objects and is usually available only on Salesforce editions that support CDC.
Overwrite Warning:
Be careful when SF → Lexie Update is off but Lexie → SF Update is on. In that configuration, changes made in Salesforce are ignored, and Lexie can overwrite Salesforce values during the next outbound sync. This can be useful when Lexie owns a field, but it should be intentional.
HubSpot Integration
Connect HubSpot when your GTM data starts in HubSpot but you want Sales Assistant to enrich, organize, and operationalize it with AI workflows.
Setup:
- Go to Settings > External Credentials
- Under CRM Accounts, click Connect for HubSpot
- Authenticate with your HubSpot account
- Click Setup Integration after the account is connected
Initial Setup: Setup creates or verifies a lexie_id property on HubSpot contacts, companies, and tasks. Sales Assistant uses this property, plus the HubSpot record ID and portal ID, to keep future syncs linked to the same records.
Objects Synced:
- HubSpot Companies → Sales Assistant Organizations
- HubSpot Contacts → Sales Assistant Contacts
- HubSpot Contacts as Leads → Sales Assistant lead-style contact records when lead sync is enabled
- HubSpot Tasks / Activities → Sales Assistant Tasks and Communications
- HubSpot Meetings / Marketing Events → Sales Assistant Events, depending on the enabled object sync
Sync Configuration:
HubSpot uses the same per-object sync model as Salesforce:
- CRM → Lexie Create / Update controls what HubSpot can create or update in Sales Assistant.
- CRM ← Lexie Create / Update controls what Sales Assistant can create or update in HubSpot.
- Direction shortcuts are CRM → Lexie, Bidirectional, Lexie → CRM, and Disabled.
- Field mapping is available for companies, contacts, and lead-style contact sync.
HubSpot-Specific Nuances:
- HubSpot does not have a Salesforce-style separate Lead object. Sales Assistant lead sync is based on HubSpot contacts and the selected sync/mapping configuration.
- HubSpot Companies map to Sales Assistant Organizations. The default company mappings include name, domain, and industry.
- HubSpot Contacts map to Sales Assistant Contacts. The default contact mappings include first name, last name, email, phone, and job title/current position.
- Use Import Routing to place incoming HubSpot contacts/leads into a contact group and incoming companies into an organization segment.
- Sales Assistant can preserve an existing Lexie value when the CRM field is empty, which helps avoid blank CRM fields wiping useful data in Sales Assistant.
- Manual sync can be incremental or full. Scheduled sync runs automatically every 15 minutes.
- If Delete Lexie records when deleted in HubSpot is enabled, HubSpot becomes the source of truth for deletions during full sync or deletion-aware sync flows.
- Real-time HubSpot sync can be enabled when the HubSpot webhook/permission setup supports it. If it is unavailable, scheduled or manual sync should be used.
General CRM Sync Best Practices:
- Start with one source of truth per object or field. For example, Salesforce may own lifecycle stage while Sales Assistant owns AI-generated qualification notes.
- Configure import routing before the first large sync so new records land in the correct segment, contact group, and folder.
- Run a manual full sync after changing sync directions or field mappings.
- Use incremental or scheduled sync for day-to-day updates.
- Review the last sync results after each major sync. Counts for pulled, created, updated, unchanged, linked, pushed, and deleted records help confirm whether the configuration is behaving as intended.
- Avoid turning on bidirectional update for every field unless the team is clear about which system should win conflicts.
POSTS, SEQUENCES, SIGNALS
Email Signature
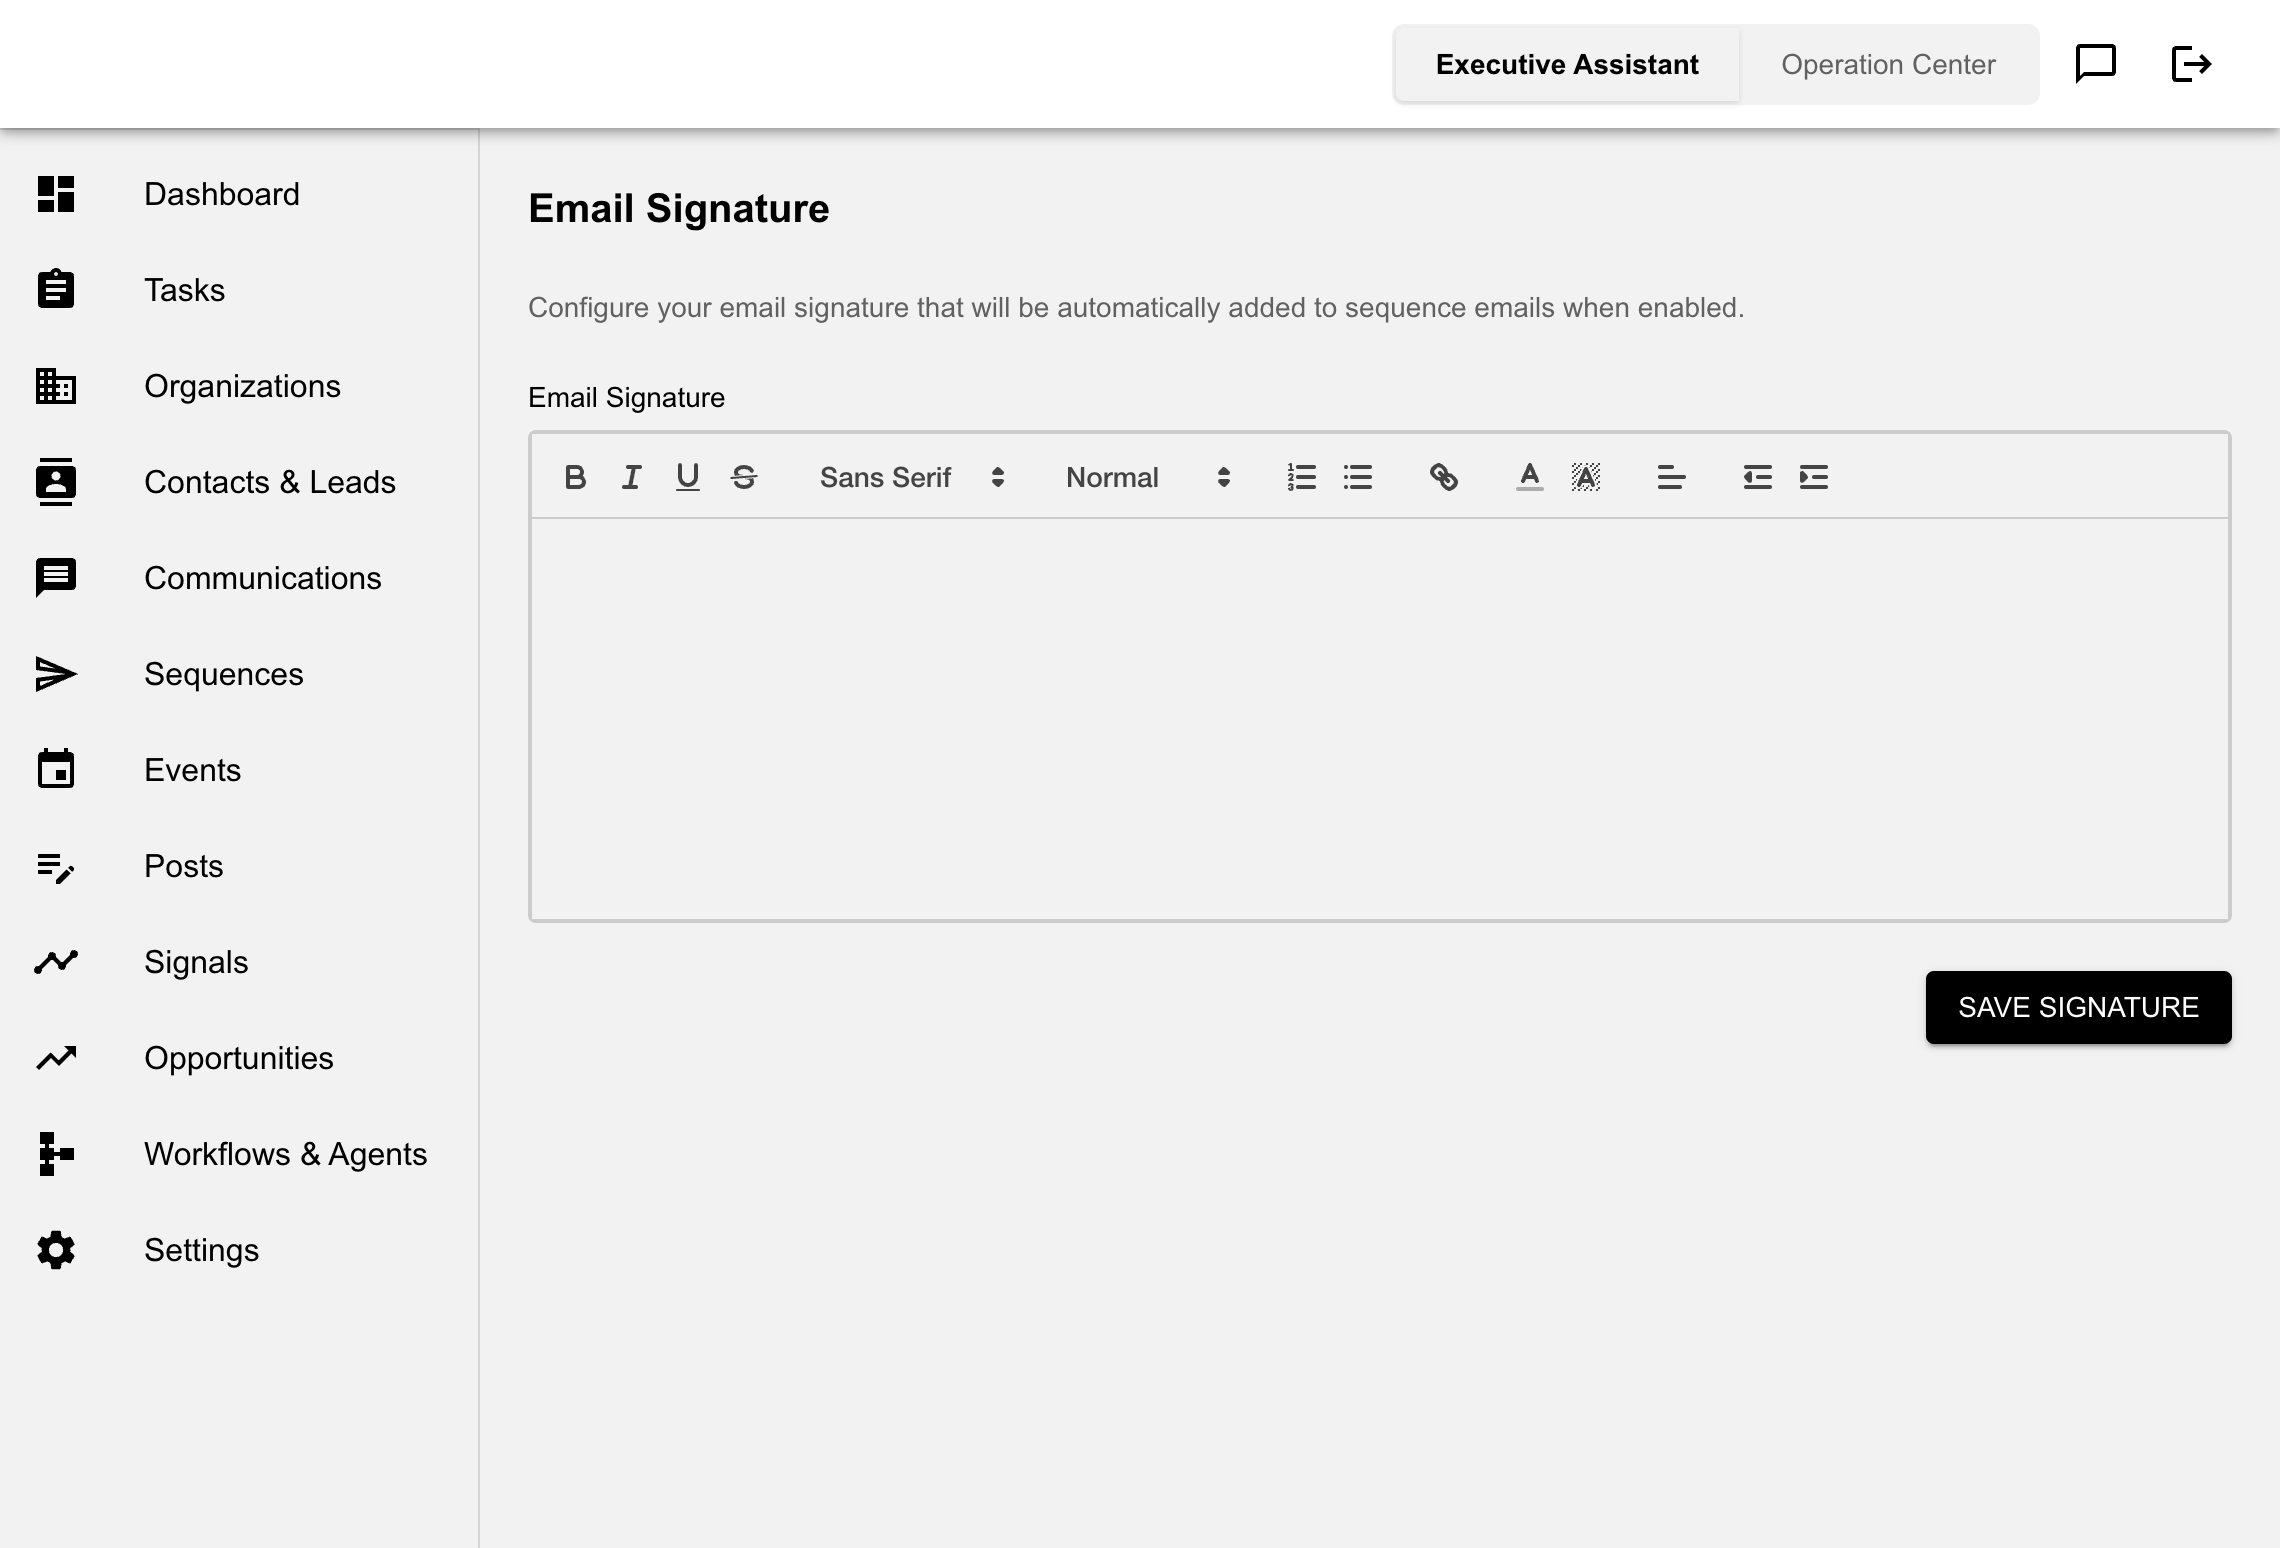
Configure the email signature that can be appended to sequence emails.
Setup:
- Go to Settings > Posts, Sequences, Signals > Email Signature
- Enter your signature (rich text)
- Click Save Signature
Chrome Extension
The Thought Graph Chrome Extension enhances your Sales Assistant experience by providing quick access to features directly from your browser.
Finding and Installing the Extension
- Visit the Chrome Web Store
- Search for "Thought Graph"
- Click Add to Chrome
- Confirm the installation
Logging In
Before using the extension, you must be logged into your Sales Assistant account:
- Visit sa.lexie.ai
- Log in with your credentials
- The extension will automatically detect your session
If you don't have an account:
Pinning the Extension
For easy access:
- Click the Extensions icon in your Chrome toolbar (puzzle piece icon)
- Find "Thought Graph" in the list
- Click the pin icon next to it
- The extension icon will now appear in your toolbar
Using the Extension
- Click the Thought Graph icon in your Chrome toolbar
- The extension popup will appear
- Select the app or feature you want to use
- Click the switch button to activate it
TG Apps in the Extension
The extension can contain multiple Thought Graph apps. Each app is a small browser automation workflow that can be enabled or disabled from the extension popup.
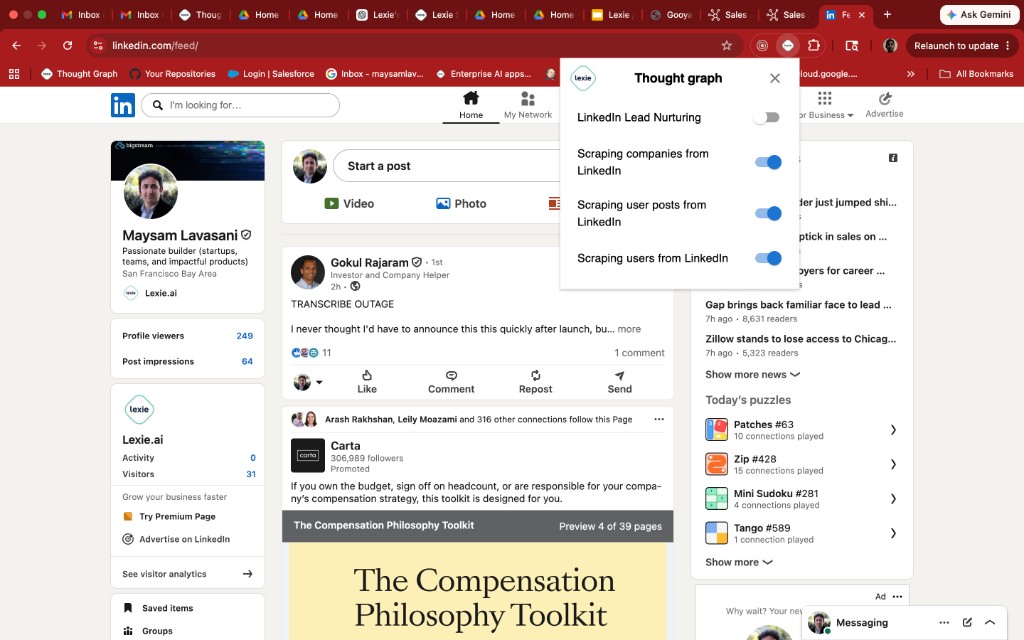
When a TG app is enabled, it can trigger on the URLs it was built for. For example, LinkedIn-focused apps run while you are browsing LinkedIn pages. They can inspect the current page, collect visible data, and send structured results back to Sales Assistant for later use in workflows, enrichment, or lead generation.
The screenshot shows three enabled LinkedIn scraping apps:
- Scraping companies from LinkedIn: Runs on relevant LinkedIn company pages or lists and extracts company information that can be used to create or enrich organization records.
- Scraping user posts from LinkedIn: Runs on LinkedIn profile or feed pages and extracts posts that may be useful for research, personalization, signals, or outreach context.
- Scraping users from LinkedIn: Runs on relevant LinkedIn profile or people-list pages and extracts person-level information that can be used to create or enrich contacts and leads.
Some extension apps may only collect data. Others may take browser actions, such as opening pages, clicking through a workflow, or preparing scraped data for confirmation. Keep only the apps you need enabled, because enabled apps may run automatically when you visit matching URLs.
Features Available in Extension
- Quick access to Sales Assistant features
- Integration with web pages you're browsing
- Streamlined workflow execution
Tips for Using the Extension
- Grant Permissions: Make sure to grant all necessary permissions for full functionality
- Keep Updated: Enable automatic updates to get the latest features
- Check Login: If features aren't working, verify you're logged into sa.lexie.ai
- Browser Support: The extension works best with the latest version of Chrome
Support and Contact Information
Getting Help
If you need assistance with Sales Assistant, we're here to help:
Email Support:
- Email: support@lexie.ai
- Response time: Within 24 hours for most inquiries
Phone Support:
- Phone: +1-512-632-5758
- Available: Monday-Friday, 9 AM - 5 PM CT
Reporting Issues
When reporting issues, please include:
- Detailed description of the problem
- Steps to reproduce the issue
- Screenshots if applicable
- Your account email
- Browser and version you're using
Feature Requests
We welcome feedback and feature requests:
- Email your suggestions to support@lexie.ai
- Include use cases and expected benefits
- Our product team reviews all requests
Training and Onboarding
For team training or onboarding assistance:
- Contact support@lexie.ai
- We can arrange personalized training sessions
- Documentation and video tutorials available
Status and Updates
Stay informed about system status and updates:
- Check for platform notifications within Sales Assistant
- Subscribe to our updates mailing list
- Follow our blog for feature announcements